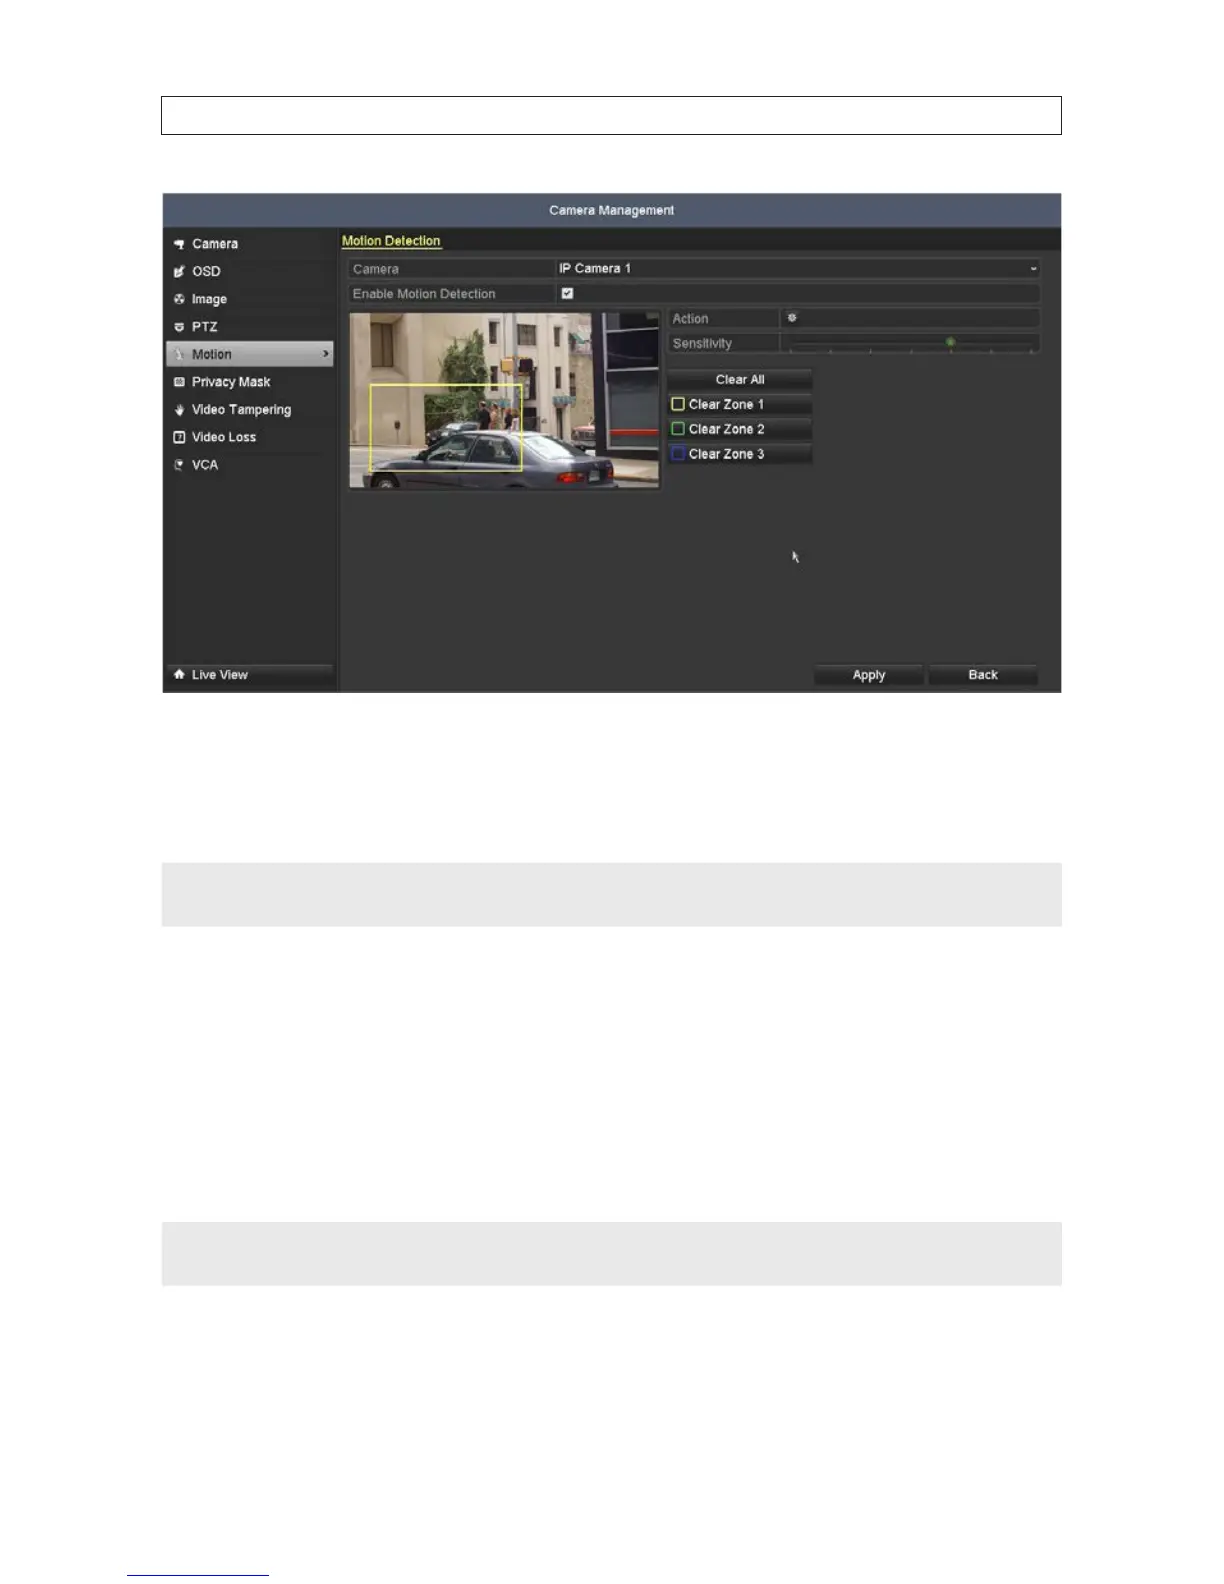
2. In the Camera eld drop down list, select the camera you want to congure. In the example shown, IP Camera 1 is selected.
3. Check or un-check the box to Enable Motion Detection. If you checked the box, the grid shown over the video image is the
area where motion will be detected. To change this area, do the following:
NOTE
Dening a specic area where you want to detect for motion is more ecient for the NVR than searching for motion anywhere in
the image.
a. Click Clear to erase the grid.
b. Drag the mouse pointer across a rectangular area of the video image where you want to detect for motion. The area you
select will be surrounded by a colored frame. See the image above. You can dene up to three motion detection zones.
Each zone is color coded.
c. Click Apply to save your settings.
d. Adjust the Sensitivity slider as needed to detect the motion of objects moving through the zones.
NOTE
Test your settings during broad conditions to ensure that motion in the eld of view triggers an action. You may need to return to
this menu later to adjust the Sensitivity slider to ensure it is working adequately.
e. Click Apply again to save your settings.
4. Click the Settings icon. In the Handling Trigger Channel tab:
SECTION 2: INSTALLING THE SYSTEM
 Loading...