Maintenance
Assembling the progressing cavity pump
34
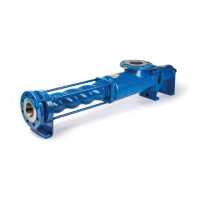
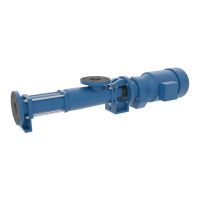
Series AE1F, AE1L, AE.E, AE.N, AE.H, AE.V, AED1E,
AED2N ID, ZD construction types
BA-2011.11
760.0002 GB - 150 500
Caution!
In order to flare the sealing lip of
the shaft seal ring, first slide the
mechanical seal casing (214) with
integrated shaft seal ring (232)
backwards onto the drive shaft
(118) with the shaft seal ring
ahead. After flaring, pull off the
mechanical seal casing (214) from
the drive shaft (118) and quickly
slide it back onto the drive shaft
(118) in the proper position with the
flange side ahead.
10.2.2.5 Installing the mechanical seal,
single-acting with throttle ring
For the positions of referenced parts
sectional drawings on pages 43, 44, 45, 46,
47, 48, and 49.
1. Concentrically push the throttle ring
(234) with O-ring (235) into the
mechanical seal cover (215).
Notice!
Be sure to apply pressure evenly.
2. Use a punch to drive the locking pin
(236) into the mechanical seal cover
(215). The locking pin may not
protrude inwards.
3. Slide the mechanical seal cover (215)
over the drive shaft (118).
4. Install the mechanical seal as
described under the section "Installing
the mechanical seal, single-acting" (
section 10.2.2.3 page 33).
5. Pull the O-ring (218) onto the
mechanical seal casing (214).
6. Slide the mechanical seal casing (214)
with the mechanical seal's counterring
(219) over the drive shaft (118) and
secure with the hexagon screws (245)
on the cover of the mechanical seal
(215).
10.2.2.6 Installing the mechanical seal,
double-acting
For the positions of referenced parts
sectional drawings on pages 43, 44, 45, 46,
47, 48, and 49.
1. Drive the locking pin (236) into the
mechanical seal cover (215).
2. Concentrically press the mechanical
seal's counterring (219) with O-ring
into the mechanical seal cover (215).
Notice!
Always use uniform pressure
distribution on the locking pin. The
locking pin may not protrude
inwards.
3. Slide the mechanical seal cover (215)
over the drive shaft (118).
4. Install the mechanical seal as
described under the section "Installing
the mechanical seal, single-acting" (
section 10.2.2.3 page 33).
5. Pull the O-ring (218) onto the
mechanical seal casing (214).
6. Slide the mechanical seal casing (214)
with the mechanical seal's counterring
(219) over the drive shaft (118) and
secure with the hexagon screws (245)
on the cover of the mechanical seal
(215).
10.2.3 Installing the drive shaft with
shaft seal
For the positions of referenced parts
sectional drawings on pages 43, 44, 45, 46,
47, 48, and 49.
1. Slide the thrower (114) onto the drive
shaft (118).
2. Press the drive shaft (118) with
installed stuffing box casing (204) or
mechanical seal casing (214) and
integrated stuffing box (207) or
mechanical seal (219) through the
bearings (104) and (103) into the
bearing bracket (110).
Notice!
Observe the installation position of
the distance ring (113) and the
distance sleeve (102). When
pressing in the groove ball
bearing's (103) internal ring with a
suitable tool, provide bracing or a
counterhold.
Notice!
On pump sizes AE1N 380, AE2N
380, AE4N 380, AE1E 750, AE2E