71
・If the MX-300 is not correctly mounted, it might fall, resulting in damage
and/or injury.
・Be sure to use the appropriate kind of screws when mounting the MX-300 on a
concrete wall or a wall with some other kind of special material.
3
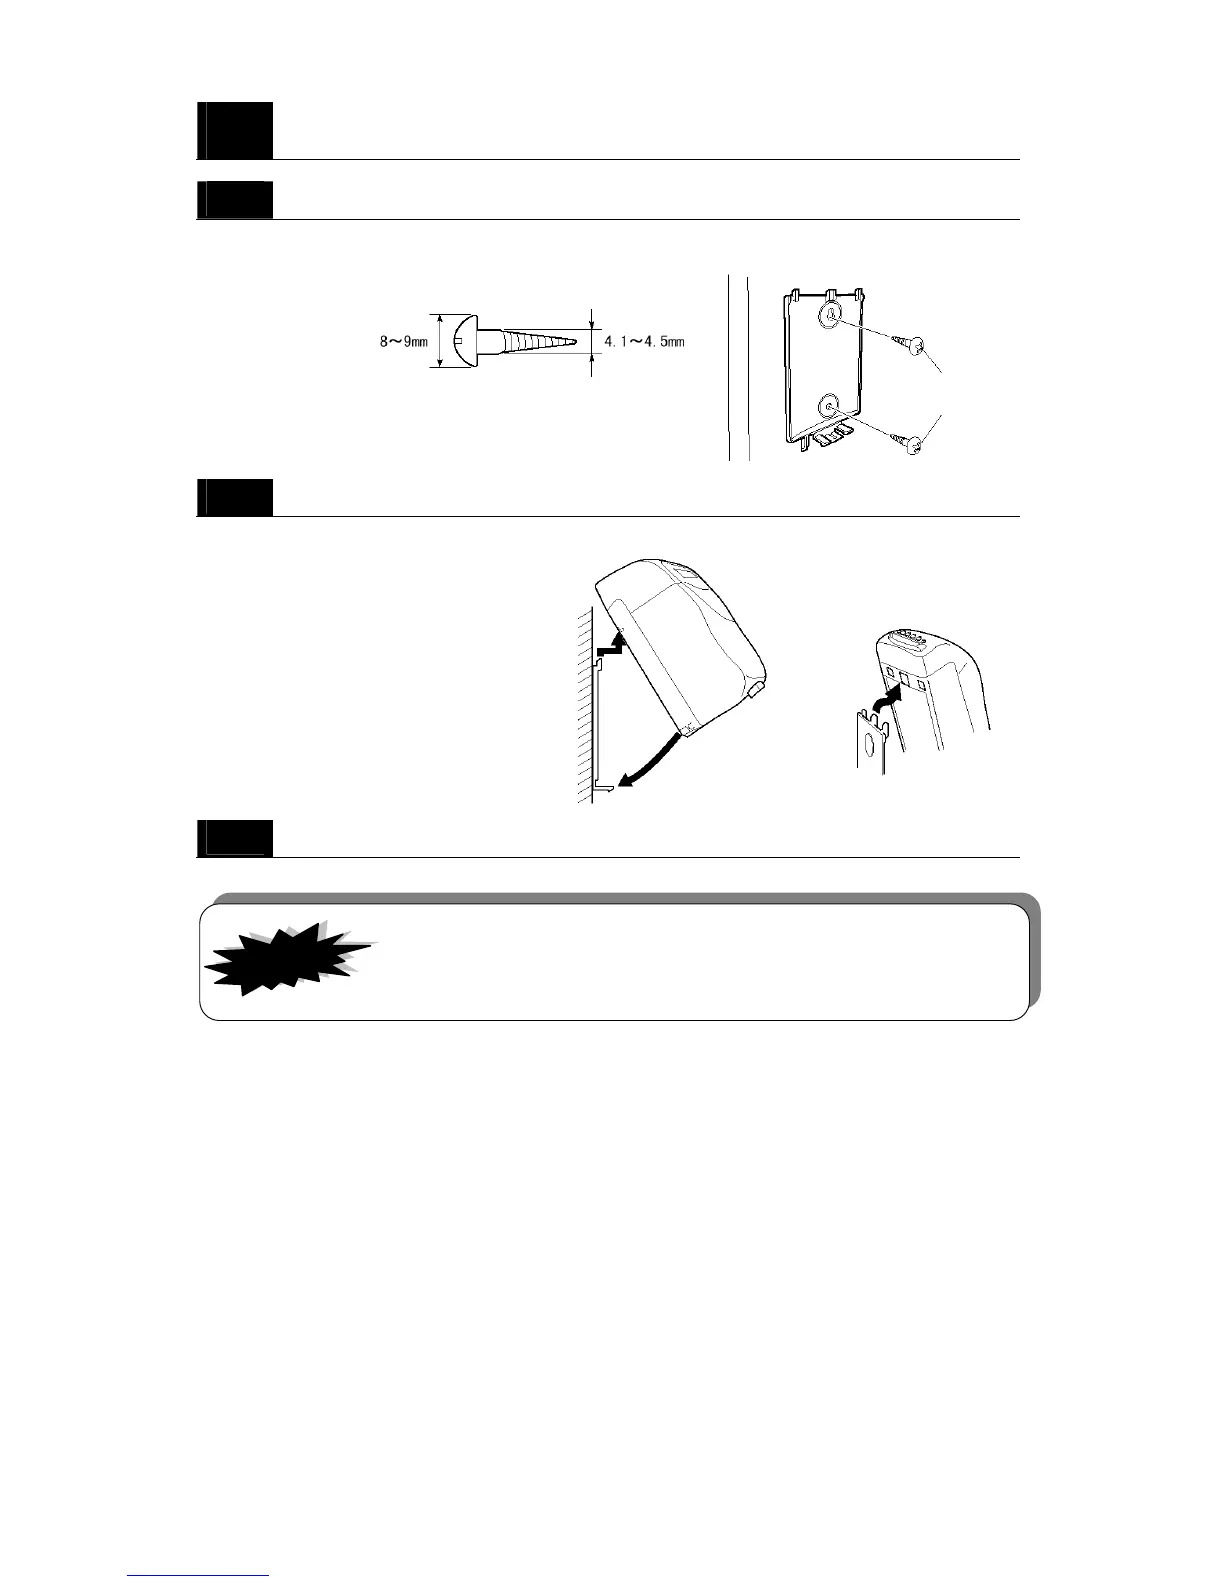
Use a screwdriver to remove the center material from the mounting
holes in the back panel.
4
Mount the back panel to the wall.
Use the two wood screws to mount the back panel to the wall. Be sure to select the type of screw
best suited to the material of your wall.
two screws suited to the material of your wall
5
Reattach the MX-300 to its back panel.
As illustrated below, first carefully snap the top side of the MX-300 into place first and then the
bottom should fit into place.
6
Secure the plastic rivet into the bottom of the MX-300.
IMPORTANT!
Suited to the
material of
your wall