7 Adjusting the plough
7.1 Adjusting the cutting width
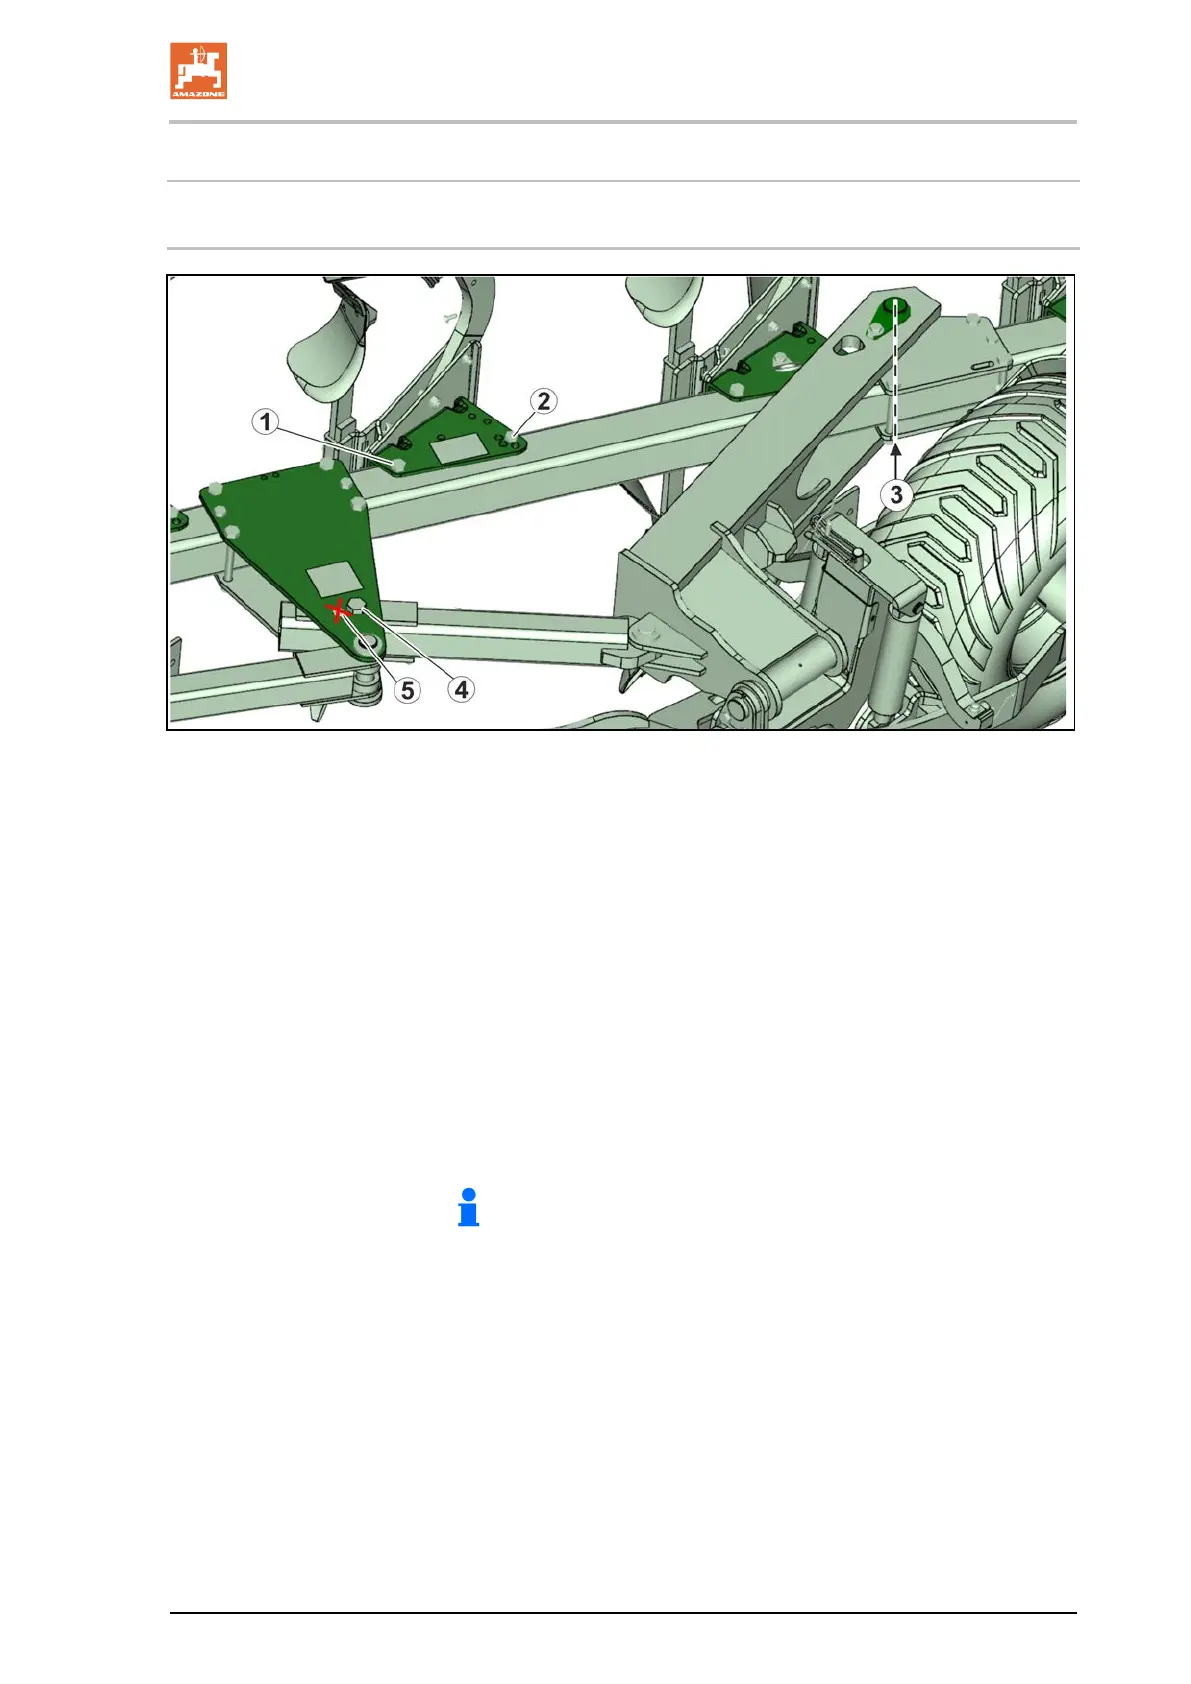
Each element must be manually adjusted to the new cutting width.
1. Move the plough into working position. The shares should not be
resting on the ground.
2. Loosen the bolt (1).
3. Take out the adjusting screw and turn the element to the desired
position (cutting width).
4. Put the bolt back in and tighten it.
5. Retighten the large bolt (see top image)
6. Repeat the procedure for all of the elements.
8. Remove the bolt (4) and set the plough beam carrier to the
desired cutting width.
9 Retighten the bolts (3) and (4).
Do not use screw hole (5)!
Any adjustments to cutting width is automatically passed on to
leading tools such as the fertiliser skimmers, disc coulter, and support
wheels (if present) and fit exactly to the new cutting width.
No further adjustments whatsoever are required.
Hektor BAG0186.1 07.19
37