M19-2101 REVISION 2.0 DVNEXT RHEOMETER - OPERATIONAL MANUAL
A.3 Set-up
• Select configure viscosity test from the main menu.
• Press spindle and select or scan one of the cone plate
spindles (40, 41, 42, 51, 52).
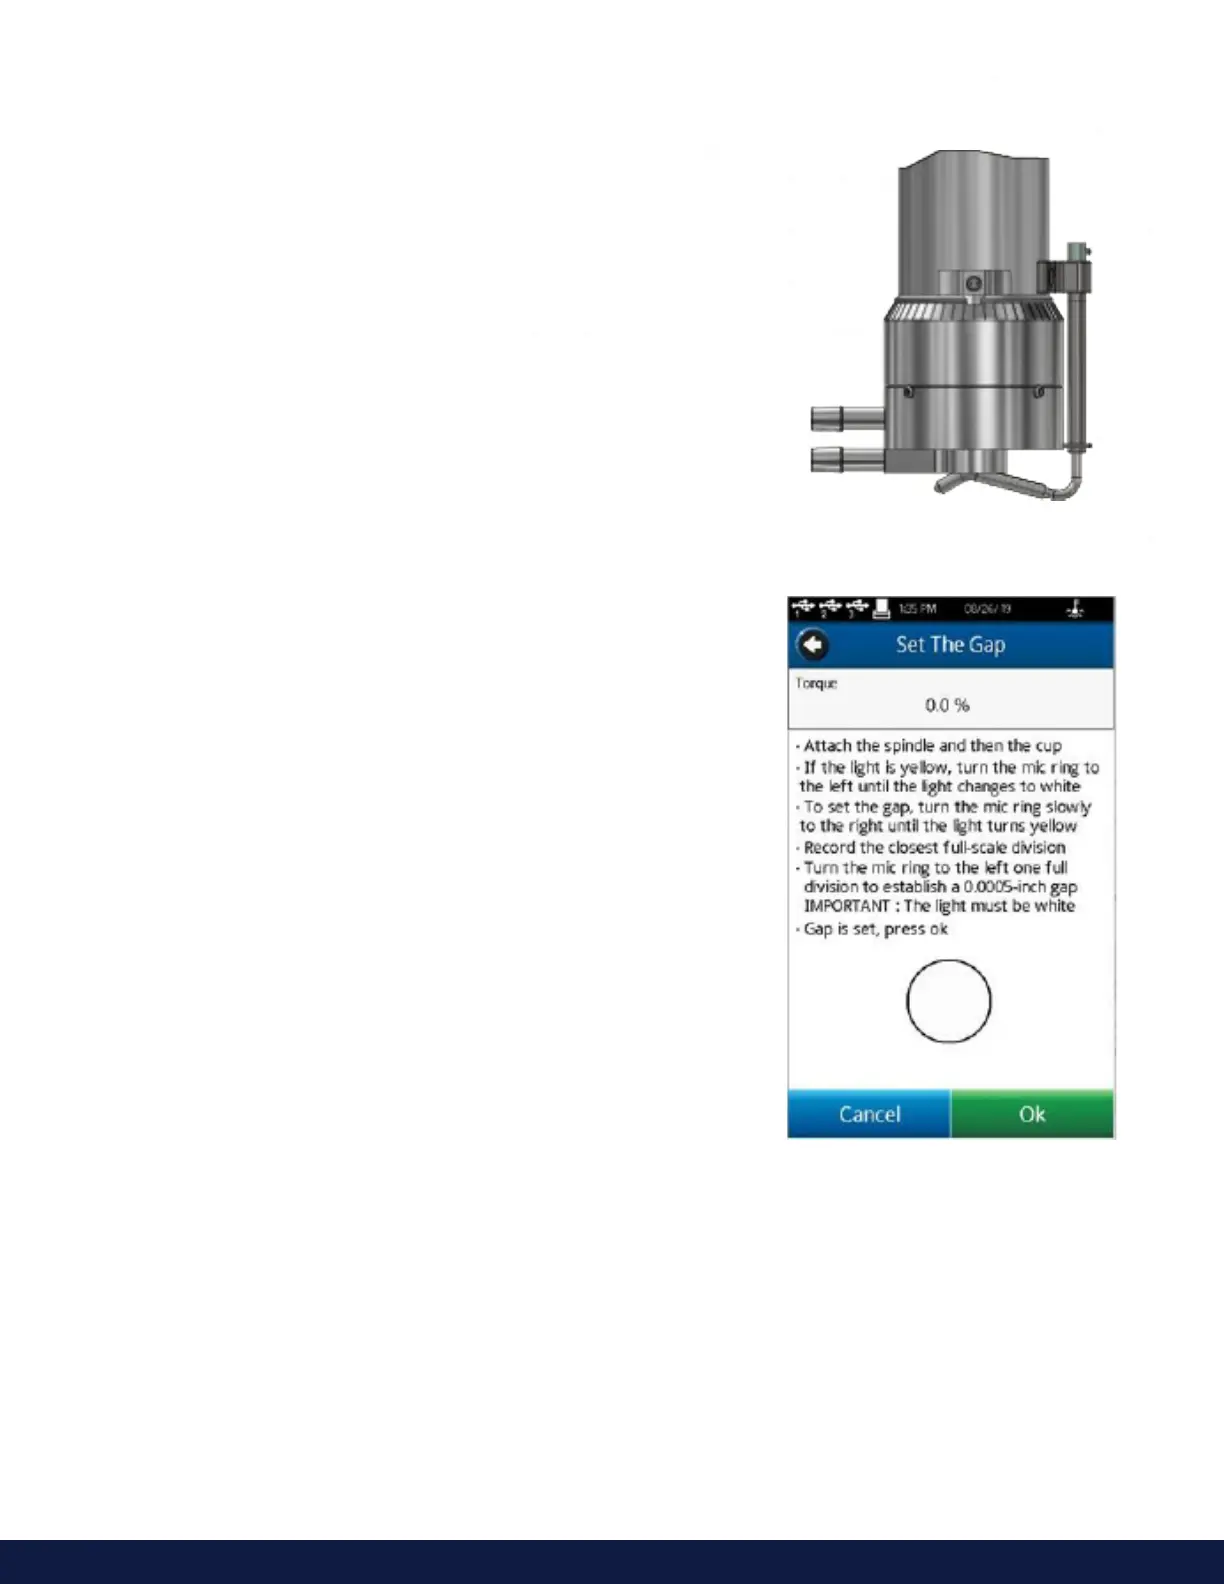
• Confirm you would like to set the gap by pressing Yes.
• If the contact light (yellow) is illuminated, turn the
micrometer adjustment ring clockwise (as you look down on
the instrument) until the light is no longer illuminated (see
Figures A-1 and A-6).
• If the yellow contact light is not illuminated, slowly turn the
micrometer adjustment ring in small increments (one or two
scale divisions) counterclockwise.
• Continue moving the micrometer adjustment ring slowly
counterclockwise until the contact light (yellow) first turns
on. THIS IS THE “HIT POINT.”
• Adjust the sliding reference marker, right or left, to the
closest full scale division mark (see Figure A-1).
• Turn the micrometer adjustment ring one scale division to
the left to meet the line on the sliding reference marker. THE
YELLOW CONTACT LIGHT SHOULD GO OFF.
• You have established the gap space needed for
measurement. Press ok.
• Carefully remove the sample cup.
Note:
• The cup may be removed and replaced without
resetting the gap if the micrometer adjustment ring has
not been moved.
• Remove the spindle from the rheometer when cleaning.
• Re-establish the hit point every time the spindle is
attached/detached.
Figure A-5
Figure A-6
 Loading...