SBC-GX1 Windows XP Embedded Quickstart Security and image duplication
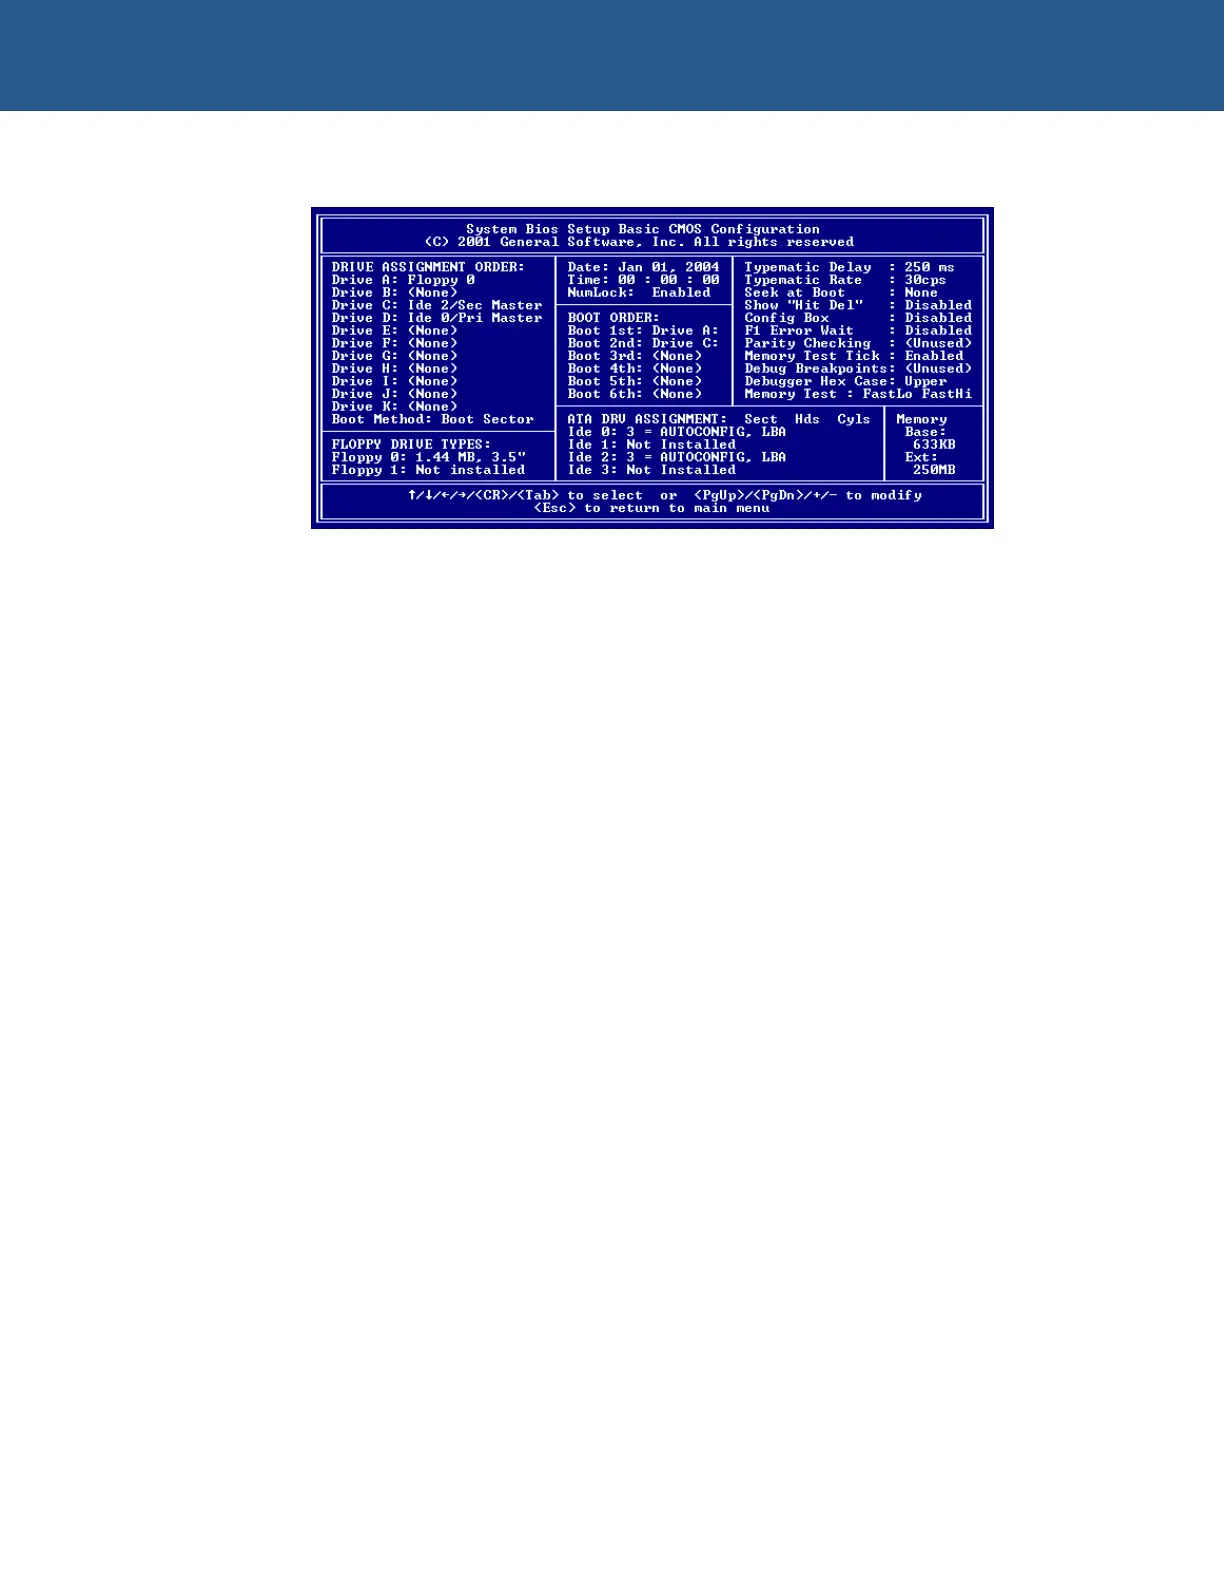
9 Adjust the settings so that they appear as shown below:
10 Press Esc and then select Save & Exit Setup from the main BIOS menu.
11 Press Enter. The following message is displayed:
SAVE to CMOS and EXIT (Y/N)? Y
12 Press Enter to save your changes. The SBC-GX1 boots from the floppy drive into
ROM-DOS.
13 Enter the following command at the ROM-DOS prompt:
A:> hdread d:\xpeimg.bin 80
The hdread utility stores the image of the master CompactFlash on the hard disk,
as the file xpeimg.bin.
14 Switch off the SBC-GX1 board and remove the master CompactFlash from the
SBC-GX1 board.
15 Insert the new CompactFlash card into the SBC-GX1. The new CompactFlash
must be the same size as the master, but does not need to be formatted.
16 Power on the SBC-GX1, which again boots from the utility floppy disk into the
ROM-DOS.
17 Type the following command at the ROM-DOS prompt:
A:> hdwrite d:\xpeimg.bin 80
The hdwrite utility writes the image of the master CompactFlash stored on the
hard disk onto the new CompactFlash. The newly created CompactFlash is the
clone device.
Repeat this procedure to create CompactFlash device you require.
© 2004 Arcom Issue D 51
 Loading...