9.0 ARRI Starlight Monitor!
Flipping the image both axes.!
•
Switch on the monitor
•
Press down on the on/off switch
to reach the menu
•
Touch the Tool icon to reach the next level of
menus.
•
Touch the Reversed Mode button to flip the
image both axes
Power In connector:!
!
!
Color temperature
D56
AvengerLeveler
™
yes
Power
5 to 30V DC
Power Cons. 6W
SD card slot yes
Dimensions
(w x h x d)
144 x 68 x 27 mm
5,66 x 2,67 x 1,06 inches
Weight < 200g / 0.5 lbs
AMIRA EXT
Lemo 1B.306
1 Can1 H
2 Can1 L
3 Can2 H
4 Can2 L
5 VBat (1A max)
6 Gnd
ALEXA Mini EXT
Lemo 1B.307
1 Can1 H
2 Can1 L
3 Can2 H
4 Can2 L
5 VBat (1A max)
6 Gnd
7 R/S
u Auto REC
13
u Mechanics & connectors
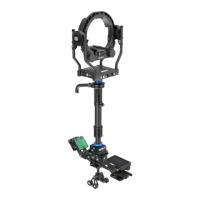
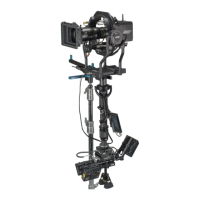
Mini 3D Swing Arm for ARRI™
Includes a special 3/8”-16 male thred on the bottom.
P/N 918TS0261
u How to update
Battery Back
For Sony L/M series - Panasonic, JVC, Hitachi 7.2V LI-ION.
P/N 918TS0274
Viewnder Adapter
3 x aspherical magnier.
Converts the StarliteHD to a viewnder.
P/N 918TS0266
Sun Hood
Protects the screen from direct sun.
P/N 918TS0265
Transportation cover plate
Protects against dust and shocks.
P/N 918TS0268
u Recording / Playing
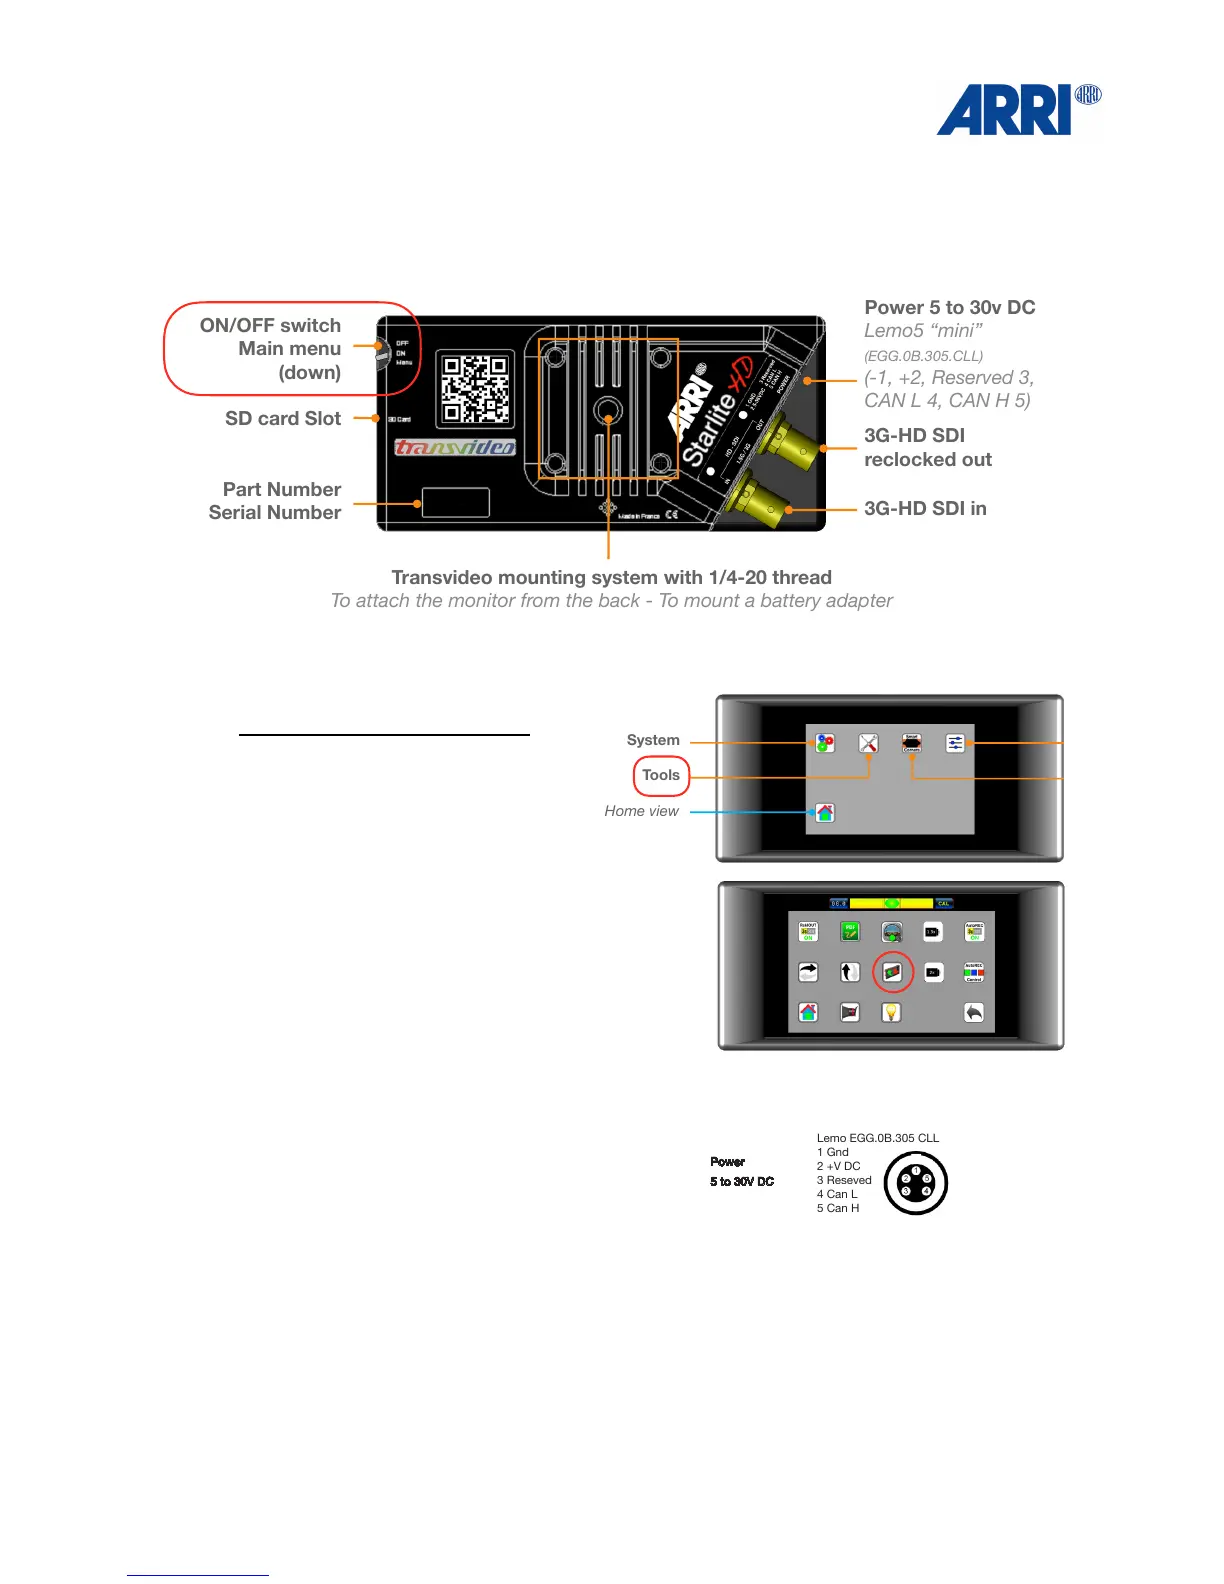
3G-HD SDI in
3G-HD SDI
reclocked out
Part Number
Serial Number
SD card Slot
Transvideo mounting system with 1/4-20 thread
To attach the monitor from the back - To mount a battery adapter
Power 5 to 30v DC
Lemo5 “mini”
(EGG.0B.305.CLL)
(-1, +2, Reserved 3,
CAN L 4, CAN H 5)
ON/OFF switch
Main menu
(down)
StarliteHD
You can generate a le which gives :
- Possibility to convert the output container from h.264 to mp4 (default) or mkv.
- Possibility to adjust the compression level and to choose intra mode for coding.
- Possibility to choose a default name for the clips.
- And so on.
Options are set online on our web site, a le is generated and placed manually onto the SD card.
For more information, visit http://www.transvideo.eu/support-StarliteHD
Plug the SD card into your computer.
Download and uncompress the latest software release (the downloaded le is in zip format) using your archive utility application.
Open the uncompressed folder then copy the le maj.tar.gz and paste it at the root of the SD card.
Do not rename the le on the SD card.
Plug the SD card into the monitor. Turn ON the monitor then push down the menu button.
Select the Settings icon then choose Update. Validate your choice and wait...
During the update , you can read the following information on the screen.
- Do not disconnect your monitor from the power supply.
- Full system update : may require more than 30 minutes.
- Applicative update in progress.
After a successful update, the monitor displays “Your monitor is up to date”.
If an error occurs, a report is generated.
You can read the online version at http://www.transvideo.eu/support-StarliteHD
u Technical specications
StarliteHD
StarliteHD
StarliteHD
14
17
u ARRI camera connectors Pin-Outs
18
15 16
u Conguration le
19 20
21 22
23 24
StarliteHD
StarliteHD
StarliteHD
StarliteHD
Play Status
Go back to the
records gallery
Delete record
Play
Slide to rewind
& forward
u Accessories / Cables
Battery Back
For Canon BP 900 series 7.2V LI-ION.
P/N 918TS0273
From the main menu, select Tools then
activate Auto REC
If you need the quick menu, also activate
AutoREC Control .
Play, Go, Delete icons should appear after the
camera stops recording.
Auto REC control is only available for build 112 and later.
You can read the build version on the monitor startup screen.
Delete the latest record
Back to work
Play the latest record
Video input 1 x 3G / HD / SDI
Video output 1 x 3G / HD / SDI
Supported
Standards
3G: 1080 / 50p, 60p
HD: 1080 / 50i, 60i
1080 / 24p, 25p, 30p
1080 / 24psf, 25psf
720 / 25p, 30p, 50p, 60p
SDI: 525 / 60i
625 / 50i
Display type
& size
AMOLED - 5 inches
Pixels Picture zone 1280 x 720
Contrast ratio 3400:1
Viewing angle
±80° H & V
Brightness max 380 Nits
StarliteHD
u Recording / Playing
Records gallery
Choose the one you
want to play
Home view
Navigation
Slide on thumbnails
to navigate
StarliteHD
u Recording / Playing / Converting
Convert output container
h.264 to mp4 (default)
* First push the “Convert“
icon then select the video
in the list
* Please note that old converted les with the same name will be overridden.
Rec-00259.h264 00:00:31 SD: 2%
Record status
Record*
Tap to record
Tap again to stop
Records gallery
Snapshots gallery
ARRI Mode
* All supported standards.
The peaking is applied on the picture area located between the two vertical bars.
StarliteHD
u Waveform
StarliteHD
u Peaking
Waveform can be fullscreen or at the bottom of the picture.
Touch the waveform to change size.
D-Tape/Lemo5 power cable
P/N 906TS0187
RS3/Lemo5 power cable
P/N 906TS0188
Lemo6/Lemo5 cable
P/N 906TS0189
http://www.transvideo.eu/StarliteHD5-ARRI
Note: All pin-outs for camera interfaces appear as seen by the user.
Lemo EGG.0B.305 CLL
1 Gnd
2 +V DC
3 Reseved
4 Can L
5 Can H
StarliteHD
Quick Start Guide
www.transvideo.eu
Several patents pending
144TD0004 - Rev 1.0 August 2015
TRANSVIDEO S.A.
Zone Industrielle
F-27135 Verneuil sur Avre
FRANCE
Tel +33 2 3232 2761
Fax +33 2 3260 1479
info@transvideo.eu
www.transvideo.eu
u Home view - Smart Corners
StarliteHD
Displays Smart Corners
Rec zone
Rec - Play & Snap buttons
1:1 Zoom zone (pixel to pixel)
Tap to zoom in or zoom out
Slide to move the zoomed picture
Smart Corners
User assigned tools
Menu / Smart Corners
Smart Corners
User assigned tools
Menu / Smart Corners
3
u Main menu
Smart Corners
System
Adjust
Press down the
ON/OFF switch to
display the main
menu
Tools
Home view
StarliteHD
4
Home view
Back to
main menu
Calendar & clock
Update
SD Card format
u System menu
StarliteHD
5
u Tools menu
StarliteHD
SDI Out
PDF report
Horizontal Flip
Home view
Vertical Flip
Viewnder mode
Virtual Horizon
Anamorphic Desqueeze 1.3x
Anamorphic Desqueeze 2x
Back to
main menu
Auto REC
Reverse mode
6
u Virtual Horizon
Snapshot
Back to
main menu
Metadata View
No tools
To assign a tool to a smart corner: select a tool, then choose the corner to which you want
to assign it.
Waveform
Home view
Record
StarliteHD
7
u Smart corners menu
StarliteHD
8
9
10
11
12
WARNING:
This product must be used in a correct grounded electrical environment; ground defects can create severe problems to the
equipment, the picture quality and even cause danger for the user.
Copyright law and international treaties protect this product, its design and its software. One or several international
patents apply to the StarliteHD. Unauthorized reproduction or distribution of this product or its design or its software
or any portion of them, may result in severe civil and criminal penalties, and will be prosecuted to the maximum
extent possible under the law.
Transvideo uses a specic cable for the StarliteHD. User must be extremely careful with the wiring of custom cables.
Using other cables may damage the product.
CAUTION:
Warranty is void as the product is opened. The unit contains electrostatic sensitive devices, which can be damaged or
destroyed if you touch them. High voltage is present in the product and there is some risk of electric shock if opened by a
non-accredited technician. Standard ESD procedures must be strictly followed during disassembly/re-assembly of the unit.
The user and/or technician assume full responsibility or any risk of bodily injury, death or property damage arising out of the
use or disassembly or repair of this equipment. In no event shall Transvideo S.A. or its local representatives be liable to a
user, technician or third party for any loss of income or any damage of any kind resulting from the use of or work on the said
equipment.
u Warning & Caution
AutoRec Control
( Play, Go, Delete )
From the main menu, select Tools icon
then activate Virtual Horizon
When you see the horizontal bar on the top
of the monitor screen, tap on CAL button.
The green bubble indicates that your
monitor is on level.
Histogram
Vectorscope
Peaking
Switch on-off Transvideo logo on the back
ARRI Mode
Visible only when ARRI
Camera detected
StarliteHD
u Adjust menu
Slide to adjust Luminosity, Brightness or
Contrast then validate by pushing
Push Reset to restore default values.
u Metadata
Displays available metadata embedded in
the SDI signal.
Metadata are camera dependent.
u Histogram / Waveform / Vectorscope
StarliteHD
Displays available measurment tools.
Histogram & Waveform can be pinned
on the picture by simply touching their
representation on this screen.
StarliteHD
StarliteHD
Quick Start Guide
www.transvideo.eu
Several patents pending
144TD0004 - Rev 1.0 August 2015
TRANSVIDEO S.A.
Zone Industrielle
F-27135 Verneuil sur Avre
FRANCE
Tel +33 2 3232 2761
Fax +33 2 3260 1479
info@transvideo.eu
www.transvideo.eu
u Home view - Smart Corners
StarliteHD
Displays Smart Corners
Rec zone
Rec - Play & Snap buttons
1:1 Zoom zone (pixel to pixel)
Tap to zoom in or zoom out
Slide to move the zoomed picture
Smart Corners
User assigned tools
Menu / Smart Corners
Smart Corners
User assigned tools
Menu / Smart Corners
3
u Main menu
Smart Corners
System
Adjust
Press down the
ON/OFF switch to
display the main
menu
Tools
Home view
StarliteHD
4
Home view
Back to
main menu
Calendar & clock
Update
SD Card format
u System menu
StarliteHD
5
u Tools menu
StarliteHD
SDI Out
PDF report
Horizontal Flip
Home view
Vertical Flip
Viewnder mode
Virtual Horizon
Anamorphic Desqueeze 1.3x
Anamorphic Desqueeze 2x
Back to
main menu
Auto REC
Reverse mode
6
u Virtual Horizon
Snapshot
Back to
main menu
Metadata View
No tools
To assign a tool to a smart corner: select a tool, then choose the corner to which you want
to assign it.
Waveform
Home view
Record
StarliteHD
7
u Smart corners menu
StarliteHD
8
9
10
11
12
WARNING:
This product must be used in a correct grounded electrical environment; ground defects can create severe problems to the
equipment, the picture quality and even cause danger for the user.
Copyright law and international treaties protect this product, its design and its software. One or several international
patents apply to the StarliteHD. Unauthorized reproduction or distribution of this product or its design or its software
or any portion of them, may result in severe civil and criminal penalties, and will be prosecuted to the maximum
extent possible under the law.
Transvideo uses a specic cable for the StarliteHD. User must be extremely careful with the wiring of custom cables.
Using other cables may damage the product.
CAUTION:
Warranty is void as the product is opened. The unit contains electrostatic sensitive devices, which can be damaged or
destroyed if you touch them. High voltage is present in the product and there is some risk of electric shock if opened by a
non-accredited technician. Standard ESD procedures must be strictly followed during disassembly/re-assembly of the unit.
The user and/or technician assume full responsibility or any risk of bodily injury, death or property damage arising out of the
use or disassembly or repair of this equipment. In no event shall Transvideo S.A. or its local representatives be liable to a
user, technician or third party for any loss of income or any damage of any kind resulting from the use of or work on the said
equipment.
u Warning & Caution
AutoRec Control
( Play, Go, Delete )
From the main menu, select Tools icon
then activate Virtual Horizon
When you see the horizontal bar on the top
of the monitor screen, tap on CAL button.
The green bubble indicates that your
monitor is on level.
Histogram
Vectorscope
Peaking
Switch on-off Transvideo logo on the back
ARRI Mode
Visible only when ARRI
Camera detected
StarliteHD
u Adjust menu
Slide to adjust Luminosity, Brightness or
Contrast then validate by pushing
Push Reset to restore default values.
u Metadata
Displays available metadata embedded in
the SDI signal.
Metadata are camera dependent.
u Histogram / Waveform / Vectorscope
StarliteHD
Displays available measurment tools.
Histogram & Waveform can be pinned
on the picture by simply touching their
representation on this screen.
StarliteHD
Color temperature
D56
AvengerLeveler
™
yes
Power
5 to 30V DC
Power Cons. 6W
SD card slot yes
Dimensions
(w x h x d)
144 x 68 x 27 mm
5,66 x 2,67 x 1,06 inches
Weight < 200g / 0.5 lbs
AMIRA EXT
Lemo 1B.306
1 Can1 H
2 Can1 L
3 Can2 H
4 Can2 L
5 VBat (1A max)
6 Gnd
ALEXA Mini EXT
Lemo 1B.307
1 Can1 H
2 Can1 L
3 Can2 H
4 Can2 L
5 VBat (1A max)
6 Gnd
7 R/S
u Auto REC
13
u Mechanics & connectors
Mini 3D Swing Arm for ARRI™
Includes a special 3/8”-16 male thred on the bottom.
P/N 918TS0261
u How to update
Battery Back
For Sony L/M series - Panasonic, JVC, Hitachi 7.2V LI-ION.
P/N 918TS0274
Viewnder Adapter
3 x aspherical magnier.
Converts the StarliteHD to a viewnder.
P/N 918TS0266
Sun Hood
Protects the screen from direct sun.
P/N 918TS0265
Transportation cover plate
Protects against dust and shocks.
P/N 918TS0268
u Recording / Playing
3G-HD SDI in
3G-HD SDI
reclocked out
Part Number
Serial Number
SD card Slot
Transvideo mounting system with 1/4-20 thread
To attach the monitor from the back - To mount a battery adapter
Power 5 to 30v DC
Lemo5 “mini”
(EGG.0B.305.CLL)
(-1, +2, Reserved 3,
CAN L 4, CAN H 5)
ON/OFF switch
Main menu
(down)
StarliteHD
You can generate a le which gives :
- Possibility to convert the output container from h.264 to mp4 (default) or mkv.
- Possibility to adjust the compression level and to choose intra mode for coding.
- Possibility to choose a default name for the clips.
- And so on.
Options are set online on our web site, a le is generated and placed manually onto the SD card.
For more information, visit http://www.transvideo.eu/support-StarliteHD
Plug the SD card into your computer.
Download and uncompress the latest software release (the downloaded le is in zip format) using your archive utility application.
Open the uncompressed folder then copy the le maj.tar.gz and paste it at the root of the SD card.
Do not rename the le on the SD card.
Plug the SD card into the monitor. Turn ON the monitor then push down the menu button.
Select the Settings icon then choose Update. Validate your choice and wait...
During the update , you can read the following information on the screen.
- Do not disconnect your monitor from the power supply.
- Full system update : may require more than 30 minutes.
- Applicative update in progress.
After a successful update, the monitor displays “Your monitor is up to date”.
If an error occurs, a report is generated.
You can read the online version at http://www.transvideo.eu/support-StarliteHD
u Technical specications
StarliteHD
StarliteHD
StarliteHD
14
17
u ARRI camera connectors Pin-Outs
18
15 16
u Conguration le
19 20
21 22
23 24
StarliteHD
StarliteHD
StarliteHD
StarliteHD
Play Status
Go back to the
records gallery
Delete record
Play
Slide to rewind
& forward
u Accessories / Cables
Battery Back
For Canon BP 900 series 7.2V LI-ION.
P/N 918TS0273
From the main menu, select Tools then
activate Auto REC
If you need the quick menu, also activate
AutoREC Control .
Play, Go, Delete icons should appear after the
camera stops recording.
Auto REC control is only available for build 112 and later.
You can read the build version on the monitor startup screen.
Delete the latest record
Back to work
Play the latest record
Video input 1 x 3G / HD / SDI
Video output 1 x 3G / HD / SDI
Supported
Standards
3G: 1080 / 50p, 60p
HD: 1080 / 50i, 60i
1080 / 24p, 25p, 30p
1080 / 24psf, 25psf
720 / 25p, 30p, 50p, 60p
SDI: 525 / 60i
625 / 50i
Display type
& size
AMOLED - 5 inches
Pixels Picture zone 1280 x 720
Contrast ratio 3400:1
Viewing angle
±80° H & V
Brightness max 380 Nits
StarliteHD
u Recording / Playing
Records gallery
Choose the one you
want to play
Home view
Navigation
Slide on thumbnails
to navigate
StarliteHD
u Recording / Playing / Converting
Convert output container
h.264 to mp4 (default)
* First push the “Convert“
icon then select the video
in the list
* Please note that old converted les with the same name will be overridden.
Rec-00259.h264 00:00:31 SD: 2%
Record status
Record*
Tap to record
Tap again to stop
Records gallery
Snapshots gallery
ARRI Mode
* All supported standards.
The peaking is applied on the picture area located between the two vertical bars.
StarliteHD
u Waveform
StarliteHD
u Peaking
Waveform can be fullscreen or at the bottom of the picture.
Touch the waveform to change size.
D-Tape/Lemo5 power cable
P/N 906TS0187
RS3/Lemo5 power cable
P/N 906TS0188
Lemo6/Lemo5 cable
P/N 906TS0189
http://www.transvideo.eu/StarliteHD5-ARRI
Note: All pin-outs for camera interfaces appear as seen by the user.
Lemo EGG.0B.305 CLL
1 Gnd
2 +V DC
3 Reseved
4 Can L
5 Can H
 Loading...