P/N PM000223A • Rev. 1 • ISS 9 August 2017 11
Installation Manual
NU-Series Hardware
System Cabling
Table 3 RJ-45 Pin-out (termination is identical on both ends)
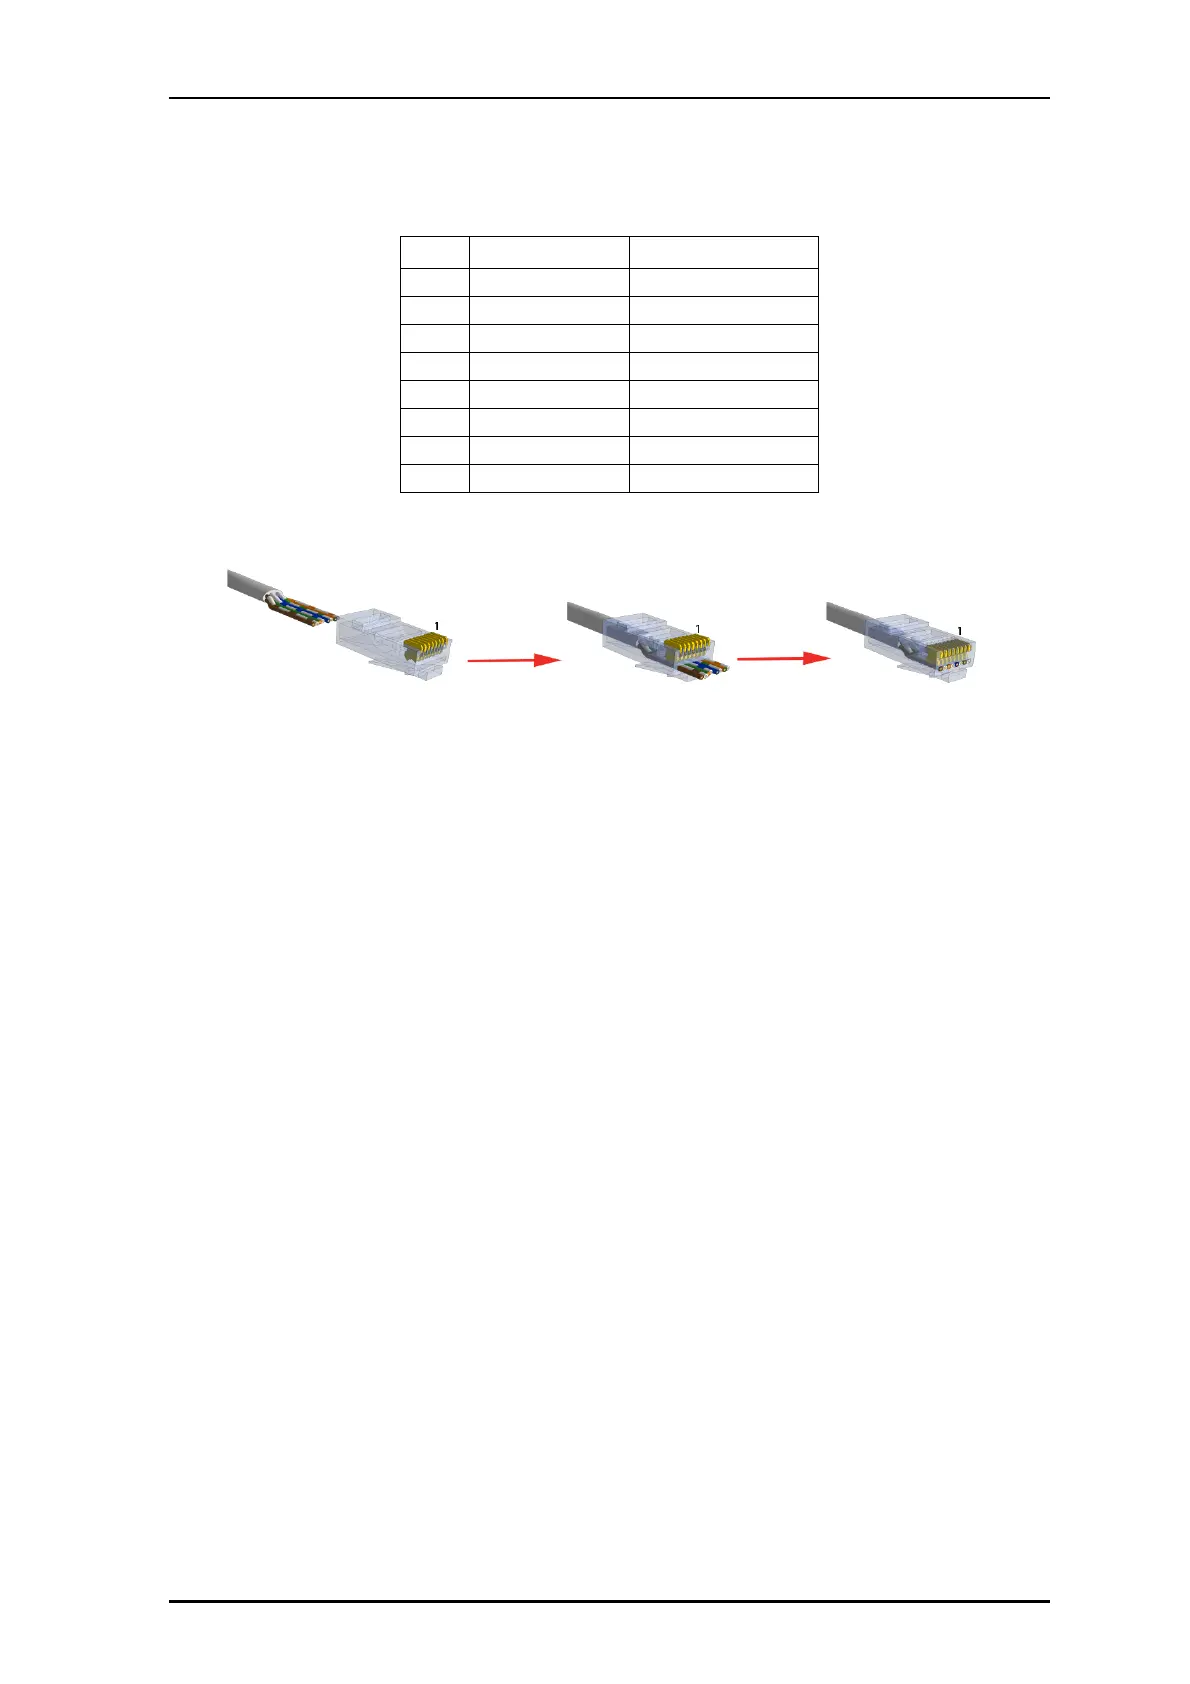
Figure 7 Terminating a Cat 5/5e/6/7 cable
To terminate a Cat 5/5e/6/7 cable:
1. Using a crimping tool, trim the end of the cable that you are terminating to ensure that
the ends of the conducting wires are even.
2. Carefully strip off approximately one inch of the cable's jacket using the crimping tool
or a UTP cable stripper.
3. Separate the four twisted wire pairs from each other, and then unwind each pair so
that you end up with eight individual wires.
4. Arrange the wires in a flat, side-by-side ribbon formation, and then place them in order
according to Table 3.
5. Orient the RJ-45 connector so that its pins are facing away from you and the plug-clip
side is facing down. See Figure 7. Carefully insert the flattened wires into the
connector. If using an EZ-RJ45 connector, push through until the wire ends emerge
from the pins. For strength of connection, also push as much of the cable jacket as
possible into the connector.
6. When you are using an EZ-RJ45 crimping tool, the tool will remove the excess wire
when you crimp the connector.
7. Make sure that the wires are in the correct order. If not, remove them from the
connector and rearrange them into the proper formation and re-insert.
8. Insert the connector/cable assembly into the RJ-45 slot in your crimping tool. Firmly
squeeze the crimper's handles together until you can't go any further. Release the
handles and repeat this step to ensure a proper crimp.
9. If your crimper does not automatically trim the wire ends upon termination, carefully
cut wire ends to make them as flush with the connector's surface as possible. The
closer the wire ends are trimmed, the better your final plug connection will be.
Pin # Color Color Abbreviation
1 Orange/White OGWH
2Orange OG
3Green/WhiteGNWH
4Blue BU
5 Blue/White BUWH
6Green GN
7 Brown/White BNWH
8Brown BN