P/N PM000223A • Rev. 1 • ISS 9 August 2017 53
Installation Manual
NU-Series Hardware
IP Devices
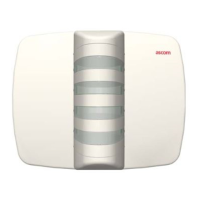
To mount the display directly on a wall:
1. Ensure that the LAN cable is connected to the corridor display. See "5.4.5, Connecting
the LAN Cable" on page 43.
2. Locate the area on the wall where you want to mount the corridor display. Be sure
there is enough space on the wall to accommodate the display.
3. Place a leveling device against a flat wall surface where you want to mount the corridor
display, and then make two marks 265mm (10.43in.) apart for the screw holes.
4. Drill two holes for the type of screws that will be used, such as wood, concrete, drywall
screws, or screws with anchors.
5. Insert each screw and tighten, leaving 4mm (.16in.) of space between the wall and the
screw head. The space is needed to accommodate the mounting clips on the back of
the display.
6. Connect the Ethernet cable from the outlet to the corridor display. See
"5.4.5, Connecting the LAN Cable" on page 43.
7. Place the display against the wall so that the screw heads can pass through the keyhole
slots on the display’s mounting clips, and then lower the display so that it is properly
seated on the screws.
5.4.7 Resetting to Factory Default
If required, you can reset the corridor display parameters to the factory’s default settings.
Important: Resetting to factory’s default will replace all existing parameters, such
as IP address and port settings, brightness and volume, etc. with the factory’s
default settings.
A small hole in the body of the corridor display gives access to the Reset button.
To reset the corridor display to the factory’s default settings:
1. Ensure the corridor display is receiving power.
2. Carefully insert a suitably sized object through the access hole, such as a small screw
driver or paper clip.
3. Press the Reset button gently for four seconds with the power on.
After releasing the button the corridor display performs a reset and restarts normally with
its default settings and displays the display’s IP address.