P/N PM000110A • REV 1 • ISS 14OCT2016 3 of 3
Notes:
1. All US and Canada installations, require powering from the HC-
IPSWITCH8 Power Switch or other E23929 listed PoE Switch.
2. For non-US or Canada installations, a locally sourced PoE switch
or power injector with EMC Class B rating must be used.
3. Desktop installations do not require the ferrite core for Class B
compliance.
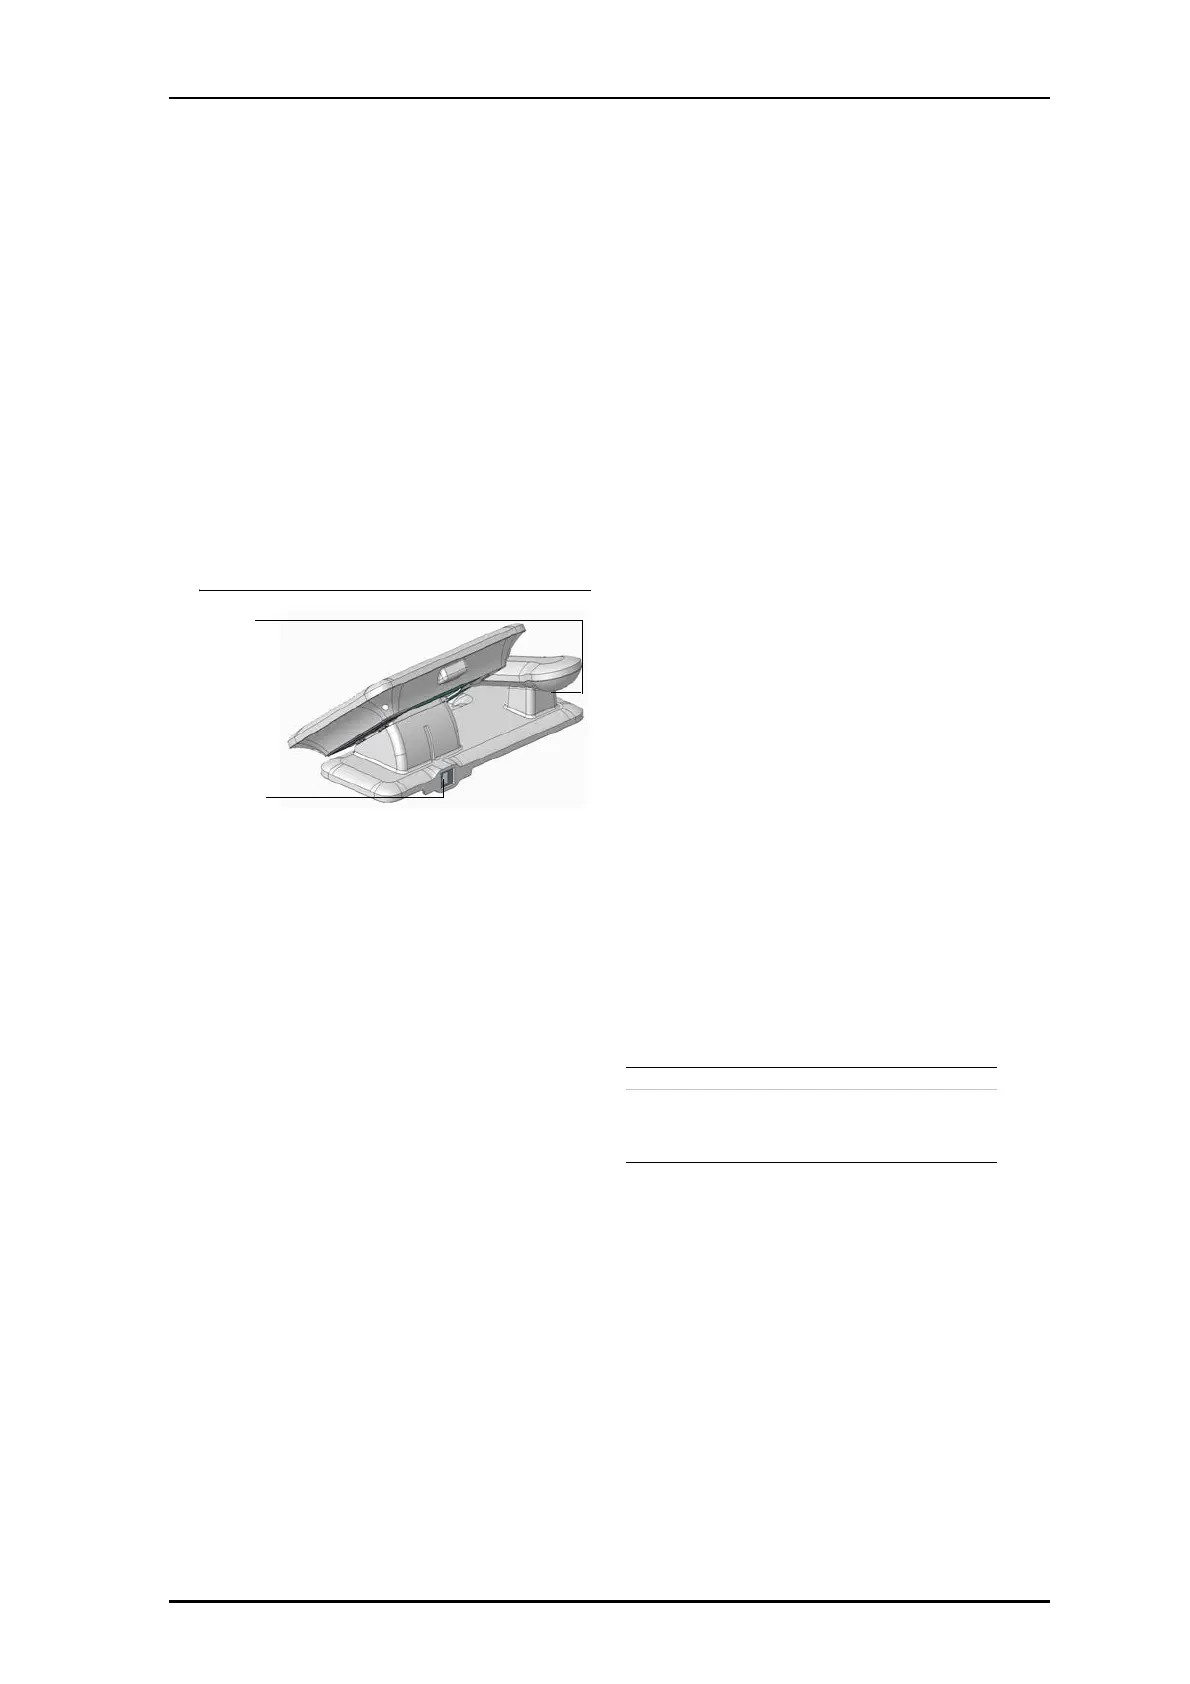
To connect a touch screen display:
1. Connect a Cat 5/5e cable from the IPSwitch8 or the PoE switch to
the PoE jack on the base of the pedestal.
2. Connect the handset cord to the RJ-22 connector on the handset
side of the pedestal base.
3. Connect other end of handset cord to the connector at the
bottom of the handset and place handset in cradle.
Touch screen display desktop PoE connection
Supervising touch screen displays
The nurse call system shall sound an alert tone and visually display
a system error message if communication with any touch screen
display is lost.
Systems with adequate supervision of device failure
Systems with multiple touch screen displays typically require no
additional supervision or annunciation. The Telligence touch screen
display supervises all system components. If power or data is lost at
one display, the remaining displays sound an alert and display an
error message.
Instances needing additional supervision
When a touch screen display is installed in an area or space where
staff members would not be able to hear an audible alert signal and
view the device display, a supervising dome light with buzzer is
required.
A supervising dome light serves to alert an operator that the touch
screen display has either lost power or communications with the
rest of the system.
The following situations require additional supervision:
• Systems limited to a single touch screen display
• Systems in which one touch screen display is placed outside the
a c o u s t i c a n d v i s u a l r a n g e o f o t h e r c o n s o l e s a n d a n n u n c i a t o r s
RJ-45
PoE jack
RJ-22
Installing a supervising dome light with buzzer for
supervision
When additional supervision is needed, install a supervising dome
light (model HC-CL4-SUPV) near each touch screen display. This
dome light uses a warning light and buzzer to alert nearby staff if
the power or data to the display is interrupted. For installation
instructions, refer to the HC Series Dome Lights Installation Sheet
(P/N 3101436). For instructions on associating the dome light with
the console, see “Configuring the dome light” in the Telligence
Installation Manual.
Replacing a Failed Device
When a touch screen display needs to be replaced, the microSD card
from the failed device needs to be removed and inserted into the
new unit.
Note: Wall-mounted devices must be removed from the wall. If
optional handset is installed, remove handset accessory from the
failed device and reattach it to the new unit (refer to “Installing the
handset cradle for a wall-mounted display” section).
To interchange microSD cards:
1. Remove touch screen display from mount (desktop pedestal or
wall mount).
2. Disconnect all cables from the failed device.
3. On the back of the failed device, open the access panel and eject
the microSD card by pushing in and activating the spring.
4. On the back of the new touch screen display, open the access
panel and eject the microSD card.
5. Insert the microSD card from the failed device into the new unit
and seal the new unit’s access panel.
6. Insert the microSD Card from the new unit into the failed device
and close access panel.
7. Reconnect all cables removed in Step 2 to the new unit.
8. For wall-mounted displays, slide the new unit downward onto
the mounting plate or, for a desktop display, slide the new unit
downward onto the desktop pedestal.
Note: The new unit’s microSD card needs to be included when
returning a failed device for warranty.
Specifications
Notes:
1) Cat 6/7 cable will work electrically but may be too stiff for
some back boxes.
Wire/terminations
Cat 5/5e/6/7 cable
Note 1
, RJ-45
Compatible electrical
boxes
United States, European Union, Australia
Standard plastic or metal back box with
mounting holes: 60mm (2.36”), 78mm
(3.07”), or 83mm (3.25”)