28
land after the GoTo slew, however, the azimuth adjustment will take you toward the center of the reticles. (Ignore
any small perpendicular displacement as your azimuth adjustment brings you to the center of the eyepiece reticles,
especially if your second star is near the horizon, as it will likely be from atmospheric refraction.)
d) No need to Re-calibrate since you have NOT used the direction buttons to do any nal centering. If you do
end up tweaking with the direction buttons, then go ahead
and re-calibrate, but you should not really need to do this.
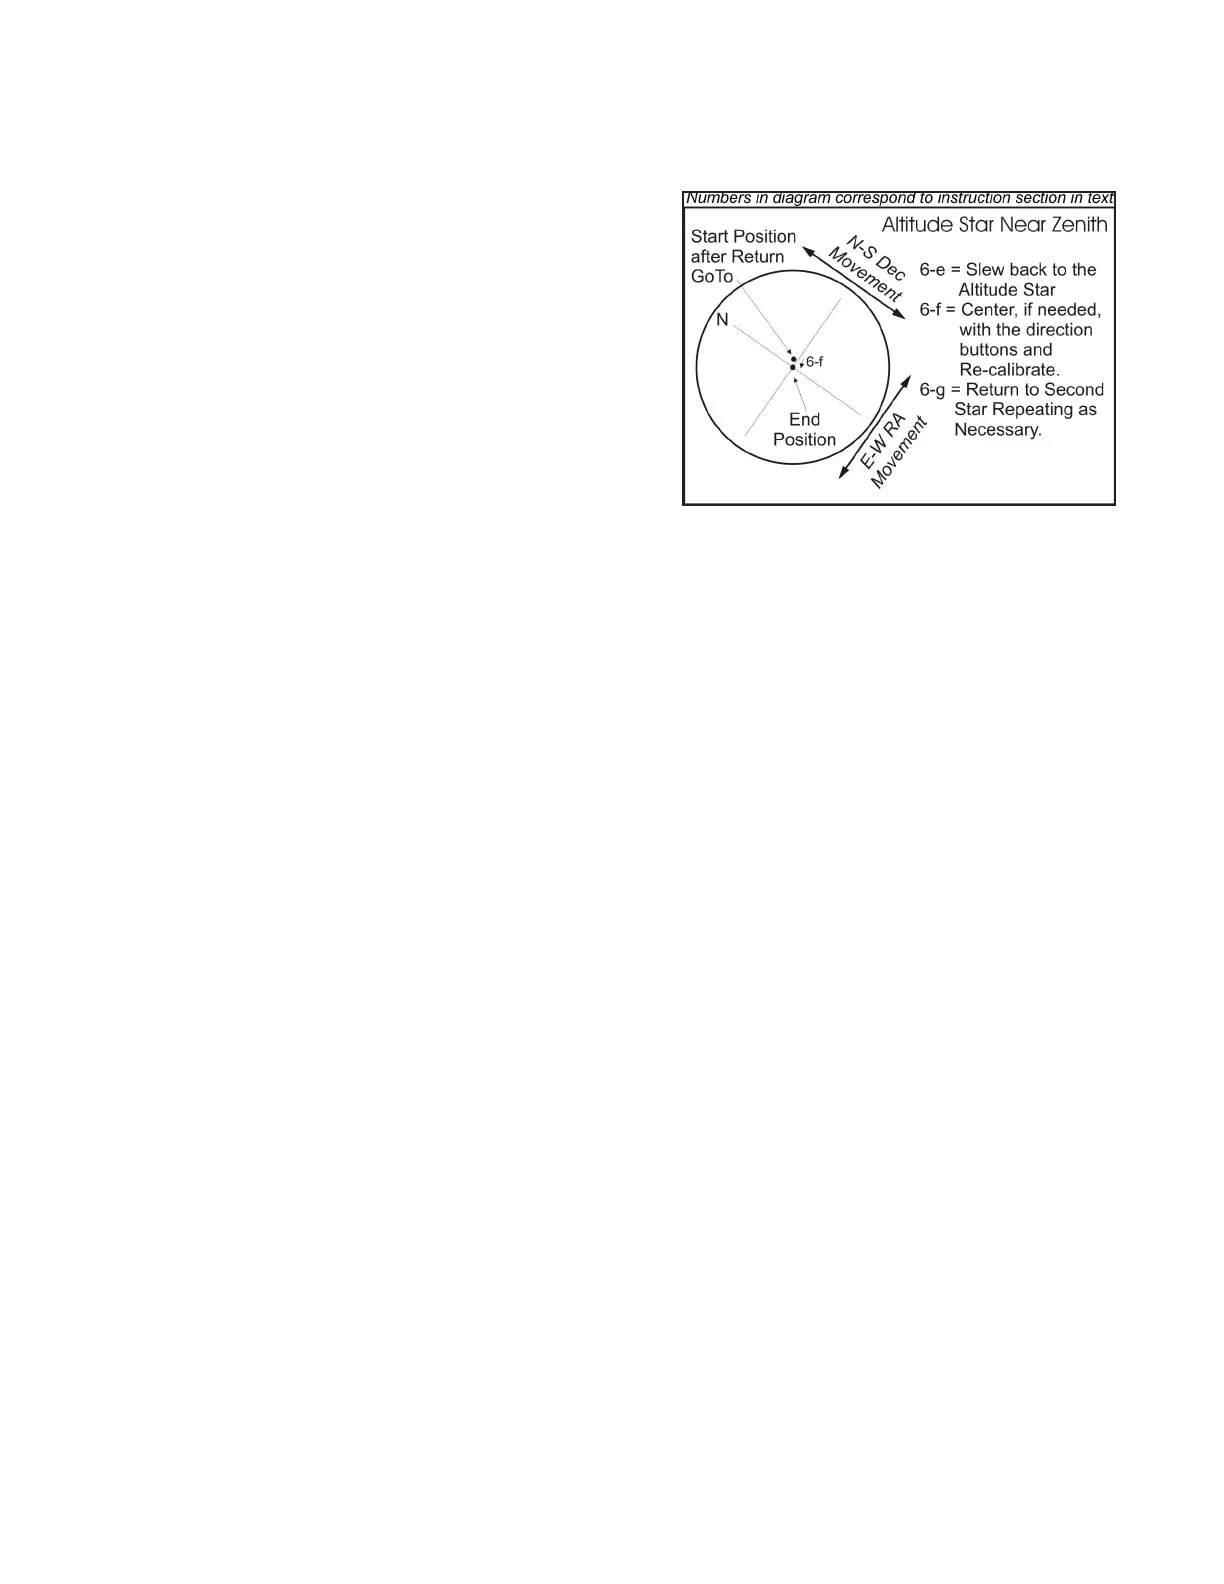
e) Slew back to the rst star (Altitude Adjustment Star).
Since it is almost directly overhead, it should be virtually
centered in the reticle. This is because the azimuth adjust-
ment you made is mostly rotating the mount around an
imaginary axis that would go straight up through this star.
f) If needed, center with the direction buttons only, and
then re-calibrate.
g) Repeat as needed. Slew back and forth between the
altitude star and second star, making the adjustment de-
scribed in 6-c above on the second star each time.
7. When these two adjustments are nished, you will be very accurately polar-aligned. If you wish, you can rene
this further by using a reticle eyepiece in your main instrument and repeating the procedure. The higher magnication
of the main instrument will allow greater precision than the nderscope. However, the nderscope had its orthogonal-
ity error removed during the altitude portion of the alignment. If you move to the main instrument, you will see the
effects of any orthogonality error in your main instrument assembly, and you can’t simply remove this error by turning
adjustment screws. The accuracy when using your main instrument also depends on how well your telescope holds
its orthogonality. Any mirror shifting or diagonal misalignment (that applies to refractor diagonals as well) will not only
compromise the polar alignment, but also the ability to accurately center objects when slewing from one to another.
Please refer to the Orthogonality section for further discussion.
8. SOME HINTS & COMMENTS:
a) You may not have a good conveniently placed star just hanging around at the zenith waiting for you to polar align.
That’s OK. Pick the best available star. Remember to set the meridian delay accordingly if you are more than one
hour in R.A. from the meridian, and take special care to be sure that your scope will not hit the pier when you ip
to the other side of the meridian (see 2-a above). Also, if your rst star, your “Altitude Star” is a ways away from
the zenith, the azimuth adjustment process may also need a bit of modication. In that case, rst pick your sec-
ond star so that it is in line with an imaginary line going through both the altitude star and the zenith. Then, ask
yourself: “What is the relationship between the altitude star, the zenith and the second star?” If the Altitude star is
further from the second star than the zenith point (in other words, you cross the zenith slewing from star to star),
your azimuth correction can be a slight bit under and then nish the last little bit with the direction buttons. If the
altitude star is closer to the second star than the true zenith, then you can very slightly over-correct with the azimuth
adjuster, and then come back to the perfect center with the direction buttons. If you do this and use the direction
buttons, remember to re-calibrate.
b) The illustrations above are simply representative illustrations and will almost certainly differ somewhat from what
you see in your own eyepiece. You may be starting out on the other side in either azimuth or altitude depending on
whether you are east or west of the pole in azimuth and above or below it in altitude. The concept is the same.
c) It is not necessary to do this at high power, nor is it necessary to get the star to fall exactly on the reticle. A stand-
ard 10 x 60 nderscope was used in our tests with this procedure to achieve enough accuracy to take 30 second
unguided frames at a 3810 mm focal length!
d) YES!! Performing this procedure does take the nder scope out of alignment with the main optical tube. That is,
in part, why the method works so well! However, it is very quick and easy to realign the nder back to the main tel-
escope optical axis, and it takes only a few moments. Many of those who use this method have found that they no
longer really need their nders for anything other than performing the alignment anyway. The subsequent GoTo’s
are simply that good! As a result, they simply leave the little scope adjusted to be orthogonal to the mount, and let
the mount nd their targets.