58
3. Do not use sync if your meridian delay feature is turned on. Meridian delay overrides the mount’s orientation / clock
information and can lead to the same problem as syncing when the mount is improperly oriented.
4. Compare the current “Z” value in the Star Selection Menu Screen with the R.A.
value for the star you will be syncing on. Remember that the “Z” value changes
along with time; you can’t use the “Z” value you remember from several hours ago.
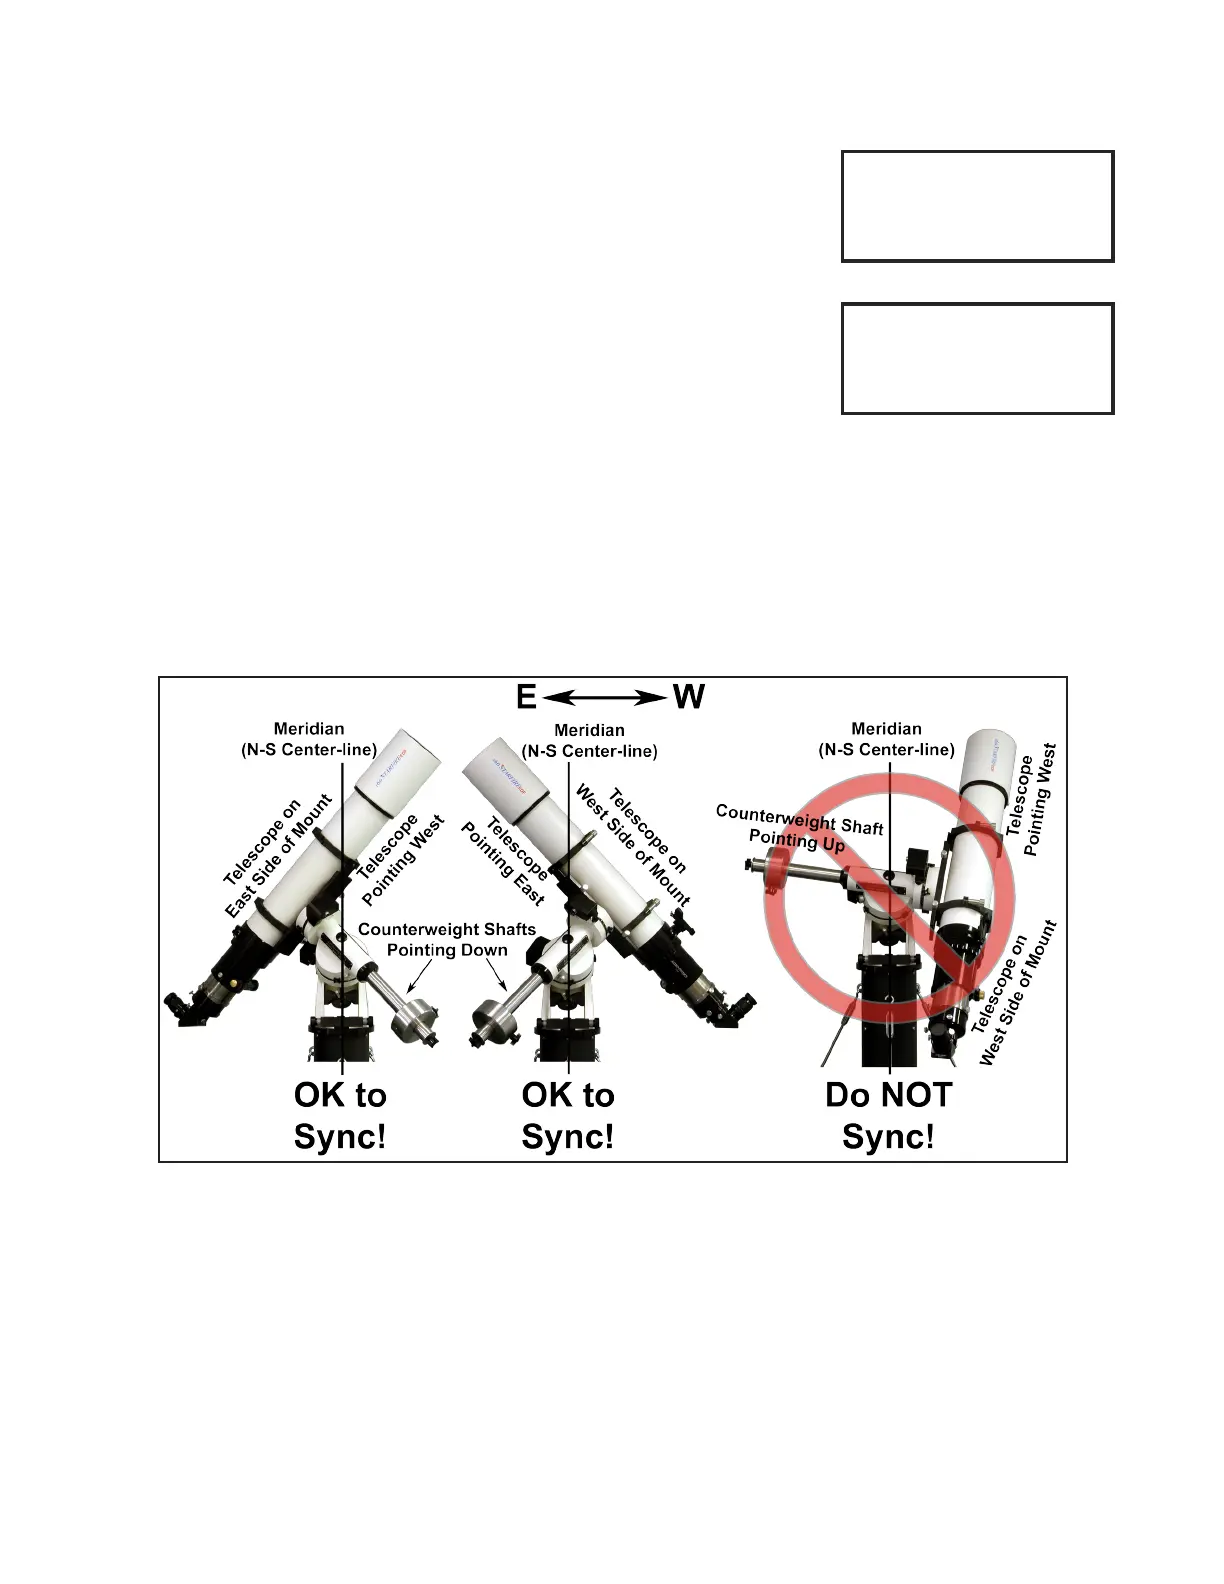
If the R.A. number is larger than the “Z” value, the star is east of the mount’s calcu-
lated meridian and the scope should be on the west side of the mount. If the R.A.
value is smaller, the star is west of the calculated meridian and the scope should
be on the east. This is an especially good way to check, since it uses the mount’s
calculated meridian and therefore bypasses any errors in time or location data.
5. To verify that everything is set correctly once you have synced, go to your Objects
Menu and Choose 7=R/D for the custom RA / DEC Entry screen. For the R.A.,
enter the “Z” value from step 2 above. (If it has been more than a minute or two,
get a fresh “Z” value from the Star Selection Menu). For the Dec. value, enter your
latitude +/– 20°. (The +/- 20° is in case you have safe zone limits set for your sys-
tem. If your system allows the scope to point straight up, you can just enter your latitude). Press GoTo. After slewing,
your counterweight shaft should be perfectly horizontal. If you were able to enter just your latitude for a Dec. value, the
scope will be pointing straight up as well. This is a good test because it also indicates whether your time and location
data are correct.
6. Your sync will result in greater pointing accuracy if you sync to a single star that is close to the celestial equator, rather
than close to your pole. This has nothing to do with the sync command itself, but instead is because of the geometry
of the celestial sphere. Think of the longitude lines on a globe, how they are widest at the equator, but converge at the
poles. A small error in centering a star near the pole would translate into a larger R.A. error than the same centering
error on a star near the celestial equator.
In summary, you use the sync command once in an observing or imaging session unless the telescope gets physically
moved by hand or by accident (as opposed to moved with the N-S-E-W buttons). While it can be used to tweak pointing
accuracy, we prefer to use re-calibrate for that. We also recommend that you Sync on objects that are at least 15 deg. (1
hour) from the meridian. This will help safeguard you from a potential clock related problem – i.e. you forgot about daylight
savings time, and it makes it easier to see that the object and telescope are on opposite sides of the meridian. If you are
permanently mounted and do not disturb the scope position, you do not need to use it after the very rst setup.
Re-calibrate is the “tweak” command. It is quick and easy and is perfect for ne-tuning your pointing accuracy during your
observing or imaging session. Rather than telling the mount where it is pointing, re-calibrate corrects its minor pointing
inaccuracies. Re-calibrate works on the object in memory that the mount thinks it is already pointing at. It does not
care what object is displayed on the screen at the time, only where the last GoTo command sent it. Since it does not re-
establish the mount’s position in memory, it doesn’t matter if the telescope and Re-cal object are both on the same side of
the meridian. It is therefore a safer command to use during your session.
Remember that for both commands, the preferred object of choice will always be a single bright star because it is a single
Choose Star Z=16:54
1=Alshain <
2=Altair
3=Altais >
Star Selection Menu - Altair
Star: Altair
RA: 19:50:47
DEC: +08:52:06
GoTo / Menu=Exit
Star Object Screen - Altair