2
GDO-10V3L2 Toro
™
Owner Installation Instructions
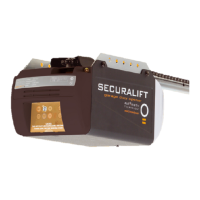
GDO-10V3L2 Toro
™
Roll Up Garage Door Opener
Contents
1. Important Safety Instructions 3
2. Controller Input And Outputs 4
3. Operating Controls 5
4. Set Up Requirements 6
4.1 Kit Contents 6
4.2 Choosing your Set up 6
5. Pre-Installation Requirements 7
5.1 Door Operation 7
5.2 Unsuitable Door Types 7
5.3 Position 7
5.4 Power Supply 7
5.5 Sideroom 7
5.6 Forks 7
6. Installation 8
6.1 Preparation 8
6.2 Fitting The Opener 8
6.3 Mounting The Opener 8
6.4 Installing The Wall Mounted Control Unit 9
7. Programming The Opener 9
8. Setting Limits 10
8.1 Setting Travel Limits 10
8.2 Code A Transmitter For Limit Setting 11
8.3 Setting Limits Via Transmitter 11
9. Coding Transmitter 12
9.1 Coding Transmitter Button 12
9.2 Selecting Function Of The Button 12
9.3 Returning To Main Screen 12
10. Remotely Coding Transmitters 13
10.1 Selecting The Function To Be Coded 13
10.2 Activate Remote Code Set Mode 13
11. Setting Pedestrian Position 13
11.1 Setting Pedestrian Position 13
11.2 Checking Pedestrian Position 13
11.3 Error Displays 13
12. Safety Obstruction Force Test 14
12.1 Testing Close Cycle 14
12.2 Testing Open Cycle 14
12.3 Adjusting the Safety Obstruction Force. 14
12.4 To Recalculate Force Margins 14
13. Safety Close & Auto-Close Mode 15
13.1 Safety Close Mode 15
13.2 Setting Up Satndard Auto-Close Mode 15
13.3 Safety Beam Triggered Auto Close 15
13.4 Pedestrian Auto-Close 15
13.5 Auto-Close After Obstruction: 15
14. Time Clock 16
14.1 Time Clock Operation 16
14.2 Time Clock Settings 16
14.3 Day Light Saving Time Adjustment 17
15. Accessories Installation 17
15.1 Fitting Courtesy Lights 17
15.2 Fitting Solenoid Or Magnetic Locks 17
16. Battery Replacement 18
16.1 Replacing Backup Batteries 18
16.2 Replacing Transmitter Batteries 18
17. Battery Disposal 18
18. Specifications 19
19. Troubleshooting 20
20. Maintenance 21
20.1 Door Maintenance 21
20.2 Lubrication (every 3 - 6 months) 21
20.3 Door Service and Repair 21
20.4 Opener Maintenance 21
20.5 Service Indicator 21
21. Appendix 22
A - Console Menu Structure 22
B - Viewing & Editing Logic Console Parameters 24
C - Control Board Adjustments 25
D - Diagnostic Tools 27
E - Memory Tools 28
F- Transmitter Editing 29
G - Transmitter Management 31
22. Warranty and Exclusion of Liability 32
Automatic Technology Australia Pty Ltd to the extent that such may be lawfully excluded hereby expressly disclaims all conditions or warranties, statutory or
otherwise which may be implied by laws as conditions or warranties of purchase of an Automatic Technology Australia Pty Ltd Garage Door Opener. Automatic
Technology Australia Pty Ltd hereby further expressly excludes all or any liability for any injury, damage, cost, expense or claim whatsoever suffered by any
person as a result whether directly or indirectly from failure to install the Automatic Technology Australia Pty Ltd Garage Door Opener in accordance with these
installation instructions.
WARNING! • The door may operate unexpectedly, therefore do not allow anything to stay in the path
of the door.
• For Safety protection, a Safety Beam must be fitted with logic console. Failure to comply
will void the warranty and may result in serious personal injury and/or property damage .
• The drive must not be used with a door incorporating a wicket door, unless the drive cannot
be operated with the wicket door open.
• The drive is intended to be installed at least 2.5m above the floor.
• DO NOT allow children to operate the opener. Any device that can operate the opener,
make sure it is out of reach of children and that the doorway is in full view at all times. Serious
personal injury and/or property damage can result from failure to follow this warning.
• When using auto close mode, a Safety (Photo Electric) Beam must be fitted correctly and
tested for operation at regular intervals. Extreme caution is recommended when using
auto close mode. All safety rules must be followed.
ELECTROCUTION! • Place opener in protected area so that it does not get wet.
• Do not spray with water .
• Disconnect the power cord from mains power before making any repairs or removing
covers. Only experienced service personnel should remove covers from the opener.
• If the power supply cord is damaged, it must be replaced by an Automatic Technology
service agent or suitably qualified person.
• Electrical wiring must be compliance with the local building an electrical codes.