Page 6–16 Stellar
®
SR55 Series Soft Starter User Manual – 1st Ed, Rev F – 09/18/2019
Chapter 6: Accessories
replaCemenT/spare parTs (ConTinued)
replaCemenT TouChsCreen
These touchscreens are exact replacements for the touchscreens that are originally installed
on the SR55 soft starters.
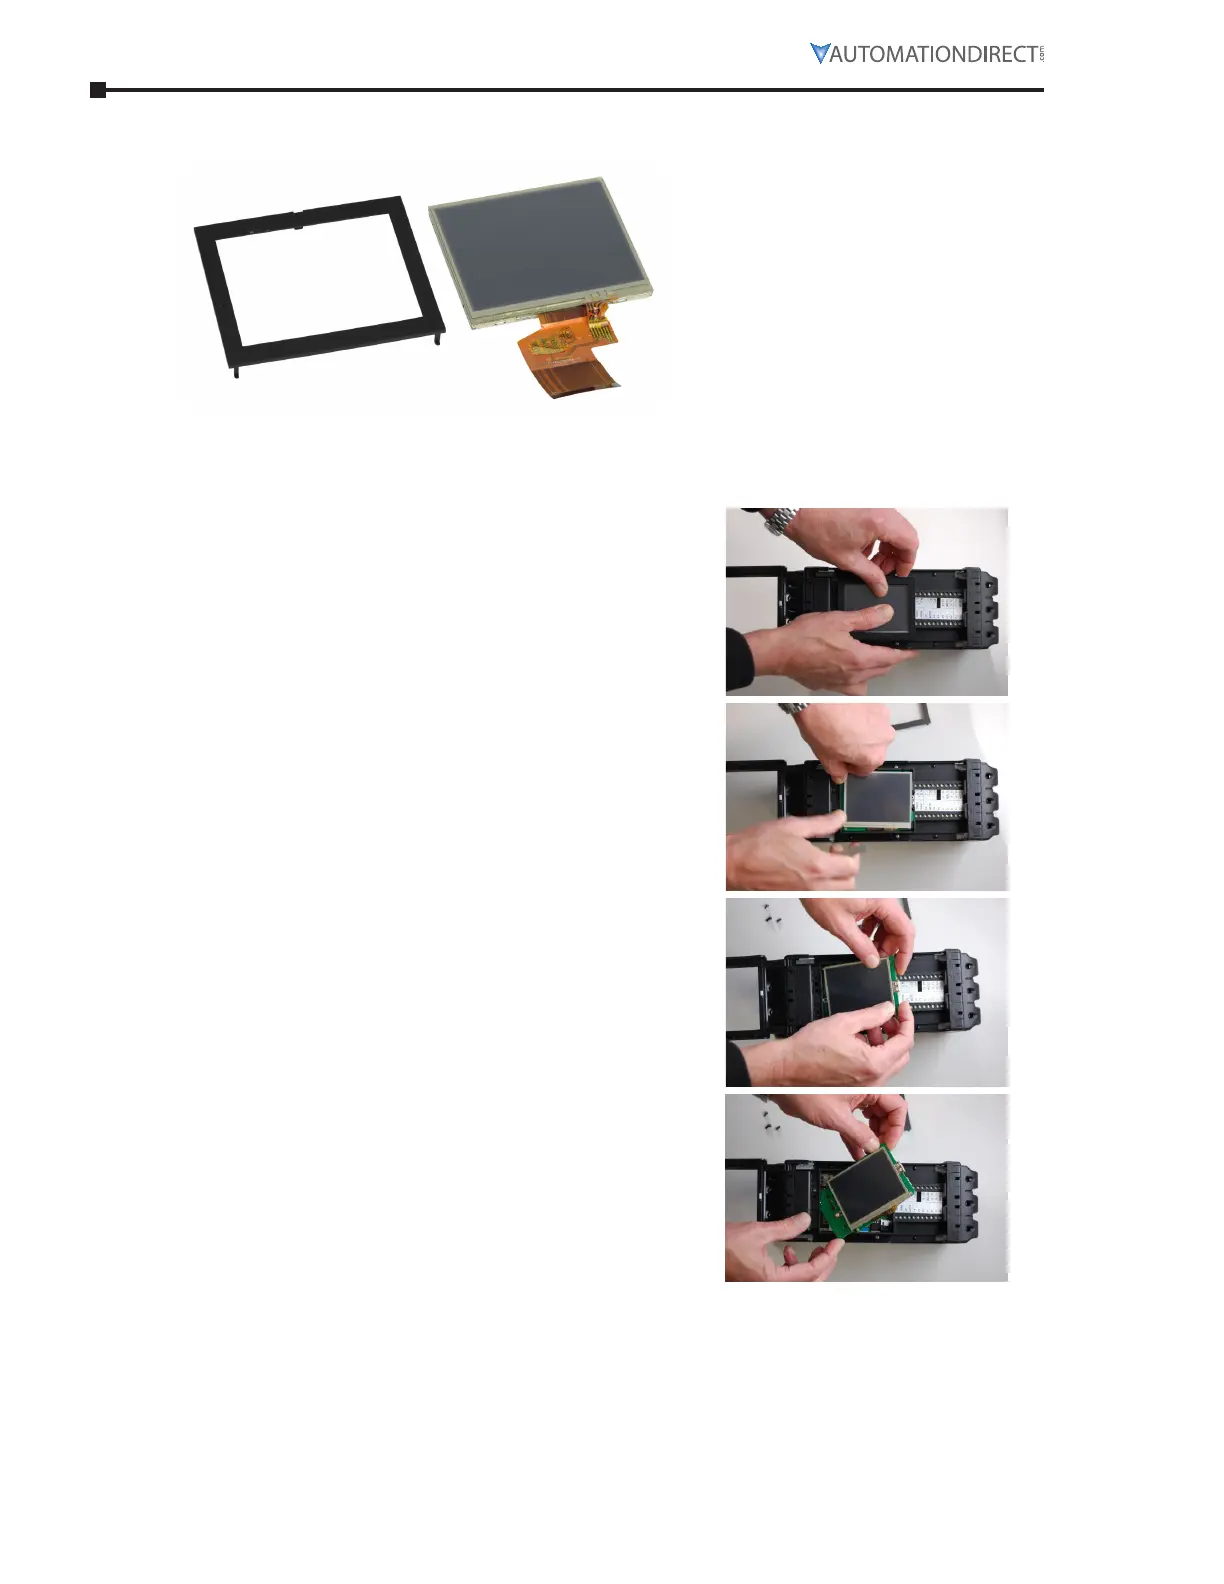
TouChsCreen replaCemenT/insTallaTion insTruCTions
1) Carefully remove the outer bevel casing around
the LCD display.
2) Remove the two plastic rivets below the LCD
display. Use a small screwdriver to pry the rivets
out.
3) When removing the LCD display and PCB,
slowly lift from the top left corner.
4) Gently remove the LCD and PCB at an angle, so
they can be lifted from the unit. Take care not to
apply excessive force.

 Loading...