Chapter 3 --- Instrument Setup
20
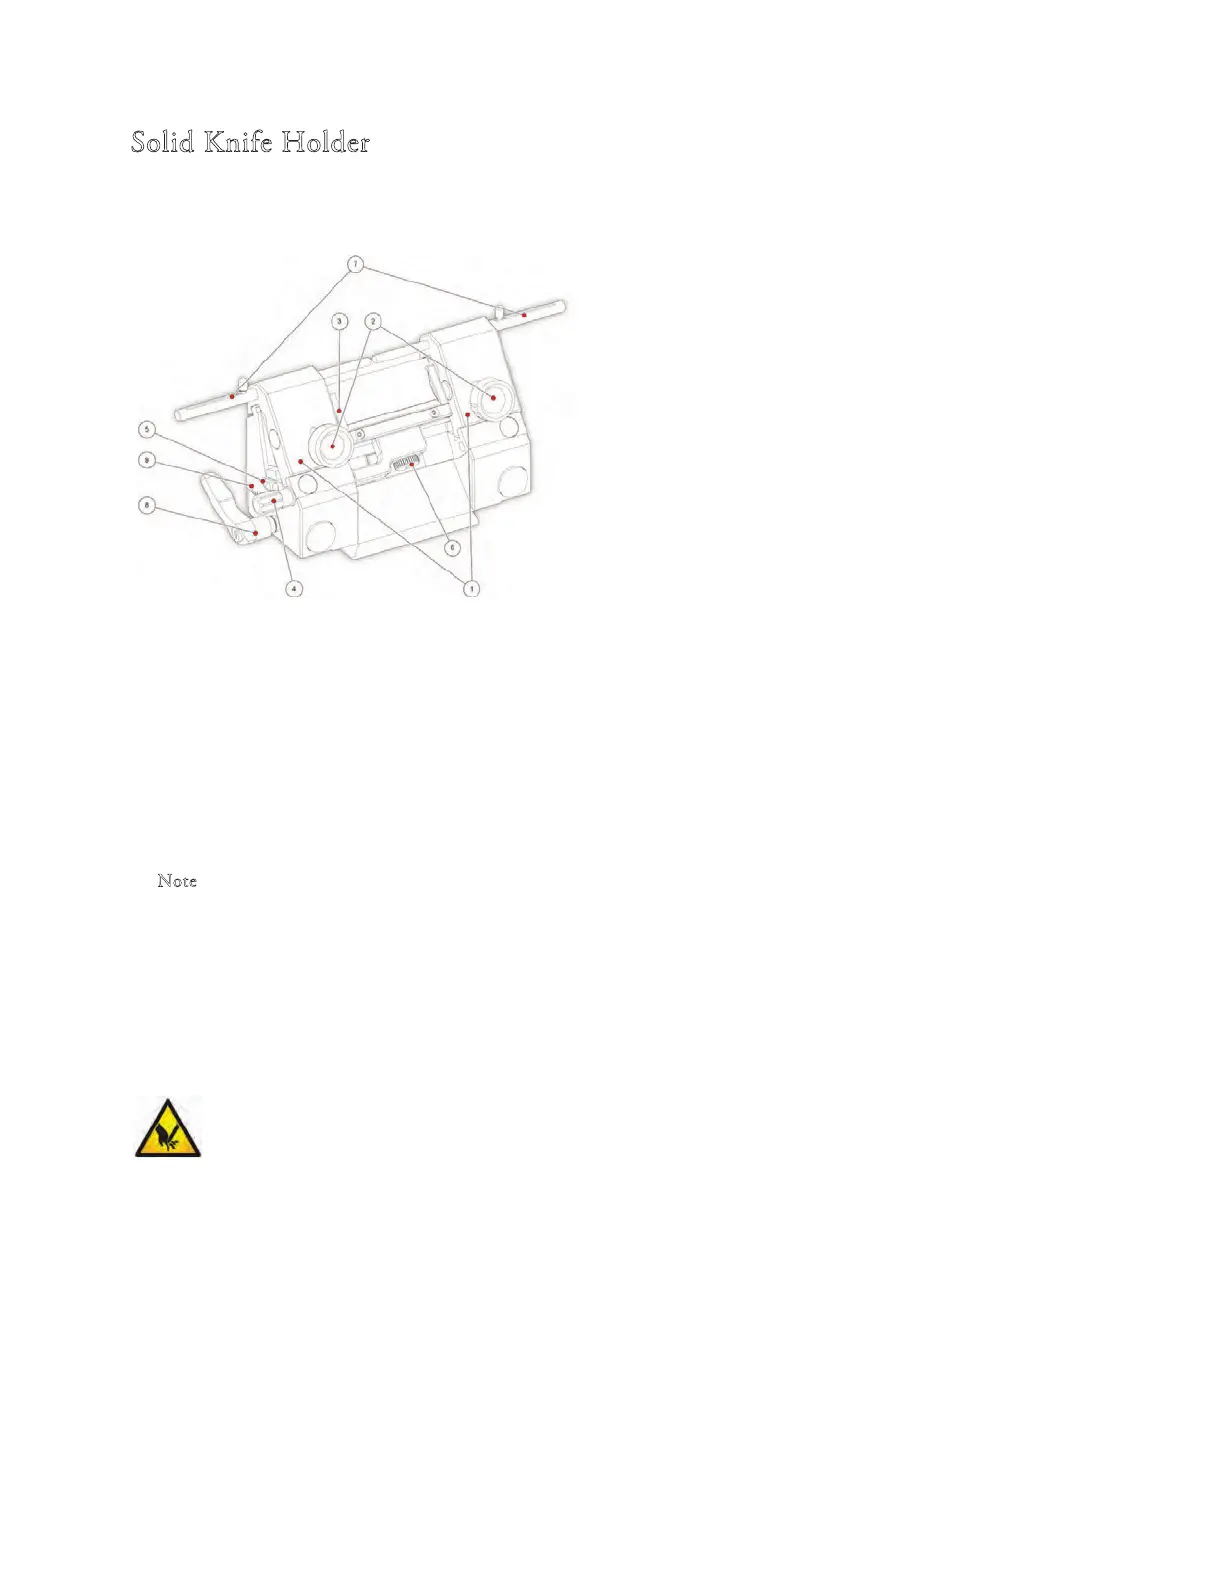
Solid Knife Holder
Inserting the knife:
e knife is inserted into the slot behind the clamping plate.
1 Clamping Plates
2 Clamping Screws
3 Anti-roll Plate
4 Anti-roll Plate Turning Lever
5 Knurled Screw
6 Anti-roll Plate Knurling Screw
7 Knife Guards
8 Clearance Angle Clamping Lever
9 Clearance Angle Scale
Inserting the knife:
•
•
e knife is inserted into the knife carrier either from the side or from the front, independently if one or tw
o
clamping plates have been removed.
Loosen the clamping screws.
• Turn the turning lever in a clockwise direction to tilt the anti-roll plate forwards.
Insert the knife.
• Turn the turning lever in a counter clockwise direction to put the anti-roll plate against the knife.
N
ote
Insert the glass anti-roll plate parallel towards the blade edge.
• en tighten the clamping screws to x the knife into position.
If the cutting area of the knife is no longer usable, the knife can be moved:
• Open the clamping screws and move the knife to the left or right side as required.
• Fix the knife again via the clamping screws.
To avoid the danger of injury on the knife during adjustment of specimen, always position the knife guards
over the blade edge.
Height adjustment of the knife:
• Loosen the clamping screws.
• Via the knurled screws which are placed on the left and right side of the knife carrier, adjust the height of the knife
to the position of the anti-roll device. ese should be parallel to each other.
• Afterwards, tighten the clamping screws to x the knife in its position.
Fine adjustment of the anti-roll device:
• e ne adjustment of the anti-roll device is carried out via the knurled screw.