nI --- 3 retpahC strument Setup
25
S
pecimen Setup
Before sectioning can begin, the specimen must be correctly clamped and oriented in the specimen head.
To clamp and orient the specimen:
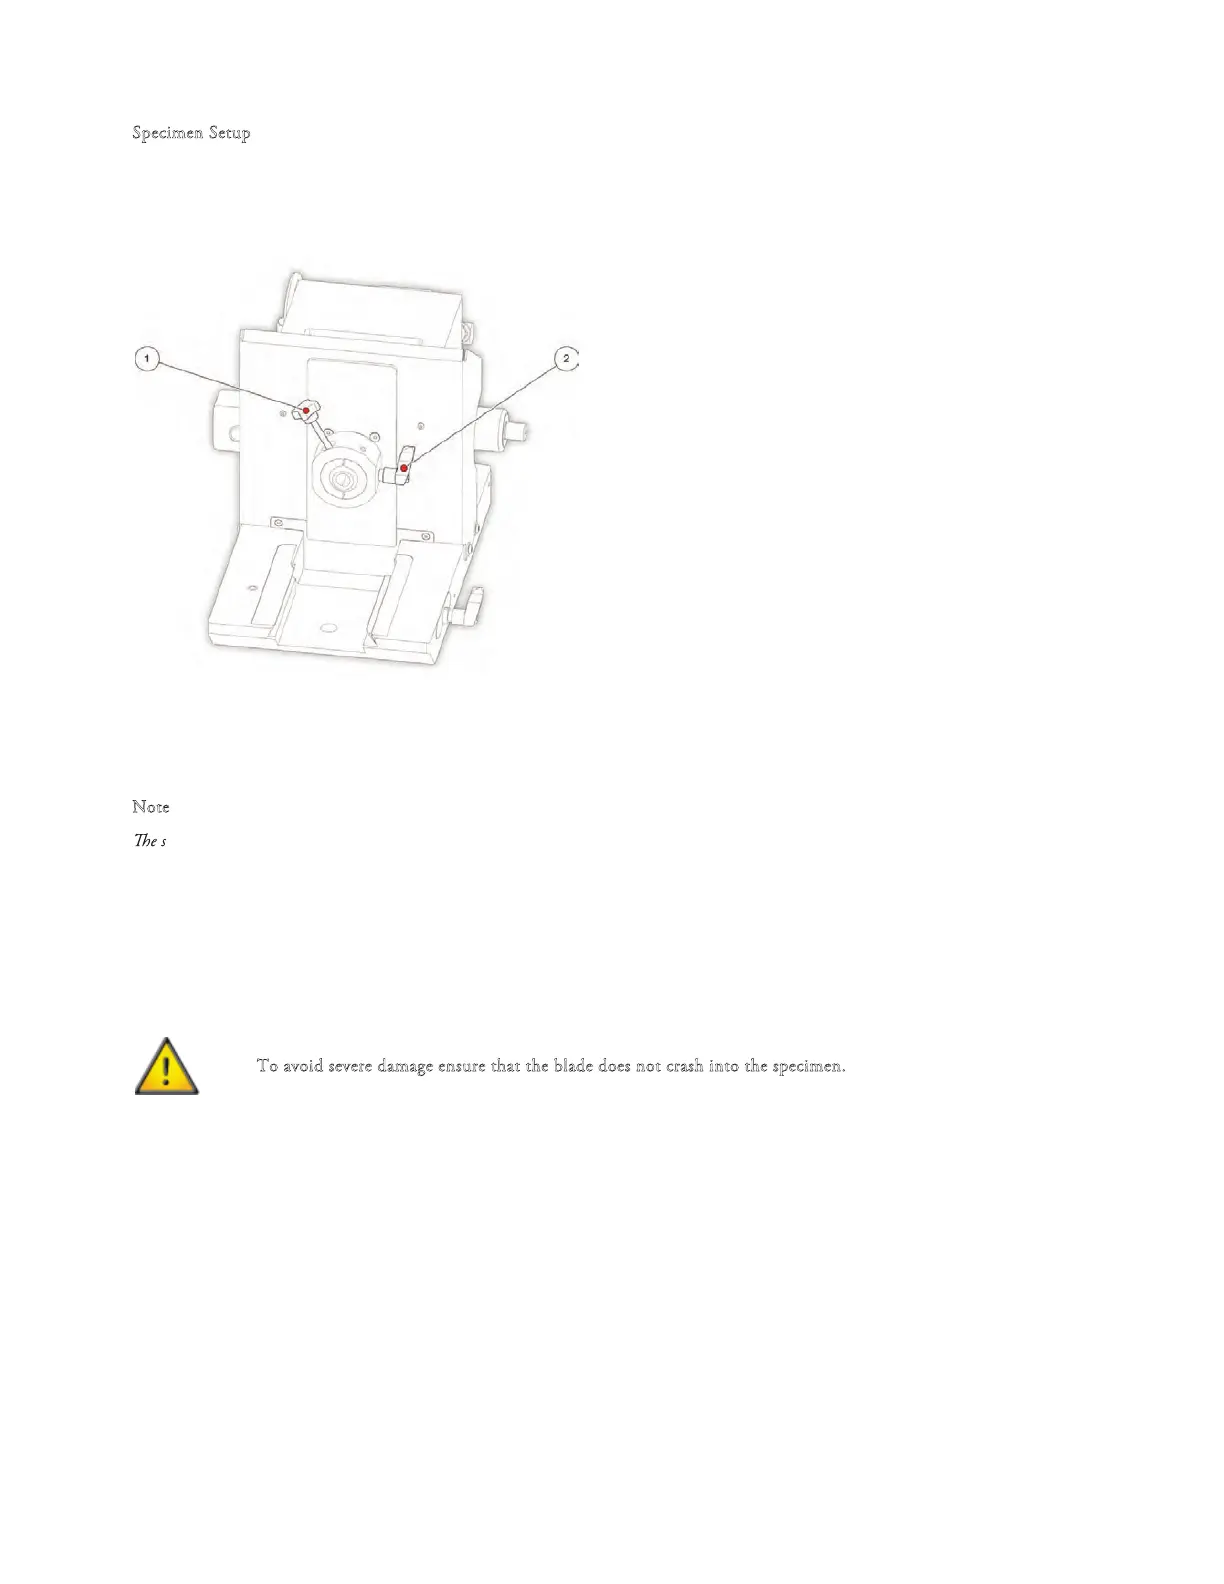
• Loosen the specimen chuck release lever and insert the specimen chuck into the center hole of the specimen
head.
1 Specimen Chuck Release Knob
2 Specimen Head Clamping Lever
• Tighten the specimen chuck release knob again to allow the jaws to grip the chuck.
• Loosen the specimen head clamping lever to allow adjustment of the specimen parallel to the cutting edge.
• Use the specimen chuck release knob to orient the specimen on the x- and y-axes.
N
ote
pecimen chuck release knobwill click into place when the centre position has been reached.
• Tighten the specimen head clamping knob again.
For further specimen orientation, the specimen chuck can also be rotated by 360° as described below:
• Loosen the specimen chuck clamping knob slightly.
• Rotate the chuck as required.
• Tighten the specimen chuck clamping knob.
T
o a
void severe damage ensure that the blade does not crash into the specimen.