Chapter 4 --- Operation
27
System Interfacing
Using the Touch screen
e QS12 has an embedded touch screen user interface which is used to set all preferences.
N
ote
Avoid using sharp or pointed objects to press buttons on the touch screen. It is recommended that a clean nger is used to operate the
touchscreen. However, if you require a stylus, the eraser-tipped end of a pencil is suitable.
M
ain Screen
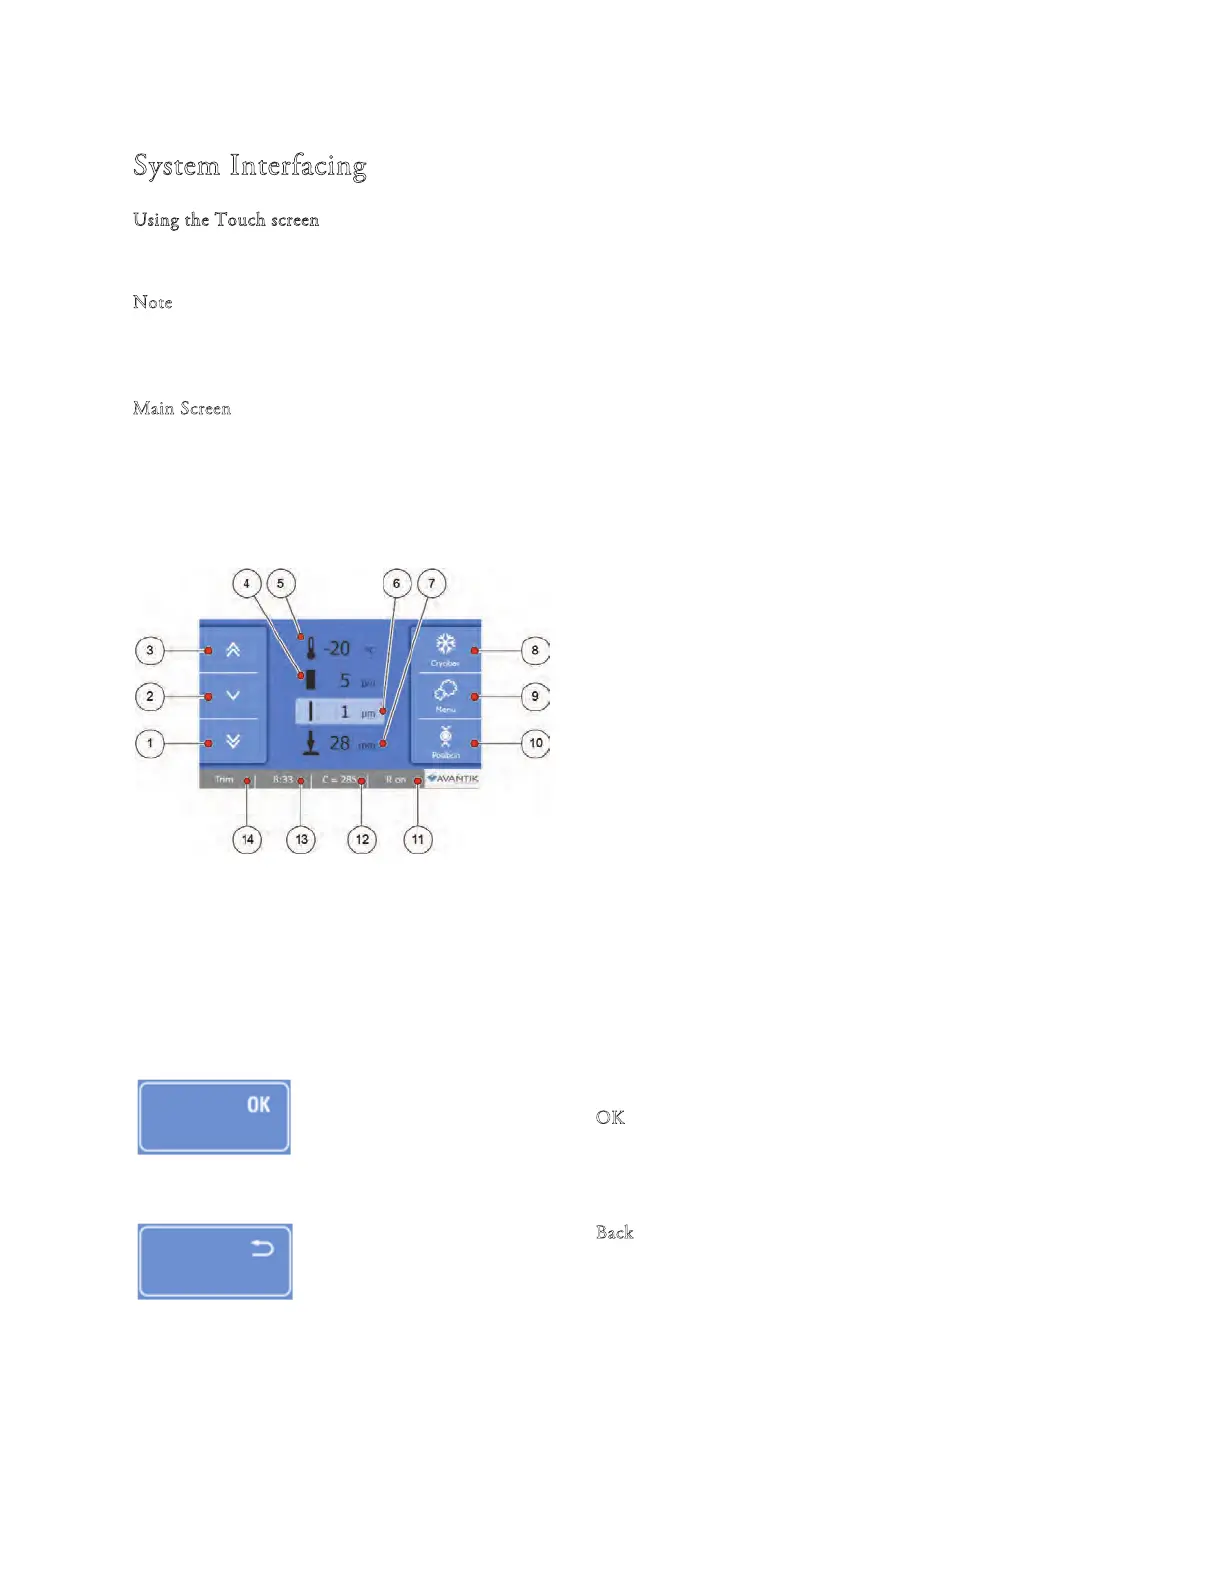
e Main screen appears after the instrument has been switched on.
1 Fast forward movement of specimen head
2 Slow forward movement of specimen head
3 Fast Backward movement of specimen head
4 Trim thickness
5 Chamber temperature
6 Section thickness
7 Remaining Travel
8 Cryobar button
9 Menu button
10 Position button
11 Retraction button
12 Counter mode (sum of sections, number of sections)
13 Time/Date button
14 TRIM button
• Press the required button to activate / deactivate the function or to display the options screen for the selected
function - See Setting Preferences.
"OK" Button
• Press the ‘‘O
K’’ button to save any changes to specic settings.
"Back" Button
• Press the ‘‘B
ack’’ button to return to the previous menu without saving
any changes.