Chapter 3 --- Instrument Setup
23
• Fix the clamping plate with the clamping lever again in the blade carrier in reverse order.
• To insert the blade, now loosen the clamping lever.
• Press the clamping plate on its lower area to open the slot behind the clamping plate.
• Insert the blade from the left side into the slot behind the clamping plate as far as possible.
• Tighten the clamping lever xing the blade in its position.
• To section the specimen, put the anti-roll plate against the blade via the turning lever in a counter clockwise
direction.
If the cutting area of the blade is no longer usable, the blade carrier can be moved:
• e blade itself is clamped solidly into the blade carrier. e complete carrier is moved.
• Open the clamping lever for the carrier and move the carrier to the left or right side.
• Tighten the clamping levers to x this position.
T
o avoid the danger of injury on the knife during adjustment of specimen, always position the knife
g
uards over the blade edge.
Fine adjustment of the anti-roll device:
• e ne adjustment of the anti-roll device is carried out via the knurling screw.
Selecting the clearance angle:
• Loosen the clamping lever.
• Swivel the upper part of the blade carrier on the base until the desired clearance angle is reached.
• e clearance angle can be read on the scale on the left side of the base.
• Bring the clamping lever into clamping position.
• e selected clearance angle is now xed in its position.
N
ote
Usable cuts are only achieved at a clearance angle of 10° or
more. S
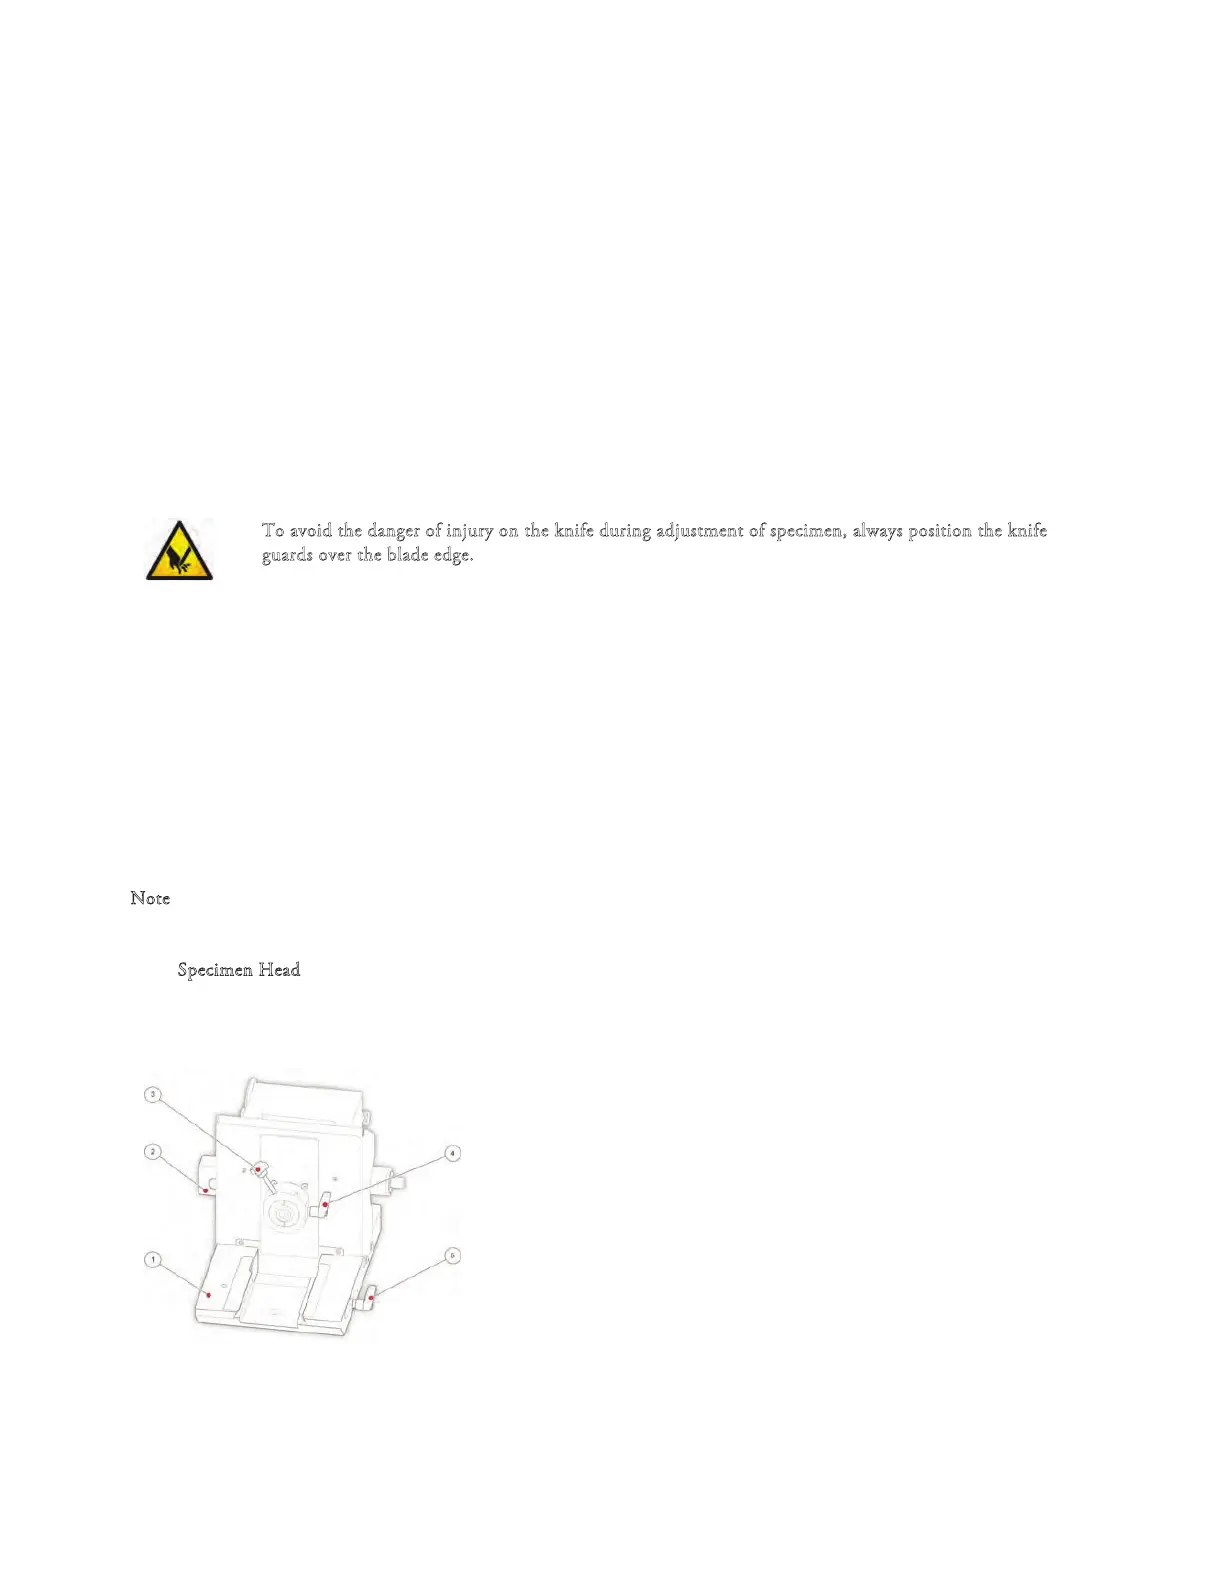
pecimen Head QS12
1 Microtome base plate
2 Electrical connector
3 Specimen Chuck Release Lever
4 Specimen Head Clamping Lever
5 Blade/Knife holder Clamping Lever