40 P/N 133487
Banner Engineering Corp. • Minneapolis, U.S.A.
www.bannerengineering.com • Tel: 763.544.3164
SC22-3 Safety Controller
Instruction Manual
Configuration — PC Interface
□ 4. Click the Confirm button in the tool bar.
A message asking if you want to save a copy of the
Controller’s existing configuration will appear. The
Controller used for the confirmation process may already
have a user-defined configuration. Any configuration
already loaded in the Controller will be overwritten during
the confirmation process. It is the user’s responsibility to
save the existing configuration, if needed.
• Select Yes to save the configuration and to proceed to
overwrite the Controller’s existing configuration.
• Configure EDM, if desired.
• Enter the password (the factory default is 0000) on the
Confirm Configuration pop-up menu.
• Click OK.
• A pop-up warning message will ask if you want to
continue; select Yes.
The configuration validation process takes a few seconds
and when complete, the Verification screen appears (see
Figure 4-10).
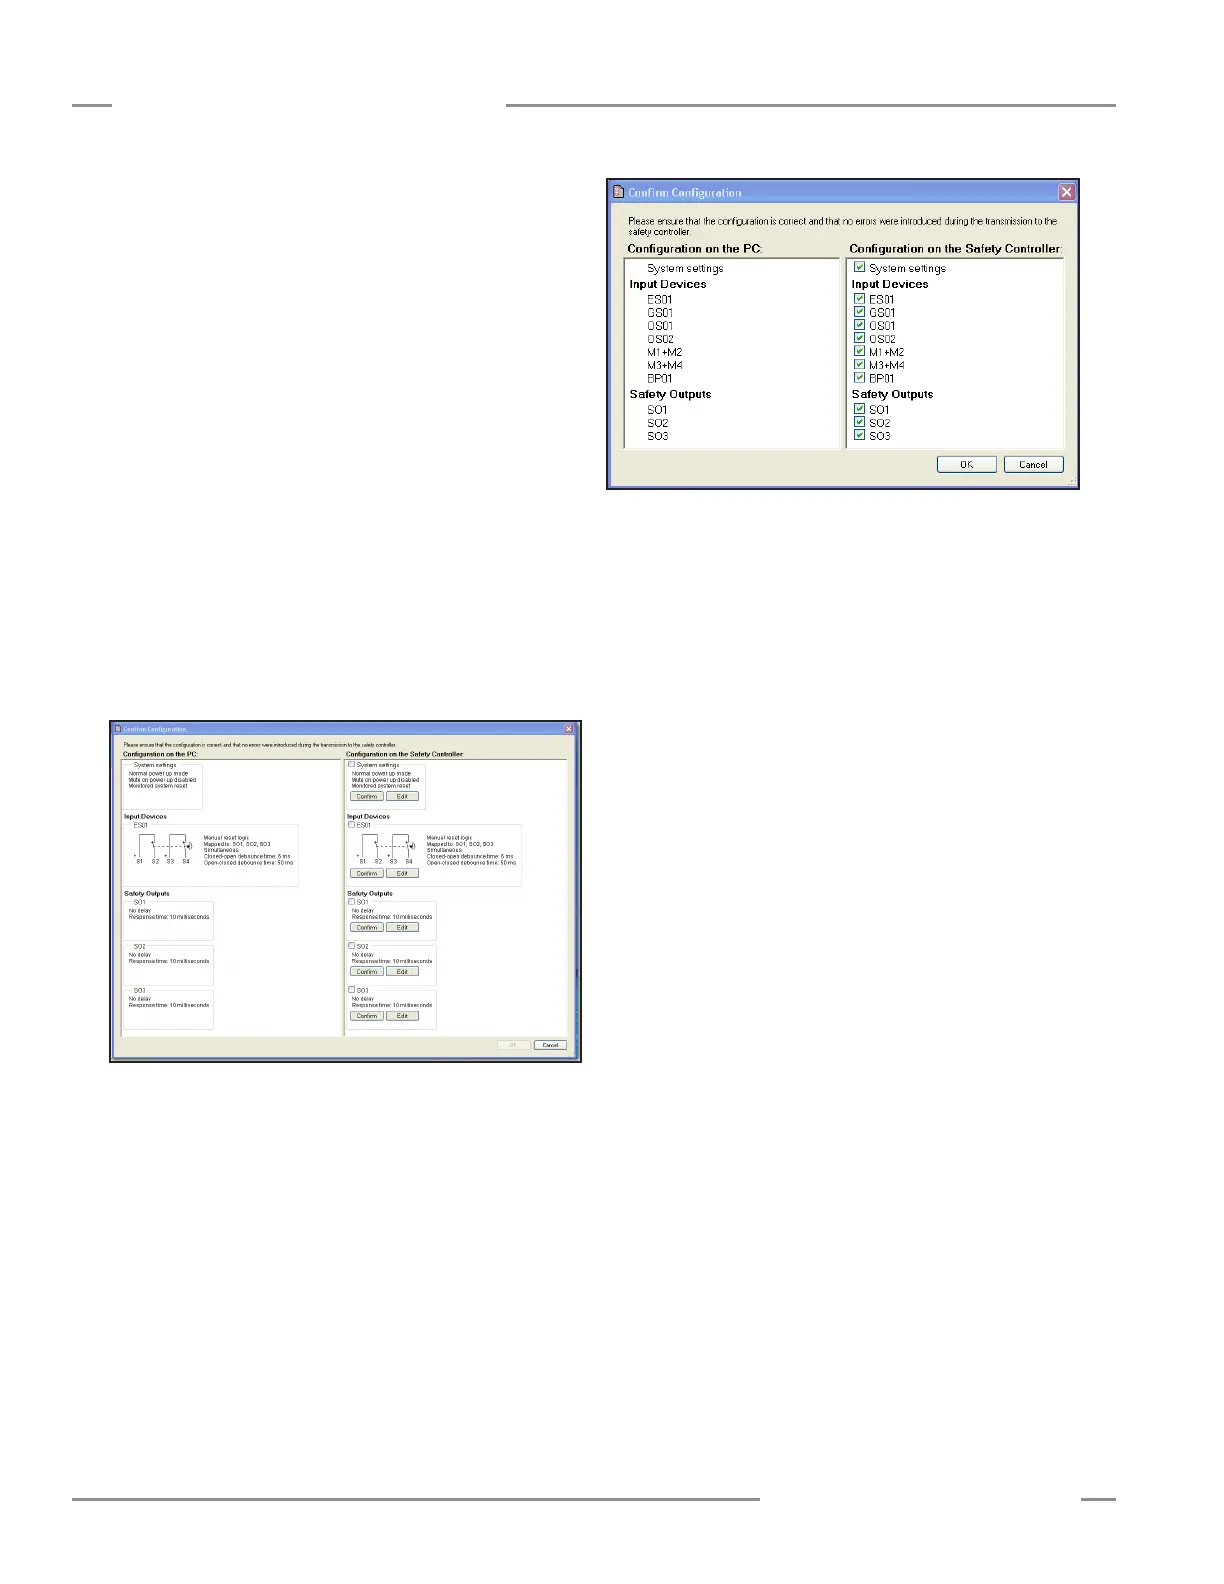
Figure 4-10. Verification screen, no devices yet confirmed by
user
□ 5. Verify that the properties in the right-hand column match
those in the left-hand column. For each device, as you
determine that its properties are correct, either click on
Confirm or click in the corresponding checkbox. A check
mark will appear in the box, and the section will compress
to a list, as shown in Figure 4-11.
If the columns do not match, or if you wish to change
any circuit:
□ Select Edit for the device to be changed.
• The Properties menu for the device will open.
• Make the necessary change(s).
• Select OK.
A message will appear asking whether you want to edit
any other devices or if you want to restart the confirmation
process.
NOTE: If any device properties are changed while in the
manual verification stage of the confirmation,
the Controller will proceed to re-validate the
code.
If the columns match, and no changes need to be
made:
□ Select Confirm for each device.
The verification screen shows the summary that is
created after each property has been verified.
If you need to review a confirmed device property,
un-check the checkbox and the Device Properties
window will reappear. Edits may then be performed, as
necessary.
□ 6. When you are through with the manual verification, click OK.
□ 7. When the verification process is complete, the Confirm
Configuration summary screen is displayed. Select Close
and perform a system reset (see Section 4.3.5).
□ 8. The Controller will activate the new configuration and will
function according to the new parameters.
Figure 4-11. Confirm Configuration screen, all devices
confirmed by user (checklist is compressed)