R5900087 /04 ClickShare CSE-200+ 37
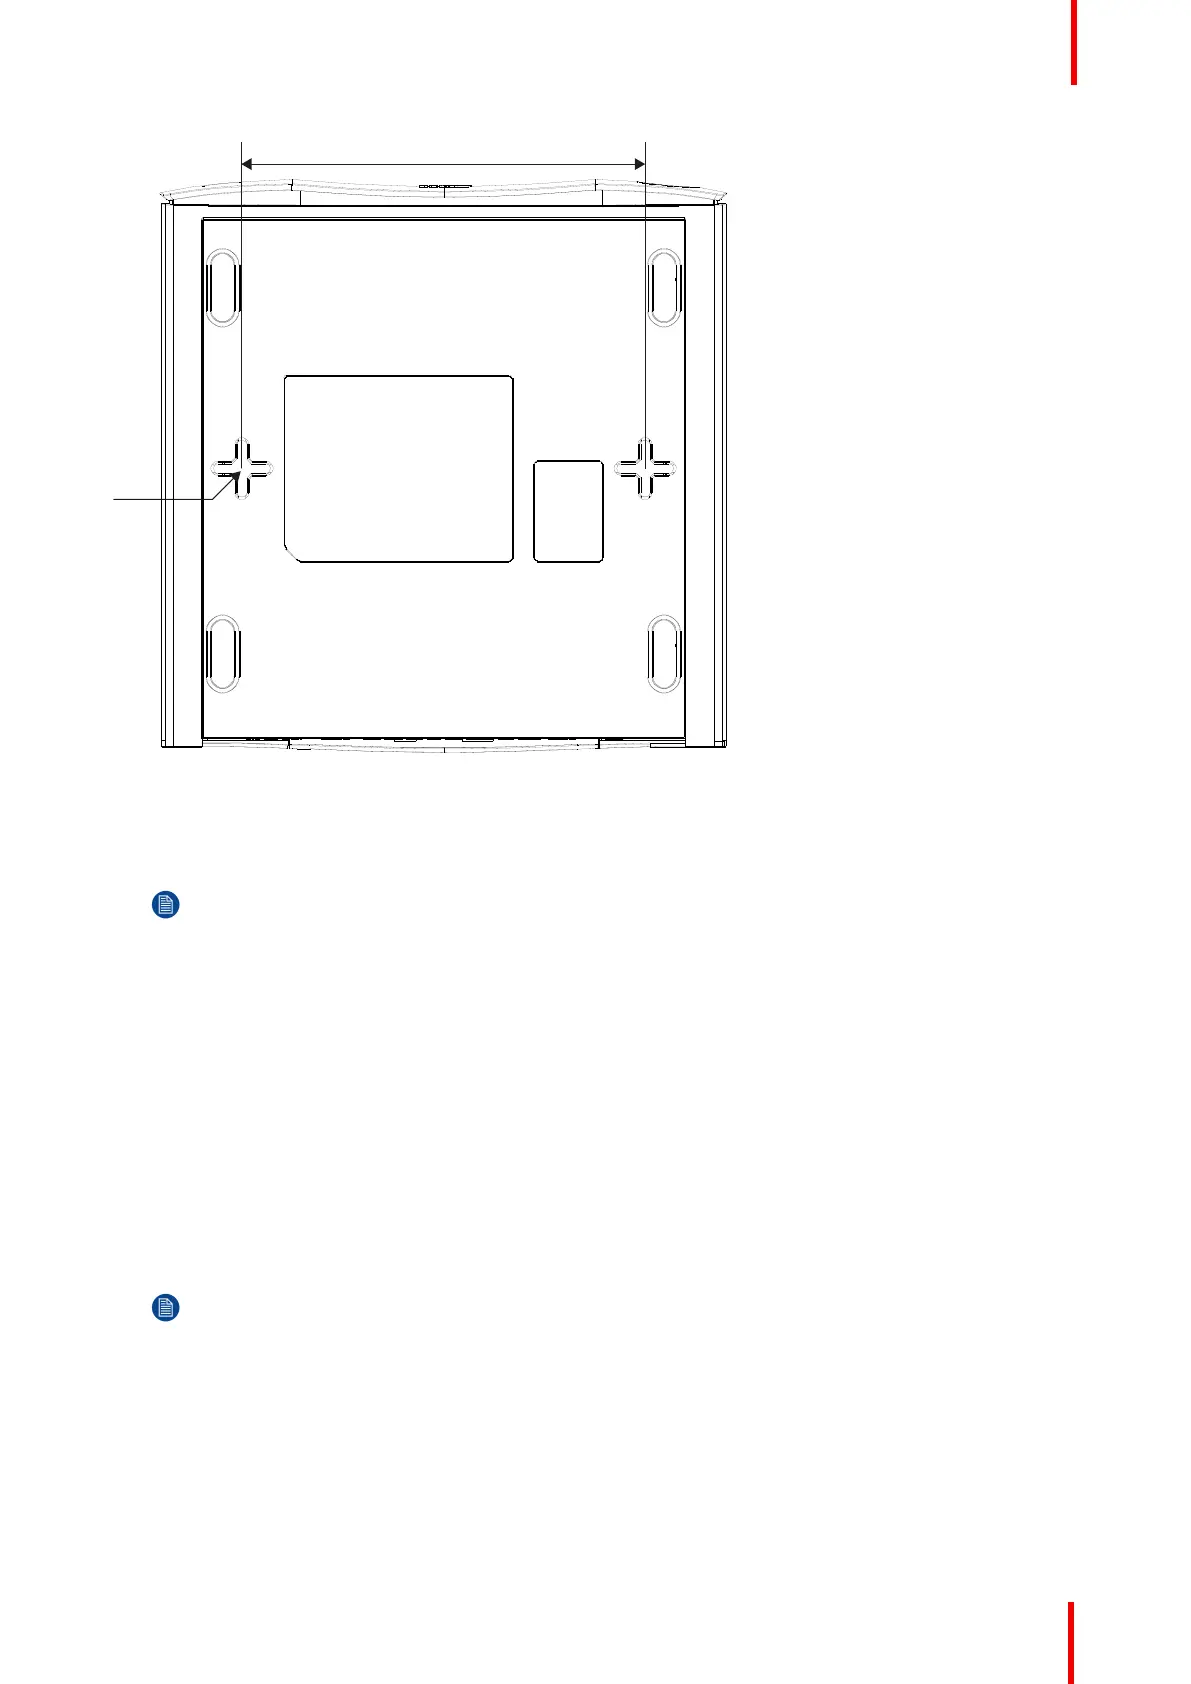
Image 4-1: Mounting holes
2. Insert a plug in each hole (if needed, depends on the wall or ceiling type) and drive in 2 screws. Do not drive in
the screws completely.
Note: Mounting screws and plugs are not included in the CSE-200+ box . The type of screws and
plugs depend on the type of wall (stone, wood, plasterboard, ...) you are mounting the Base Unit to.
Make sure the head of the screw is not larger than the hole in the bottom plate of the Base Unit (< 6.5
mm).
3. Hook the Base Unit on both screw heads and slide the Base Unit downwards until it is fixed.
4.4 Video signal connections to the Base unit
About Video signal connection
A single screen can be connected to the Base unit.
To connect a display, an HDMI connection should be made between the Base Unit and the display.
To connect
1. Connect the Base unit to the display using a display cable.
Note: No display cables are included in the ClickShare box at purchase.
When setting up a display configuration, connect the HDMI cable to the display. When necessary, use an
adapter piece to connect to a display port or a DVI port on the display side.
CSE-200+ Installation

 Loading...