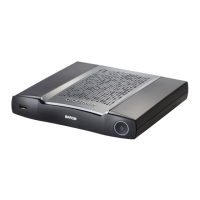
R5900087 /04 ClickShare CSE-200+66
Signal strength
1. Select the Signal Strength. Click on the slider and reduce the broadcasted power (signal strength) until the
desired strength is obtained.
Note: Too low power and interference by others might lead to connection issues. If so, increase again
the signal strength until the issues are solved.
By default the strength is set to 100%.
Reducing the signal strength limits the effect of overlapping networks in the 2.4 GHz channels. Not necessary
for the 5 GHz channels as their is no overlap.
ClickShare Configurator (WebUI) access via Wi-Fi
1. To allow access to the configurator via Wi-Fi, check the check box in front of WebUI available via Wi-Fi.
Checked: Configurator accessible via Wi-Fi.
Not checked: access to the configurator via Wi-Fi is blocked.
IP address & subnet mask
1. Log in to the Configurator.
2. Click Wi-Fi & Network → WiFi Settings.
3. To change the IP address or subnet mask, click in the input field and enter the 4 octets of the new IP address
or subnet mask.
Note: This must NOT be 0.0.0.0 for static IP-Address assignment.
6.12 WiFi settings, Wireless Client
Introduction
Wireless Client mode allows to connect the Base Unit to a network over WiFi instead of via the Ethernet
interface. It brings identical functionality as a wired network connection; complete network integration, auto-
update functionality and central management in XMS. It offers increased flexibility in the placement of the
Base Unit as a network cable drop is no longer required on the installation location.
Note that when Wireless Client mode is enabled, the Base Unit WiFi is occupied and can no longer be used
for direct connections, either from the ClickShare Button, the ClickShare apps or from Airplay or Google Cast
and Miracast. This means that these connections need to happen over the corporate network. As a
consequence, when setting up Wireless Client mode, the Buttons are auto-configured to connect to the same
network as the Base Unit. This setting however can be manually changed in the Buttons tab in the System
menu.
As a consequence of the WiFi chip being occupied in Wireless Client mode, presence detection in
the ClickShare desktop app will not work.
How to activate Wireless Client
1. Log in to the Configurator.
2. Click Wi-Fi & Network → WiFi Settings.
3. Click Edit settings.
4. Click on the drop down box next to Operational Mode and select Wireless Client.
CSE-200+ Configurator

 Loading...