R5900087 /04 ClickShare CSE-200+ 71
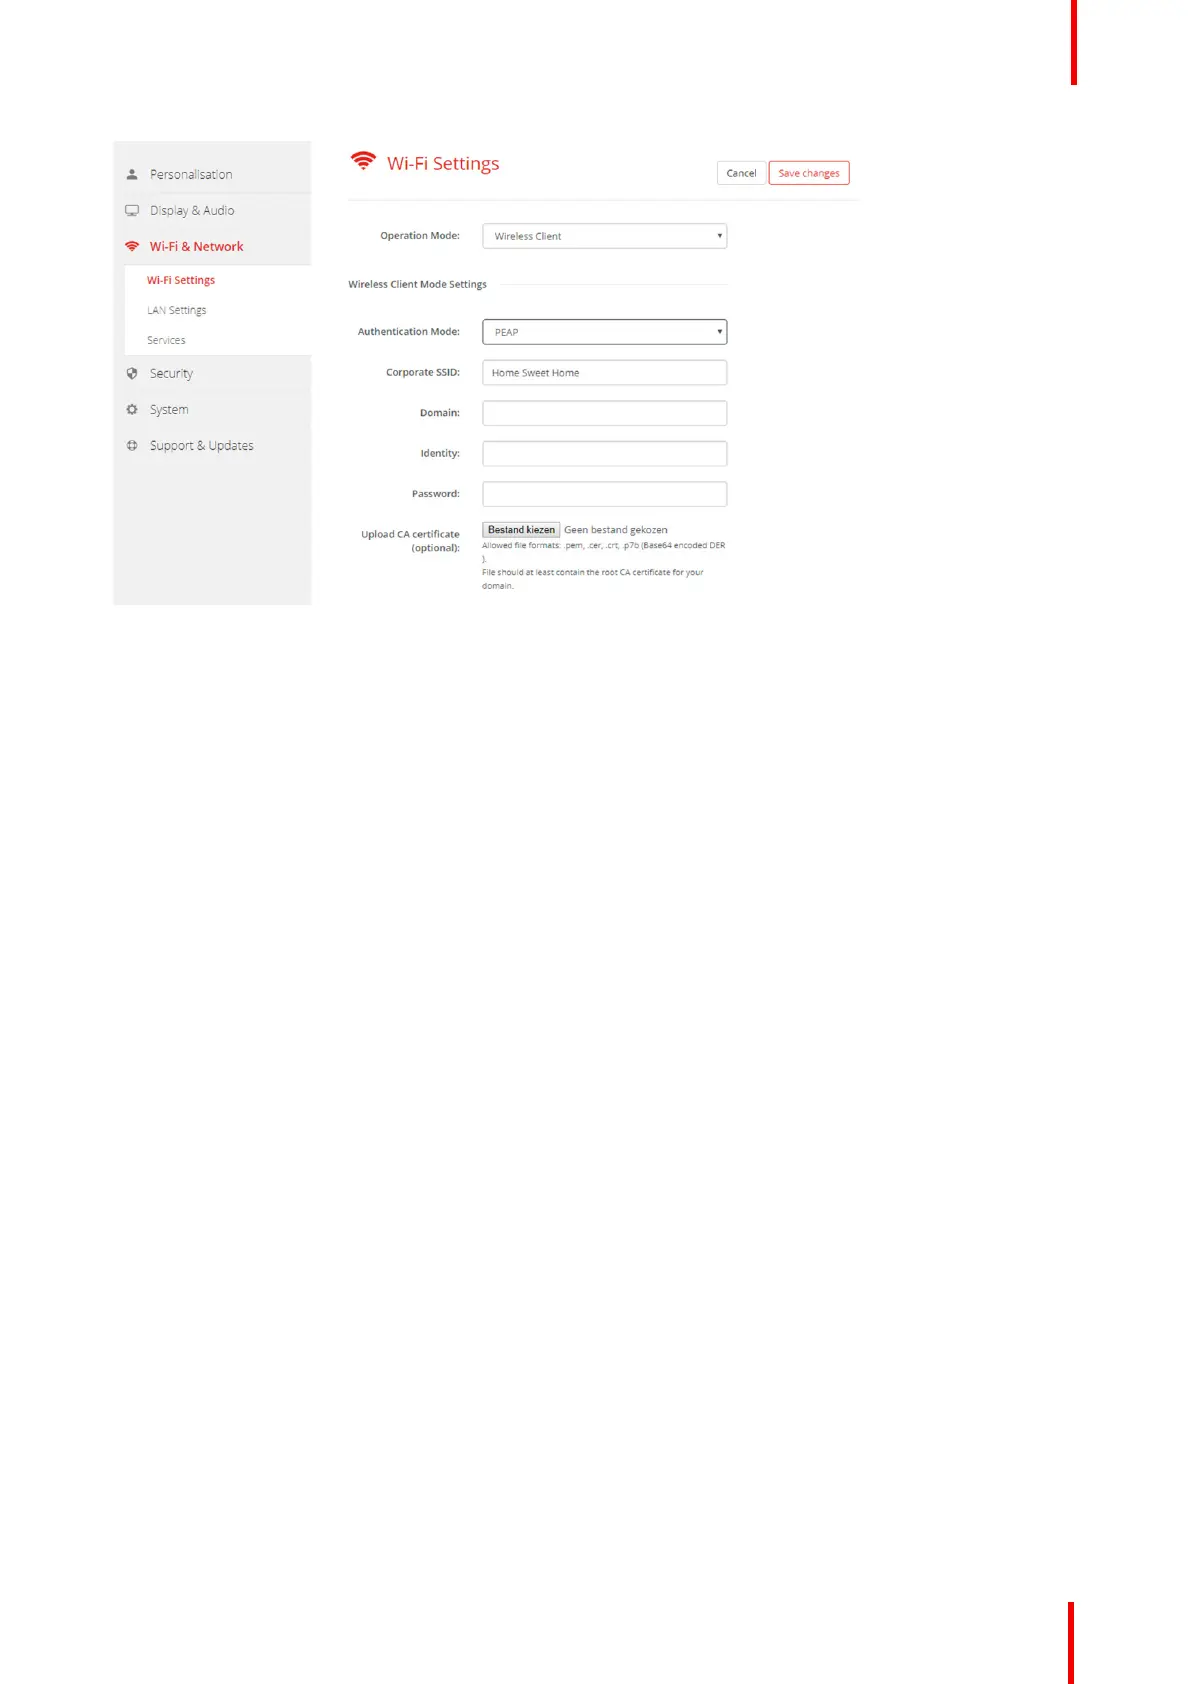
Image 6-25: WiFi Settings, Wireless Client, PEAP
4. Fill out a Corporate SSID.
The SSID of your corporate wireless infrastructure to which the ClickShare Buttons will connect.
5. Fill out the Domain and Identity.
6. Enter a Password.
7. Upload CA certificate. Click on Choose file and browse to the desired file.
The following formats are allowed:
• .pem
• .cer
• .crt
• .pb7 (Base64 encoded DER)
File should at least contain the root CA certificate for your domain.
8. Click Save Changes to save the settings.
6.16 WiFi settings, Wireless Client, WPA2-PSK
About WPA2-PSK
WPA2-PSK does not distinguish between individual users, there is 1 password (PSK – Pre-Shared Key) for all
clients connecting to the wireless infrastructure. This makes setup very straightforward. Once connected, all
data transmitted between client and AP (access point) is encrypted using a 256 bit key.
How to start up for WPA2-PSK
1. Log in to the Configurator.
2. Click Wi-Fi & Network → WiFi Settings.
3. When the Operational Mode is Wireless Client, select Authentication Mode. Click on the drop down list and
select WPA2-PSK.
CSE-200+ Configurator