6. Setup process of a X8 rental display
4
4
Image 6-7
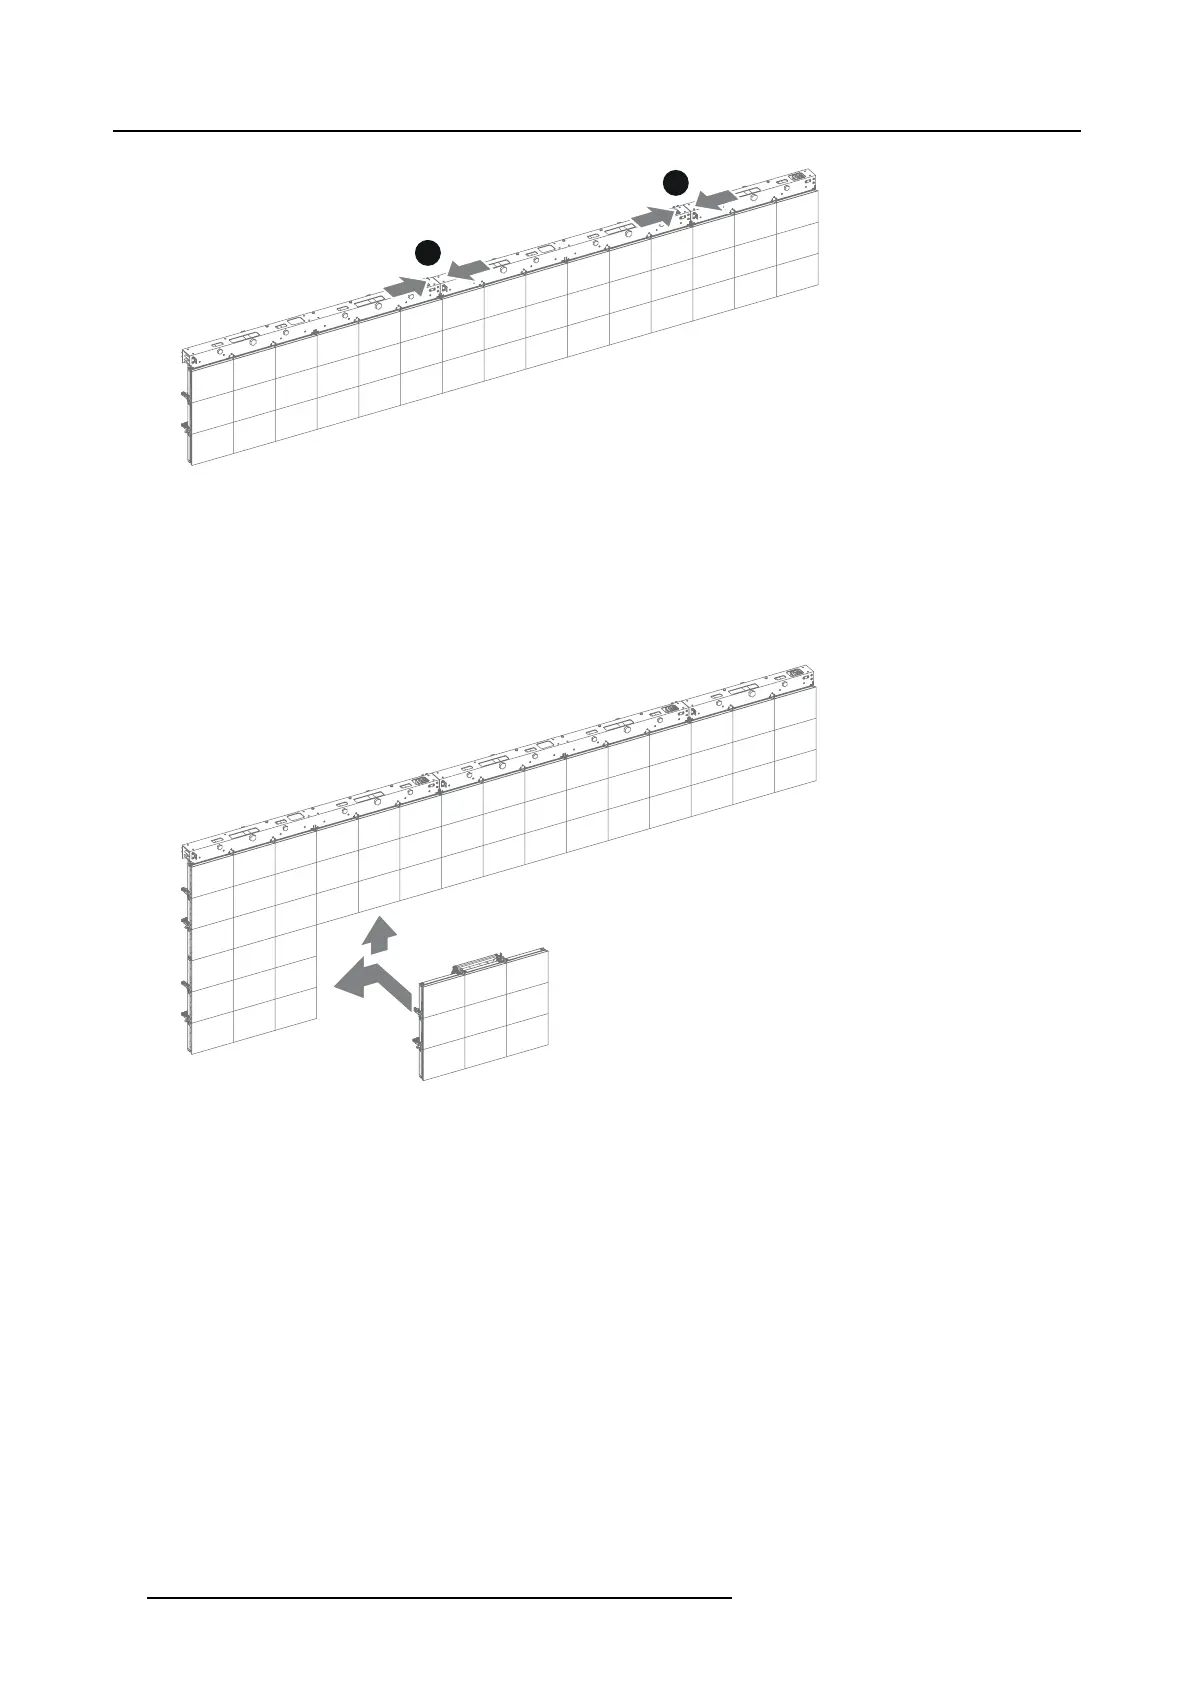
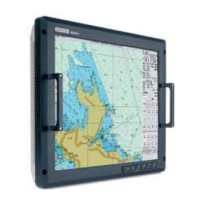
3. The next stage is the installation of the remaining X8 rental tiles, tile by tile and row by row. Approach the LED-walll with the
rental tile as illustrated. Secure the rental tile first vertically and then horizontally. See "Installing the X8 rental tile", page 45
Warning: The m axim um height of a hanging X8 rental display is 13 tiles high.
Warning: M ake sure that all hoist engines work in a synchronize way. When the wall is tilted too much or tension on a hoist is
remarkably lower, stop the installation and level the wall first .
Tip: After installing two rows of tiles, realize the data and power connection before lifting the rows further up. These rows are
now accessible from the work floor.
Image 6-8
4. The next stage is the power and data cabling of the X8 rental display. See chapter "Cabling of the X8 display", page 53.
Warning: Risk of electric sh ock / Risk of fire:
To protect against risk of fire caused by overloading of p ower cables, MAX IMUM 4 X8 Connection Boxes may be
connected in parallel. Each power source cable supplying maximum 4 X8 Connection Boxes sh ould be protected
by a circuit breaker or fuses rated 16 A / 250 VAC (15 A / 250 VAC in the US A and Canada). No te that one X8
Connection Box requires 200-240 VAC, 50-60 Hz, 3.6 am ps at 200 VAC.
5. Installation of the digitizer(s). Note that the X8 rental tiles require an NNI based digitizer such as the DX-700 digitizer. The
firmware of the Digitizer must have version v3.04 or later. Follow the installation guidelines in the manuals of these products.
6. Installation of the control software Director toolset for the X8 rental display. See installation procedure described in the manual
of the Director toolset.
36
R5905160 X8 RENTAL DISPLAY 25/02/2013