D
david60Jul 31, 2025
What to do if I return Basler GigE VISION CAMERAS material without RMA number?
- JJasmine MillerAug 1, 2025
If material is returned without a valid RMA number, we reserve the right to reject the material.
What to do if I return Basler GigE VISION CAMERAS material without RMA number?
If material is returned without a valid RMA number, we reserve the right to reject the material.
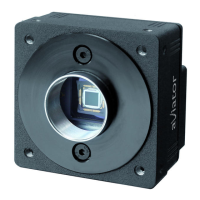
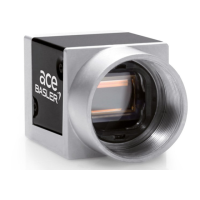
Lists camera models and their differentiators like sensor size and line rate.
Details general specifications for camera models, including sensor type, pixel size, and data output.
Displays the quantum efficiency curve for monochrome cameras, showing sensitivity across wavelengths.
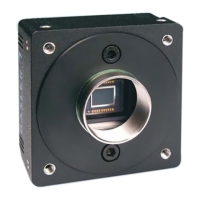
Covers physical dimensions, mounting points, and protection class of the camera housings.
Illustrates the position of the sensor line and approximate starting points for pixel numbering.
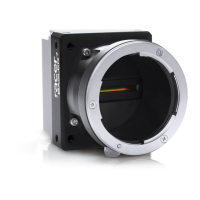
Provides dimensional drawings for C-mount, F-mount, and M42 lens adapters.
Offers guidance on choosing the correct lens mount adapter based on camera model and resolution.
Explains the procedure for attaching a lens adapter using setscrews and notes torque limits.
Contains copyright and licensing terms for the LWIP TCP/IP implementation used in the camera.
Provides copyright and licensing details for the LZ4 compression algorithm used in the camera.
Lists critical notices regarding power supply, connectors, and handling to prevent camera damage.
Introduces tools for modifying camera settings, including pylon Viewer, IP Configurator, and SDK.
Describes the pylon Viewer application for viewing, changing camera parameters, and acquiring images.
Explains the pylon IP Configurator tool for changing the camera's IP configuration.
Details the pylon SDK, including API, sample programs, and documentation for software development.
Describes the basic GigE Vision network driver compatible with most network adapters, focusing on packet resend.
Explains the hardware-specific driver that reduces CPU load and offers robust packet resend mechanisms.
Details transport layer parameters like read/write timeouts and heartbeat timeout for GigE Vision.
Lists parameters determining network connection usage, including Payload Size and Packet Size.
Discusses challenges and strategies for managing network bandwidth when using multiple cameras on one path.
Outlines a structured approach to optimize network performance and manage bandwidth for multiple cameras.
Describes the camera's connectors: 6-pin for power, 12-pin for I/O, and RJ-45 for Ethernet.
Shows pin numbering for the 6-pin and 12-pin receptacles and mentions RJ-45 adheres to Ethernet standard.
Details the specific pin assignments for the camera's 6-pin power connector.
Provides the pin assignments for the 12-pin connector, detailing I/O input and output lines.
States that pin assignments for the RJ-45 jack follow the Ethernet standard.
Identifies the specific connector types used on the camera for power, I/O, and Ethernet interfaces.
Details wiring and shielding requirements for the power cable, emphasizing EMI protection.
Specifies requirements for I/O cables, including Hirose connectors, shielding, and twisted pair wiring.
Recommends high-quality, shielded Ethernet cables (Cat 6/7) for EMI avoidance.
Details camera power supply requirements, including voltage, ripple, and consumption, and connector type.
Describes the camera's physical input and output lines, their signal compatibility, and electrical characteristics.
Describes the two physical output lines and their signal compatibility (RS-422, LVDS, TTL).
Explains how input signals can be passed through the camera to trigger other devices.
Guides on selecting standard or user-defined signals for camera output lines.
Details how to set the state of user-defined output lines using pylon API or Viewer.
Explains how to check the status of all input and output lines using the Line Status All parameter.
Describes how to determine the line logic type (positive/negative) for each I/O line using Basler pylon.
Lists general response characteristics for input and output lines, including propagation and rise/fall times.
Provides information about the camera's Ethernet GigE transceiver compliance.
Explains how to define a frame using Offset X, Width, and Height parameters to specify the image area of interest.
Outlines the five key elements involved in controlling image acquisition, including start/stop commands and triggering.
Explains the relationship between start/stop commands, acquisition mode (single/continuous), and frame acquisition.
Details how the acquisition start trigger controls frame acquisition and its relationship with frame start triggers.
Guides on setting acquisition start trigger mode, source, activation, and frame count using pylon API.
Explains how the frame start trigger controls line acquisition for each frame and its interaction with line start triggers.
Describes the Frame Timeout feature, setting maximum acquisition time per frame, and event generation.
Details how the line start trigger initiates line acquisition and its dependency on the frame start trigger being valid.
Explains how to configure line start trigger mode, source, and activation parameters for line acquisition.
Covers exposure time control, including timed and trigger-width modes, and their impact on line acquisition.
Lists the minimum and maximum allowed exposure times for acquired lines across different camera models.
Explains how to set exposure time using "raw" or "absolute" parameter values via pylon API or Viewer.
Provides use case examples illustrating combinations of trigger settings and their effects on acquisition.
Explains the concepts of non-overlapped and overlapped exposure/readout modes and their operational differences.
Introduces tools to monitor acquisition status, including trigger wait signals for debugging and avoiding overtriggers.
Describes the Exposure Active signal, indicating when exposure begins and ends for each line acquisition.
Explains how to check the camera's acquisition status (waiting for trigger) using software signals.
Details trigger wait signals that indicate the camera's readiness for acquisition start, frame start, or line start triggers.
Covers factors limiting the maximum line acquisition rate and how to determine it using camera settings.
Explains how removing limits can extend exposure time or increase line rate, with potential image quality impact.
Describes the shaft encoder module for counting encoder ticks and generating trigger signals.
Lists and explains parameters for the shaft encoder module, including counter modes and resets.
Details the frequency converter module for adjusting trigger signal frequency using pre-divider, multiplier, and post-divider.
Guides on setting the Pixel Format parameter to choose output pixel data types like Mono 8 or YUV 4:2:2.
Describes the Mono 8 pixel format, outputting 8 bits of brightness data per pixel.
Explains the Mono 12 format, outputting 16 bits with 12 effective bits of brightness data per pixel.
Details the Mono 12 Packed format, where three bytes contain data for two pixels.
Describes the YUV 4:2:2 Packed format, mimicking color camera output with Y, U, V values.
Explains the YUV 4:2:2 (YUYV) Packed format, differing in byte order from standard YUV 4:2:2.
Illustrates the order in which pixel data is transmitted from the camera for each acquired frame.
Covers adjustable gain and black level settings for modifying image brightness and contrast.
Explains how gain adjustment affects image brightness and the use of analog and digital gain.
Details how to set analog gain, its effect on all pixels, and allowed values for amplification.
Explains digital gain's effect on pixel values and its adjustable range for finer amplification control.
Describes using analog and digital gain simultaneously, noting how amplification factors multiply.
Explains how black level adjustment affects pixel value offset and its impact on image brightness.
Describes the feature to remove factory limits on parameters for extended setting ranges.
Details the AOI feature for specifying image regions, its impact on line rate, and setting Offset X/Width.
Guides on setting the AOI using Offset X and Width parameters and enabling automatic X centering.
Explains how to enable automatic centering of the image AOI on the sensor using the Center X parameter.
Covers the camera's event reporting capabilities, including overtrigger, frame timeout, and event queue management.
Explains the luminance lookup table feature for custom mapping of sensor output values and its use in 8-bit output.
Details the binning feature to increase light response by summing adjacent pixels, focusing on horizontal binning.
Explains gamma correction for adjusting pixel brightness perception and enabling/setting the gamma factor.
Covers offset and gain shading correction to compensate for sensor and optical variations.
Explains offset shading correction for dark signal non-uniformity (DSNU) and the use of shading files.
Details gain shading correction for photo response non-uniformity (PRNU) using shading files.
Differentiates between default and user-created shading set files for correction.
Explains the trigger delay feature to specify delays for acquisition start or frame start triggers.
Lists and explains user-correctable error codes detected by the camera and how to check/clear them.
Covers the camera's ability to generate test images for functionality checks and diagnostics.
Provides detailed descriptions and mathematical expressions for different test image patterns.
Lists parameters providing basic camera information like vendor, model, version, and serial number.
Explains the feature to store two user-defined 32-bit values for convenience, without affecting camera operation.
Describes configuration sets (active, default, user) for storing and managing camera parameter settings.
Details the three-step process to save the current active settings into a user set in non-volatile memory.
Guides on loading saved user sets or the default set into the active set, overwriting current settings.
Explains how to designate a default configuration set to be loaded upon camera startup or reset.
Defines chunk features as data added to frames, such as frame counters and timestamps, requiring chunk mode activation.
Explains how to activate chunk mode, enabling extended frame data and other chunk features.
Details the frame counter feature, which adds a sequential frame number chunk to acquired frames.
Guides on enabling the frame counter chunk and retrieving its data using the pylon API and chunk parser.
Explains the time stamp feature, adding a chunk with the generation time of the frame start trigger.
Details enabling the time stamp chunk and retrieving its data via the pylon API and chunk parser.
Introduces trigger counters (ignored, end-to-end) that help determine correct camera triggering and acquisition.
Explains the encoder counter chunk, indicating the Shaft Encoder Module Counter value at frame trigger time.
Guides on enabling the encoder counter chunk and retrieving its data using the pylon API and chunk parser.
Details the input line status feature, which samples and adds input line states as a chunk to acquired frames.
Guides on enabling the input status at line trigger chunk and retrieving its data.
Explains the CRC checksum feature, adding a chunk for frame data integrity verification.
Guides on enabling the CRC checksum chunk and retrieving its integrity check result.
Explains camera reset (software reset) procedures, its effect on volatile memory, and preservation of settings.
Lists Basler technical support resources, including website downloads, FAQs, and application notes.
Details the process for obtaining a Return Material Authorization (RMA) number before returning equipment.
Advises on collecting essential information and forms before contacting technical support for efficient problem resolution.
| Brand | Basler |
|---|---|
| Model | GigE VISION CAMERAS |
| Category | Digital Camera |
| Language | English |