FULL SIDE WASHER
1MANUL854 Belanger, Inc. * PO BOX 5470 * Northville, MI 48167 -5470 * Ph (248) 349-7010 * Fax (248) 380-9681 25
Installation
Waves and Fins Cleaning Material
Hitch Hiker
Note: Hitch Hiker Fins™ come in 28” for the lower portion of the Hitch Hiker and 30” for the
upper portion of the Hitch Hiker.
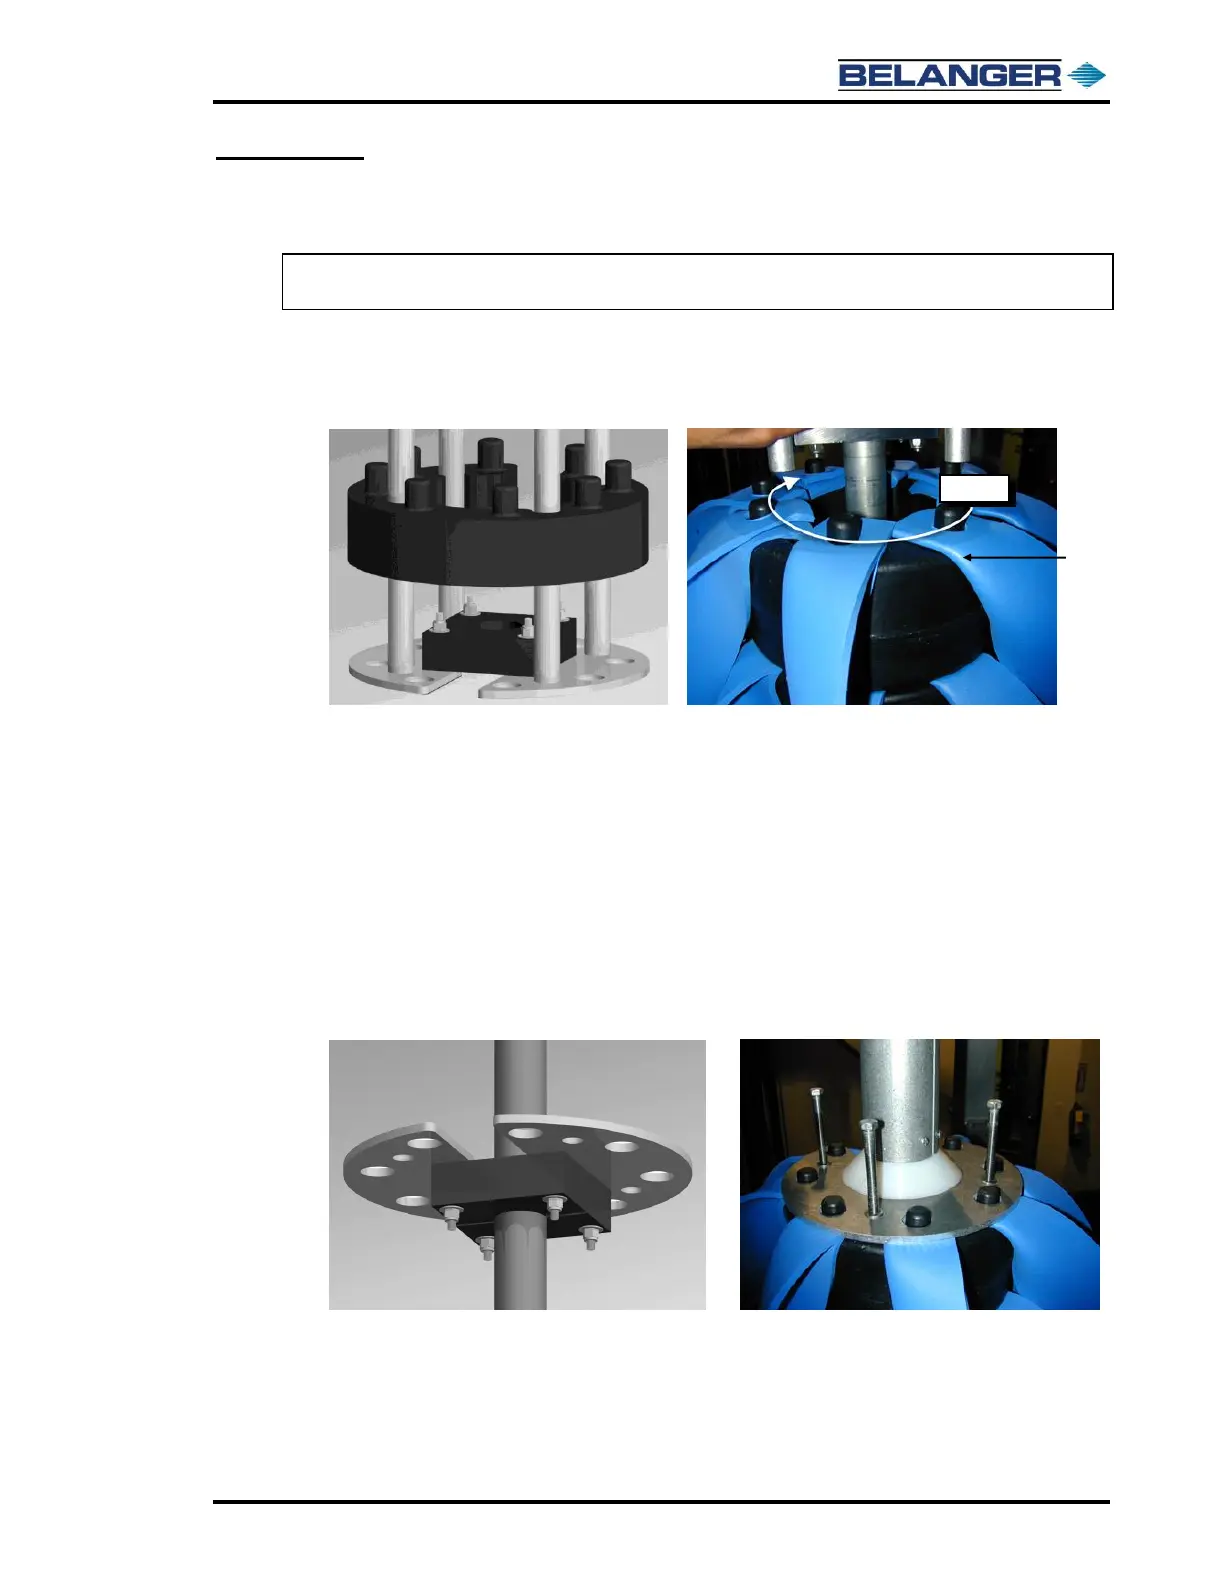
1) Locate the bottom plastic Wave™ and place it on the frame assembly with the opening opposing
the opening on the lower retainer plate (below, left).
2) Locate the 28” Hitch Hiker Fins™. Place one on each of the pegs with the “fold” following the
rotation of the wheel (below, right).
3) Place the next Wave™ on the frame making sure that the openings are opposing each other.
4) Continue to install the Fins™ and the Waves™ until 5 rows of wash material have been
completed.
5) Locate the 30” Hitch Hiker Fins™. Place one on each of the pegs with the “fold” following the
rotation of the wheel.
6) Place the next Wave™ on the frame making sure that the openings are opposing each other.
7) Continue to install the Fins™ and the Waves™ until the last 5 rows of wash material have been
completed.
8) Once all of the wash material has been installed, locate the top retainer and the two plastic
bushings that were removed earlier (below, left). Secure them to the shaft above the Hitch Hiker.
9) Slide it down onto the Hitch Hiker and replace the previously removed bolts (below, right).
10) Locate the split locking collars and install one a 1/4” above the top of the Hitch Hiker hub to
prevent the hub from climbing up the shaft.