38
Bridge Stitch
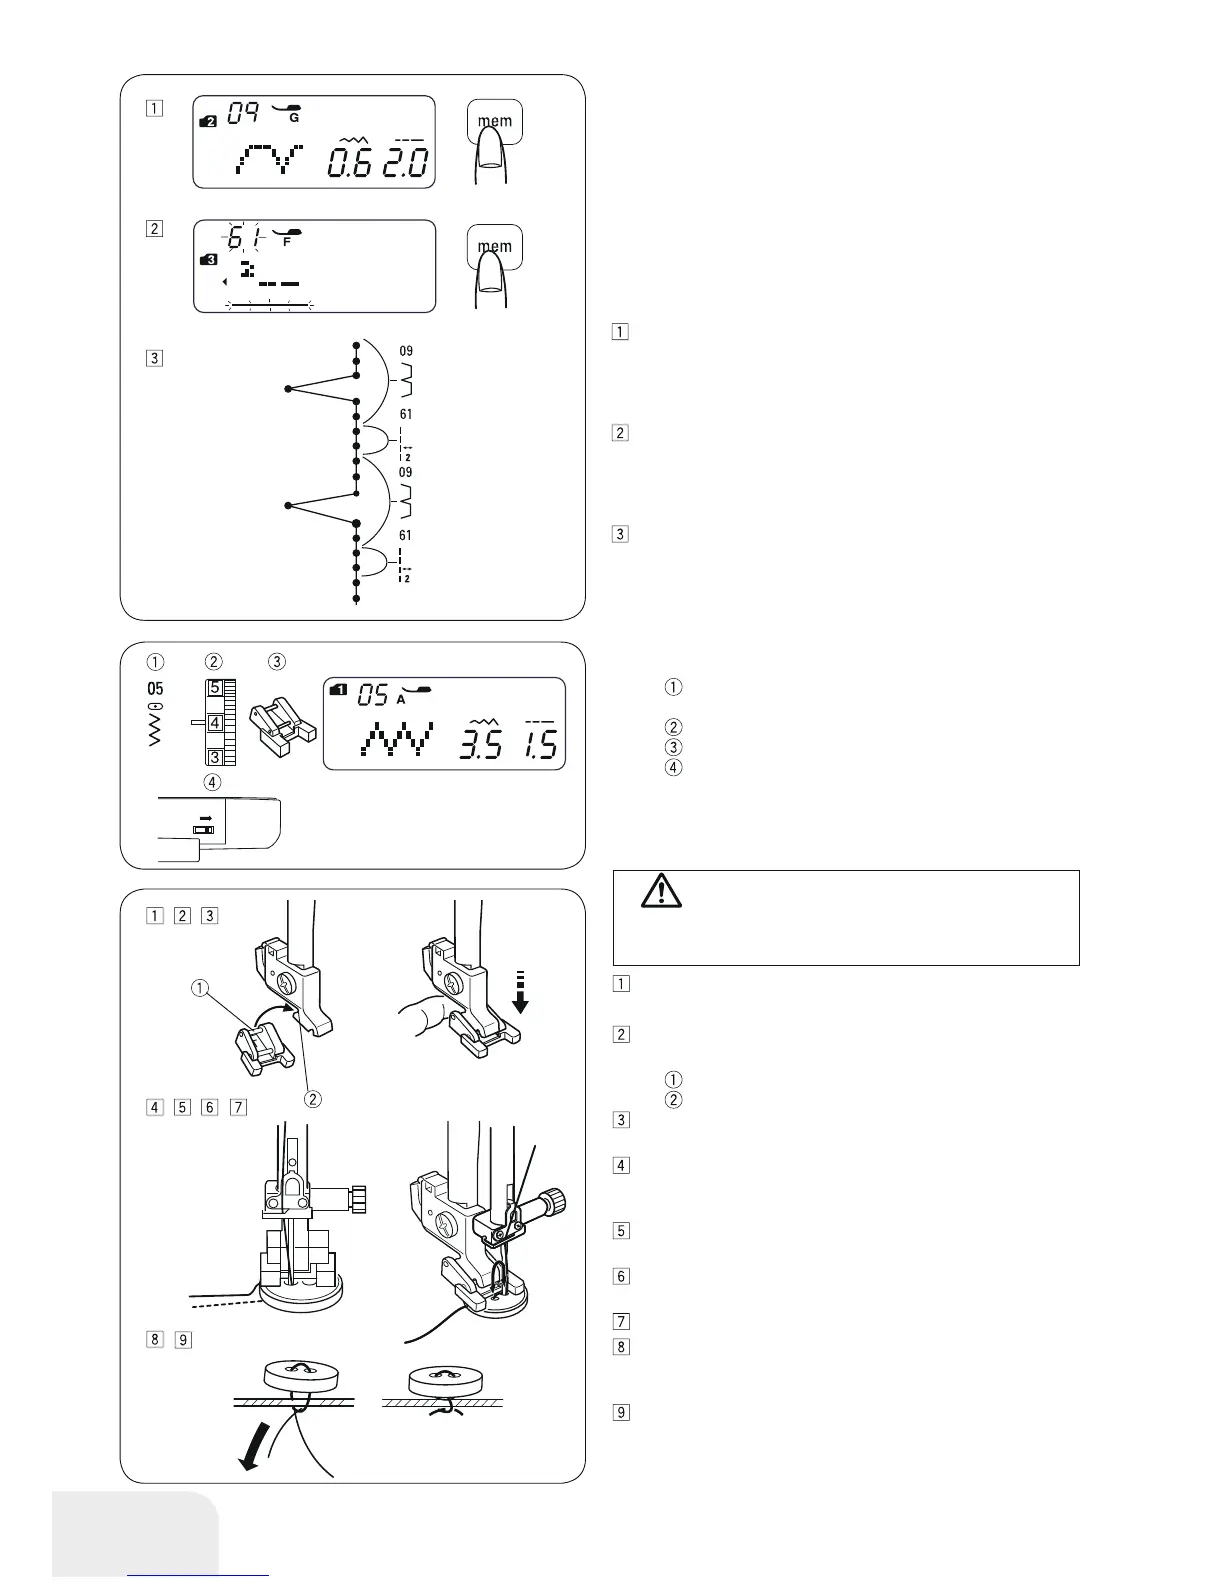
Patterns #59 to #62 in mode 3 are extender stitches which are
used to insert straight stitches after a stitch pattern.
The extender stitches #61 and #62 inherit the stitch length and
needle position of a previous pattern in programmed pattern
combination. To see more detailed information about extender
stitch, please refer to page 57.
Example: Inserting 2 counts of the straight stitch after a stitch
pattern.
Select pattern 09 (mode 2).
Press the memory button.
Pattern 09 is memorized.
Select pattern 61 (mode 3).
Press the memory button.
Pattern 61 (2 counts of straight stitch) is memorized.
Two counts of straight stitch are inserted between blind
stitches.
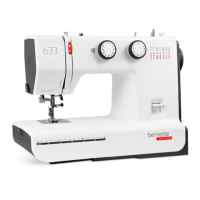
Button Sewing
Stitch pattern: Mode 1 : 5
Mode 2 : 05
Thread tension: 3 - 7
Presser foot: Button-sew-on foot
Feed dog: Lowered
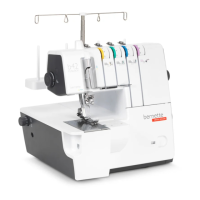
Lower the feed dog.
Set the slide speed control at a slower speed.
Insert the rear pin of the foot into the rear notch of the
presser foot holder.
Back pin
Back notch
Gently and slowly lower the presser foot lever while holding
the foot with your finger to fit the foot.
Place a button on the fabric and lower the needle into the
left hole of the button by turning the handwheel with your
hand.
Lower the foot to hold the button in place, aligning the direc-
tion of the button.
Turn the handwheel so that the needle will enter the right
hole of the button. Readjust the stitch width if necessary.
Stitch several times.
After the sewing process has finished, cut the thread. After
you finish sewing, cut the thread but leave 3˝ to 4˝ of thread
at the end close to the fabric.
With a hand sewing needle, draw the top thread to the
reverse side of the fabric and knot the threads.
After the button sewing is completed, raise the feed dog for
normal sewing.
CAUTION:
Turn OFF the power switch before changing the presser
foot.