69
Buttonholes
Leave Program
► touch or «man»
► screen reverts to original Buttonhole screen
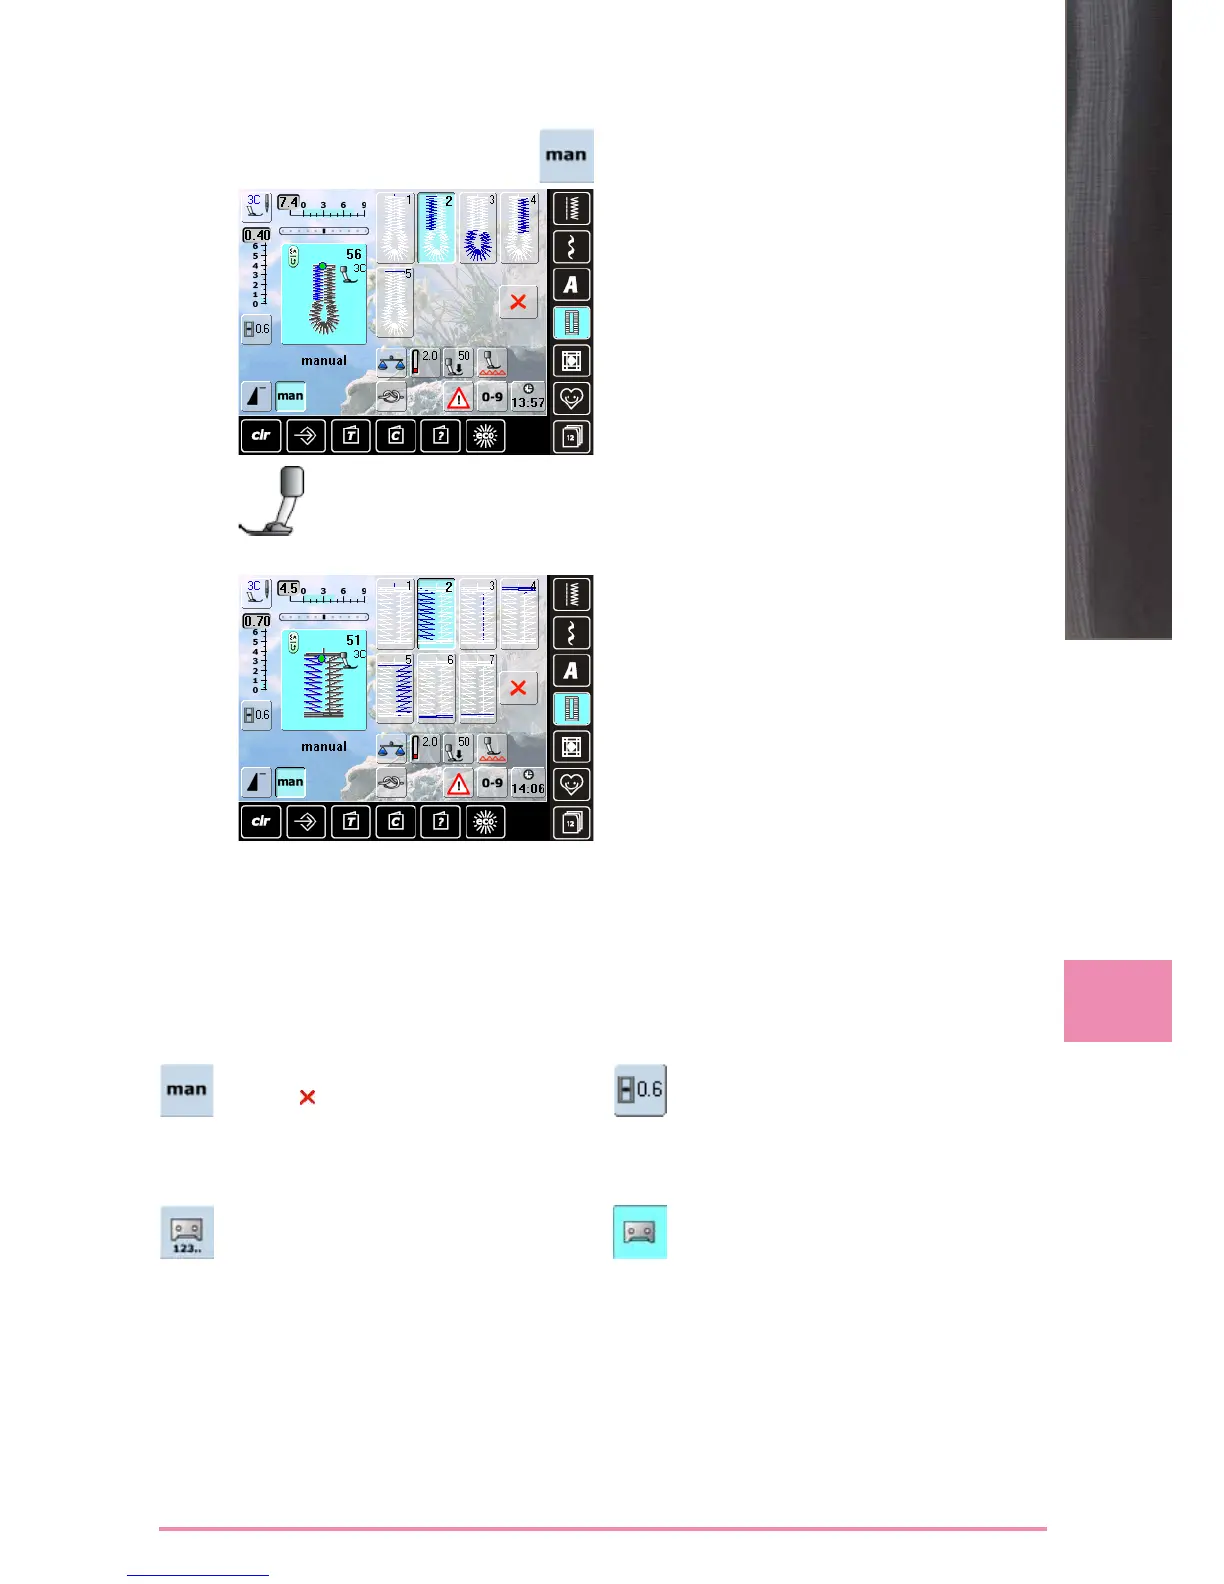
Combining with Functions
► select desired buttonhole type
► touch the «man» icon = manual
Sewing 5-Step Buttonhole
► the length of the beads is determined manually while
sewing
► bartack, eye and securing stitches are pre-programmed
► individual steps can also be selected by pressing the
Quick Reverse button
► step «1» is activated for the beginning of the buttonhole
► at the beginning of sewing, step «2» is activated
► sew first bead
► stop sewing at the desired bead length
► touch «3»
► sewing computer sews the eye or the keyhole
► touch «4»
► sewing computer sews 2nd bead in reverse
► stop sewing at the first stitch
► touch «5»
► sewing computer sews the top bartack and secures
stitches automatically
Sewing 7-Step Buttonhole
► step «1» is activated for the beginning of the buttonhole
► at the beginning of sewing, step «2» is activated
► sew first bead
► stop sewing at the desired bead length
► touch «3»
► sewing computer sews straight stitches in reverse
► stop sewing computer at the 1st stitch of the first bead
► touch «4»
► the sewing computer sews top bartack and stops
automatically
► touch «5»
► sewing computer sews the second bead
► stop sewing
► touch «6»
► the sewing computer sews bottom bartack and stops
automatically
► touch «7»
► sewing computer secures stitches and stops automati-
cally
Manual 5- or 7-Step Buttonhole
Buttonhole Slit Width
► select buttonhole
► touch «Buttonhole Slit Width» icon
► set the cutting space width using the stitch
width or stitch length knobs (0.1 - 2mm)
► larger slit width will result in narrower beads
Buttonhole Stitch Counter
► select buttonhole
► touch the «Stitch Counter» icon
► when the desired length is achieved
(first bead) press the Quick Reverse button
► after the length of the second bead has
manually been set using the Quick Reverse
button, the display changes to «auto»
► the selected buttonhole is programmed
► for making very large repeatable buttonholes
Programming Buttonhole Length
► the icon is automatically highlighted in blue
(= active) when a buttonhole is selected
► buttonhole length can be set with the Quick
Reverse button or the length can be program-
med directly by touching the icon
► if the buttonhole is programmed the icon is
inactive, gray
► if a new length is to be programmed, touch the
icon again
► attach foot no. 3C


 To Next Page