98
Practical Applications
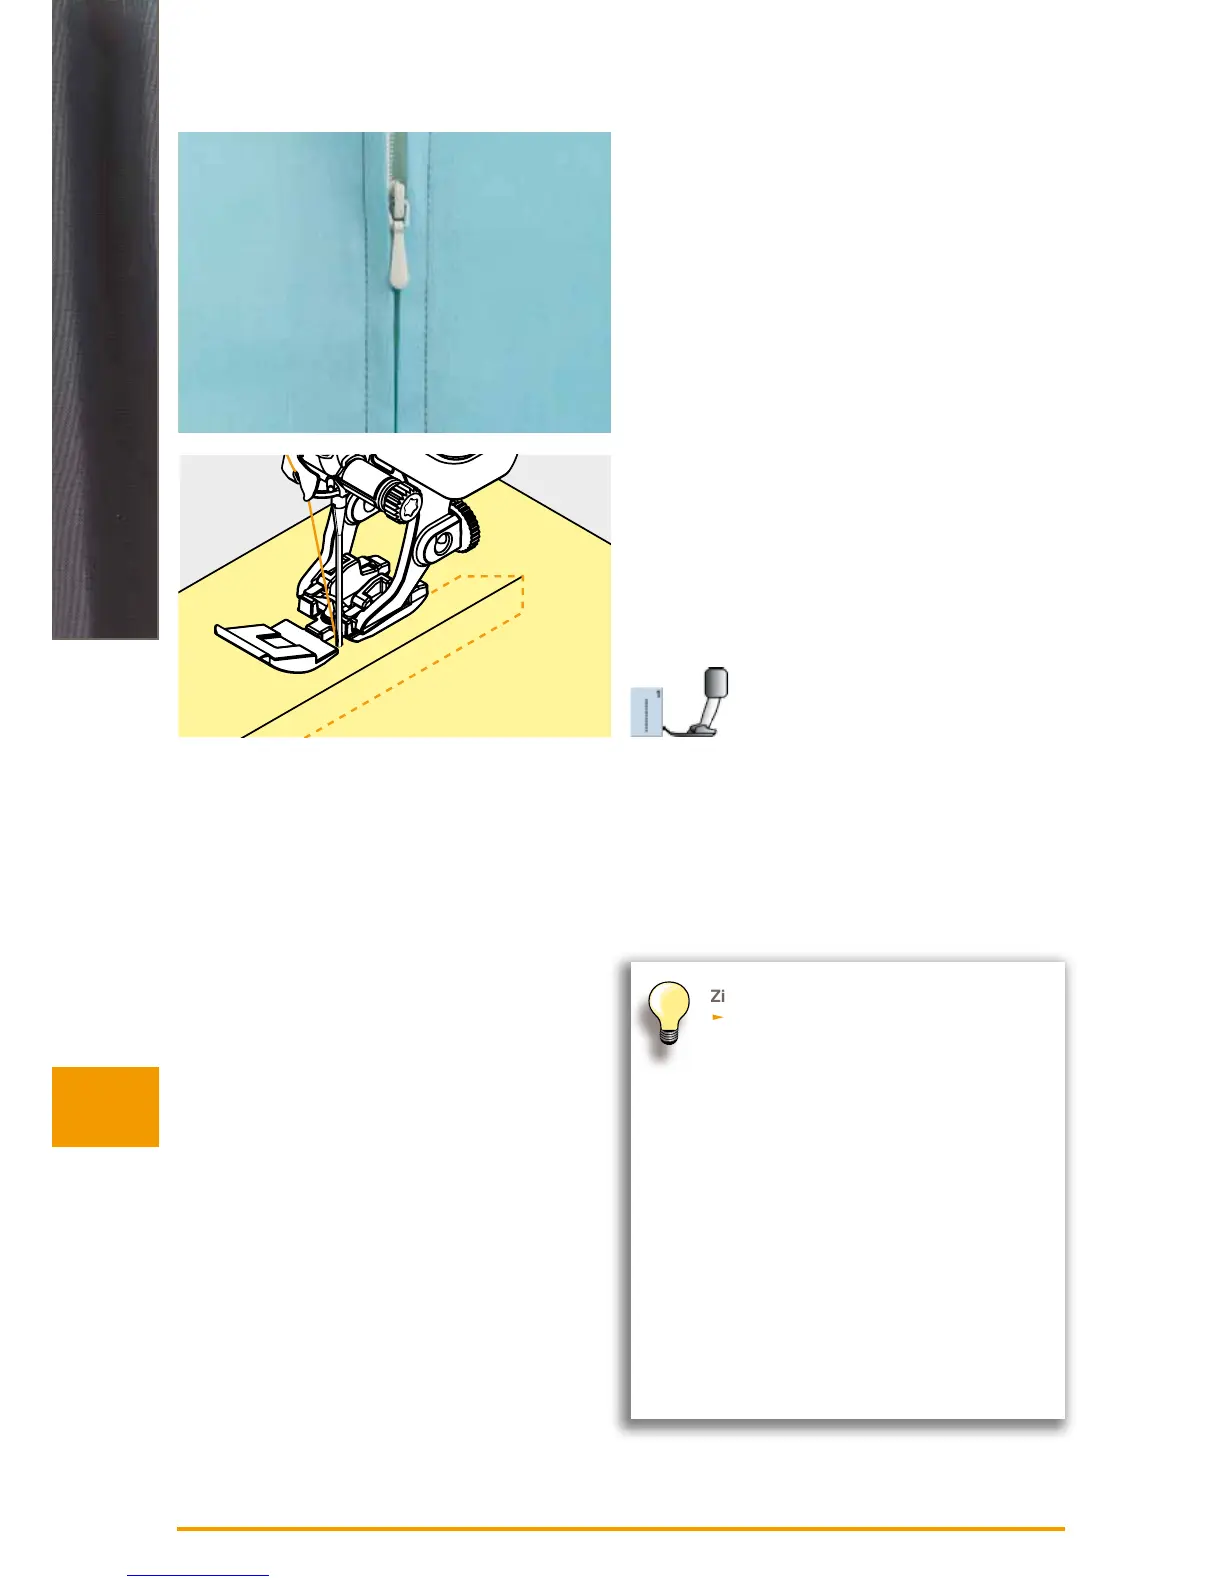
Inserting
Zippers
Preparation
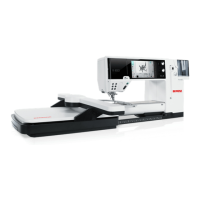
► select the icon showing the attached presser foot in the
presser foot selection (refer to p. 56)
► baste seam closed and clean finish the seam allowance
► baste or pin zipper in place so that fabric folded edges
meet over the center of the zipper
With Straight Stitch no. 1
► open zipper a little
► start sewing from top left
► position the foot so the needle stitches along the edge
of the zipper coils
► stop in front of the pull (needle position down), raise the
presser foot and close zipper again
► continue to sew to the base of the zipper (needle
position down)
► turn fabric and sew across the seam (needle position
down)
► turn fabric again and sew second side of the zipper from
bottom to top
Variation
Sew both sides of Zipper from bottom to top
► suitable for all fabrics with nap or grain (e.g. velvet)
► prepare zipper as described above
► start sewing in the seam of the zipper end and sew first
side from bottom to top
► sew the second side the same way from bottom to top
► Zipper foot no. 4D
► Zipper foot with guide no. 14 (optional
accessory)
Zipper as a decorative element
► sew a visible zipper into the fabric as a
decorative element
To sew around the zipper pull
► close the zipper and sew up to about
2” (5cm) away from the pull
► stop with the needle down in the fabric,
raise the presser foot. Open zipper, pulling
the tab below the needle; lower presser
foot and continue to sew
Starting to sew
► hold threads firmly when starting to sew
and pull the fabric gently behind the needle
for a few stitches
Zipper tape or firm fabric
► for even stitch formation use a size
90 - 100 needle