17 support@cedarsummitplay.com
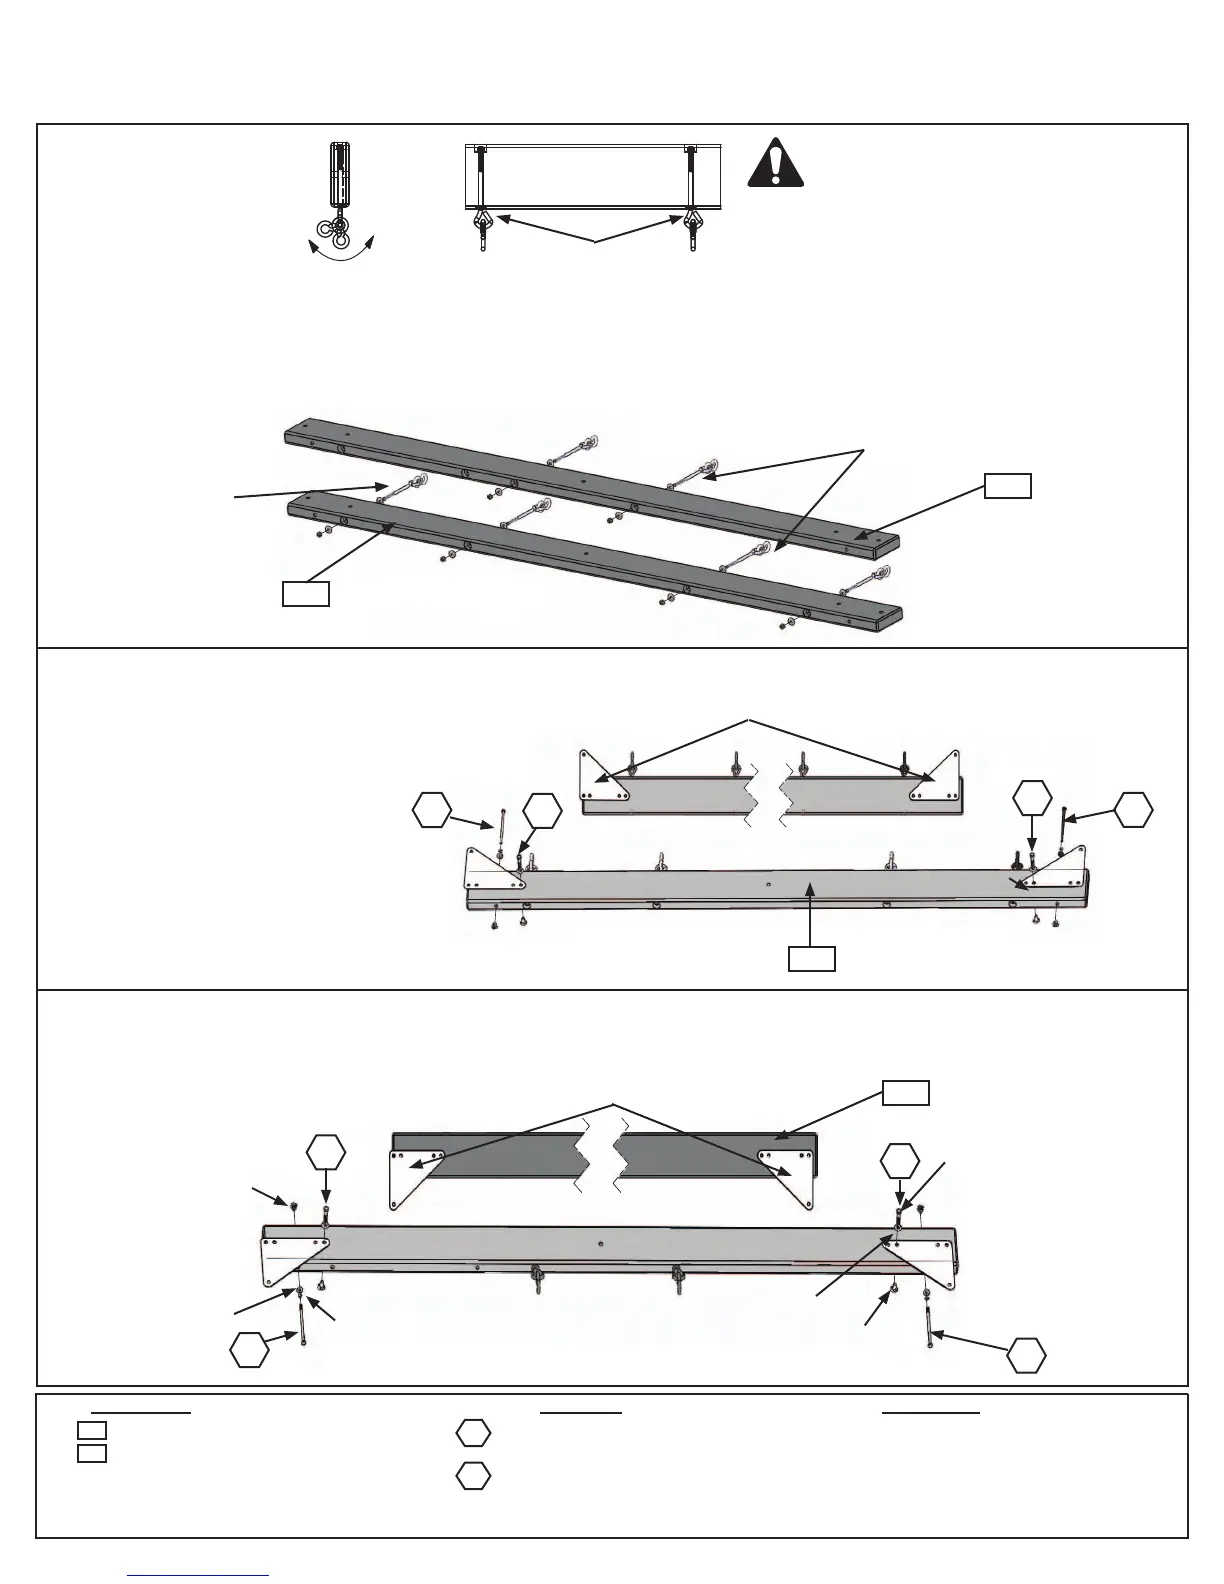
Step 3: Swing Beam Assembly
Make sure triangle is
tight against beam
Warning: For your child’s safety,
orientate the swing hangers as
shown to ensure your swing will
have proper swing motion when
installed. Failure to do so could
result in premature failure of the
swing hanger or swing chain.
A:Inthemiddleholesof(1825)BackBeaminstall
2Bolt-ThruSwingHangers(g.3.1)makingsure
theswinghangersareorientedinthedirection
showning.3.4tomaintainproperswingmotion.
B:Intheendholesof(1826)FrontBeaminstall4Bolt-
ThruSwingHangers(g.3.1)makingsuretheswing
hangersareorientedinthedirectionshowning.3.4to
maintainproperswingmotion.
Fig. 3.4
C: Attach1TrianglePlate
totheendsofeach(1826)
FrontBeamand(1825)Back
Beamusing1(G1)5/16x
1-1/2”HexBolt(withlock
washer,atwasherand
t-nut)intheholeindicatedin
g.3.2&3.3.Correct hole
usage is very important.
Important!
Swing End
(With Overhang)
Important!
Fort End Side
(No Overhang)
D:Attach1(H7)1/4x5-1/2”HexBolt(withlockwasher,atwasherandt-nut)totheendsofeach(1826)Front
Beamand(1825)BackBeam.Theboltsdonotattachtoanything,butMUSTbeinstalledtothebeamstoprevent
splittingandcheckingofwood.(g.3.2&3.3)
Swing End
(With Overhang)
Fort End Side
(No Overhang)
Wood Parts
Hardware
Bolt-Thru
SwingHangers
4 x 1/4 x 5-1/2” Hex Bolt
(1/4” at washer, 1/4” lock washer, 1/4” t-nut)
4 x 5/16 x 1-1/2” Hex Bolt
(5/16” at washer, 5/16” lock washer, 5/16” t-nut)
H7
G1
1 x Bolt-Thru Swing Hangers (pkg of 6)
1 x Triangle Plate (pkg of 4)
1 x Front Beam 2 x 6 x 83-5/8”
1 x Back Beam 2 x 6 x 83-5/8”
1826
1825
Triangle
Plates
G1
H7
1826
1825
1/4”Flat
Washer
1/4”Lock
Washer
1/4”
T-Nut
5/16”Flat
Washer
5/16”Lock
Washer
5/16”
T-Nut
1826
1825
H7
Other Parts
Fig. 3.2
Fig. 3.3
G1
H7
G1
G1
H7
Fig. 3.1
Bolt-Thru
SwingHangers
TrianglePlates