25 support@cedarsummitplay.com
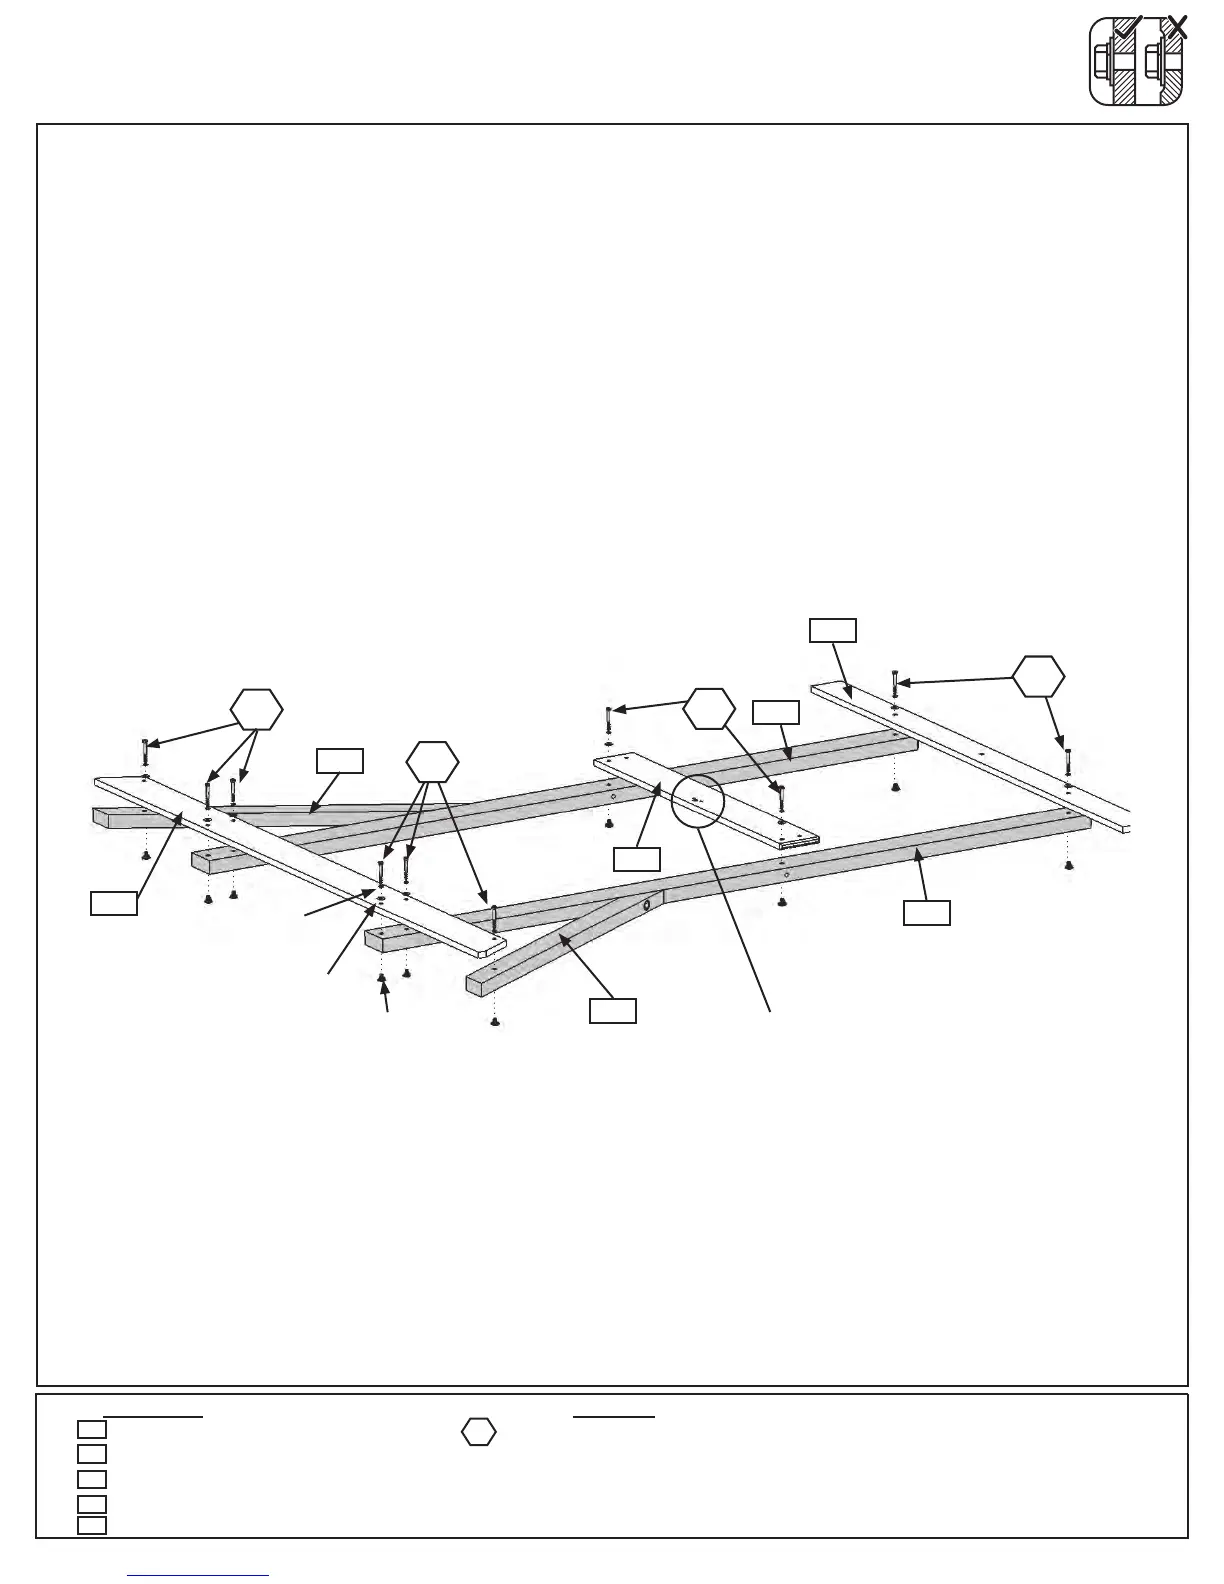
Step 10: Swing Wall Assembly
Part 1
Note: Keep all bolts loose in this step.
A:Onthegroundlayat2(1931)Poststhenattach(2029)GroundSWwith4(H2)1/4x2”HexBolts(withlock
washer,atwasherandt-nut);(1895)FloorEndusing2(H2)1/4x2”HexBolts(withlockwasher,atwasher
andt-nut)inthebottomholes;and(2030)SideRoofusing2(H2)1/4x2”HexBolts(withlockwasher,at
washerandt-nut)asshowning.10.1.
B:Attach1(0369)LowerDiagonaltoeachsideofthe(2029)GroundSWwith1(H2)1/4x2”HexBolt(withlock
washer,atwasherandt-nut)perdiagonal.(g.10.1)
Notice the hole
locations of (1895)
Floor End.
Wood Parts Hardware
Fig. 10.1
10 x 1/4 x 2” Hex Bolt (1/4” lock washer, 1/4” at washer, 1/4” t-nut)
2 x Post 2 x 4 x 81”
2 x Lower Diagonal 2 x 3 x 37”
1 x Side Roof 1 x 4 x 58-1/2”
1 x Ground SW 1 x 5 x 72”
1 x Floor End 1 x 5 x 35-1/4”
1931
0369
H2
H2
1/4”Flat
Washer
1/4”Lock
Washer
1/4”
T-Nut
2030
2029
1895
H2
H2
H2
2029
0369
0369
1895
1931
1931
2030