45 support@cedarsummitplay.com
Hardware
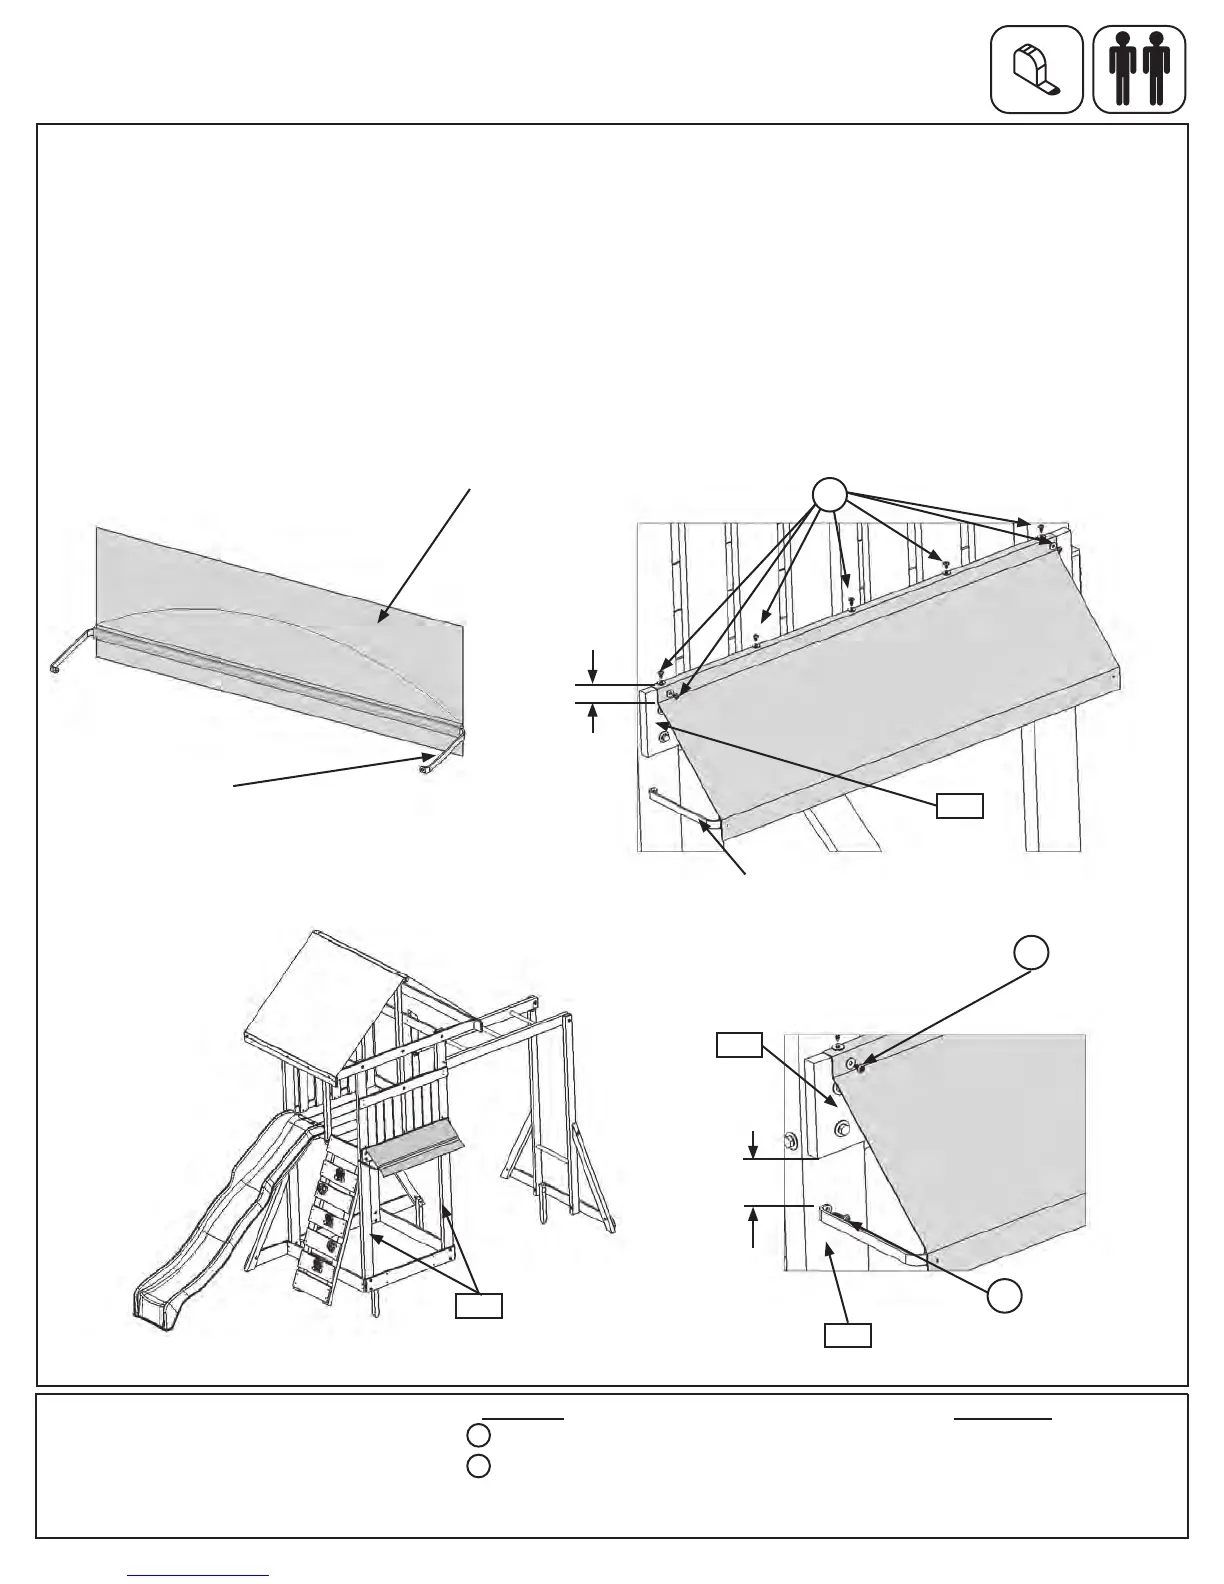
Step 27: Attach Cafe Canopy to Fort
A:FeedCafeCanopyFramethroughthepocketoftheCafeCanopy.(g.27.1)
B:Withahelper,holdtheCafeCanopyFrame3-1/4”downfrombottomof(2032)EndFloor,againstboth(1931)
PostsontheCafeWallsideoftheassembly.(g.27.2and27.3)
C:AttachCafeCanopyFrametobothposts,tighttothebottomof(2032)EndFloor,with1(S6)#12x1”Pan
Screwperpost.(g.27.3)
D:MakesuretheCafeCanopyissmoothandtightthenattachtothetopof(2032)EndFloorwith5evenlyspaced
(S5)#8x1/2”PanScrews(with#8atwasher)asshowning.27.4.OneachsideoftheCafeCanopymeasure
1”downfromthetopof(2032)EndFloorand1/2”infromtheedgeofthecanopy,theninstall1(S5)#8x1/2”Pan
Screw(with#8atwasher)toeachside.(g.27.4)
7 x #8 x 1/2” Pan Screw (#8 at washer)
2 x #12 x 1” Pan Screw
S5
S6
Other Parts
1 x Cafe Canopy Frame
1 x Cafe Canopy
Fig. 27.1
CafeWallSide
1931
CafeCanopy
CafeFrame
Fig. 27.2
SIZE
WEIGHT:
Brookridge Cafe Canopy-S14
SHEET 2 OF 2
REV.
A
DWG. NO.
SCALE:1:12
SIZE
WEIGHT:
Brookridge Cafe Canopy-S14
SHEET 2 OF 2
REV.
A
DWG. NO.
SCALE:1:12
Fig. 27.4
Fig. 27.3
2032
2032
S6
1931
CafeFrame
CafeCanopy
Graphic Not Shown
1”
3-1/4”
with#8atwasher
S5
S5
with#8at
washer