37 support@cedarsummitplay.com
Hardware
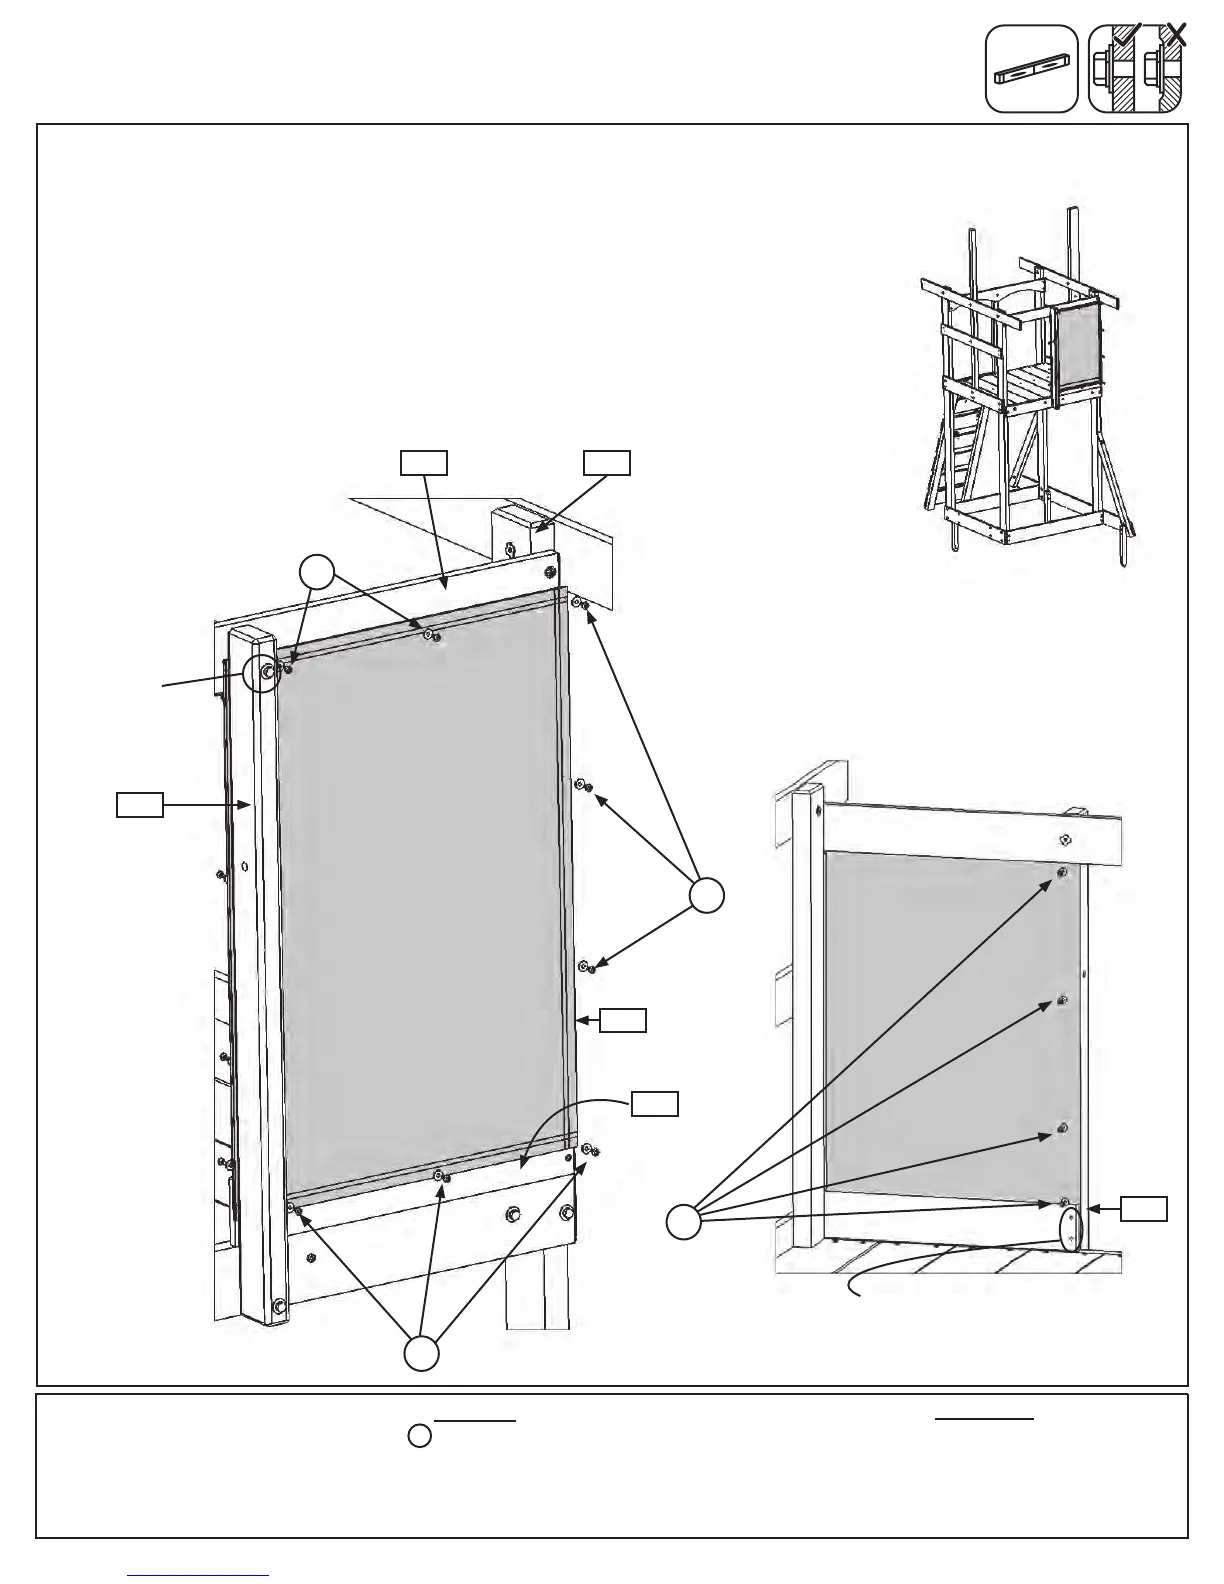
Step 19: Attach Chalk Wall/Tarp to Fort
A:Loosenthetopboltin(2033)MKMountandplacetheChalkWallTarpin
between(2033)MKMountand(1906)TopFrontBack.(g.19.1and19.2)
B:AttachChalkWallTarpto(1906)TopFrontBack,(1944)PanelFrame,
(1227)CEWallBoardand(2033)MKMountusing12(S5)#8x1/2”Pan
Screws(with#8atwasher)asshowning.19.2and19.3.The4screwson
(2033)MKMountareattachedfromtheinsideoftheassembly.(g.19.3)
Fig. 19.2
Fig. 19.3
Fig. 19.1
2033
1906
1227
1931
Loosen
thisbolt
12 x #8 x 1/2” Pan Screw (#8 at washer)
S5
Other Parts
1 x Chalk Wall Tarp
Back
ChalkWallTarp
S5
S5
S5
Fig. 19.3
InsideFortView
2033
with#8at
washers
with#8at
washers
with#8at
washers
with#8at
washers
S5
Note: Leave these holes
vacant until later step.
Evenly
spaceall
screws
1944
(hiddenbehindtarp)