KBF-S / KBF-S-UL (E6) 11/2021 page 53/95
If manual assignment of the DNS server address has been selected, you can now change with the arrow-
down button to assign the DNS server address (chap. 15.2.6).
With the Back button you can go back to the “Ethernet” submenu and, repeatedly pressing it, to Normal
display.
15.2.3 Assigning the IP address
Access to this function is possible only if manual IP address assignment has been selected (chap. 15.2.1)
Path: Normal display Settings Ethernet IP address
Press the OK button to enable the setting.
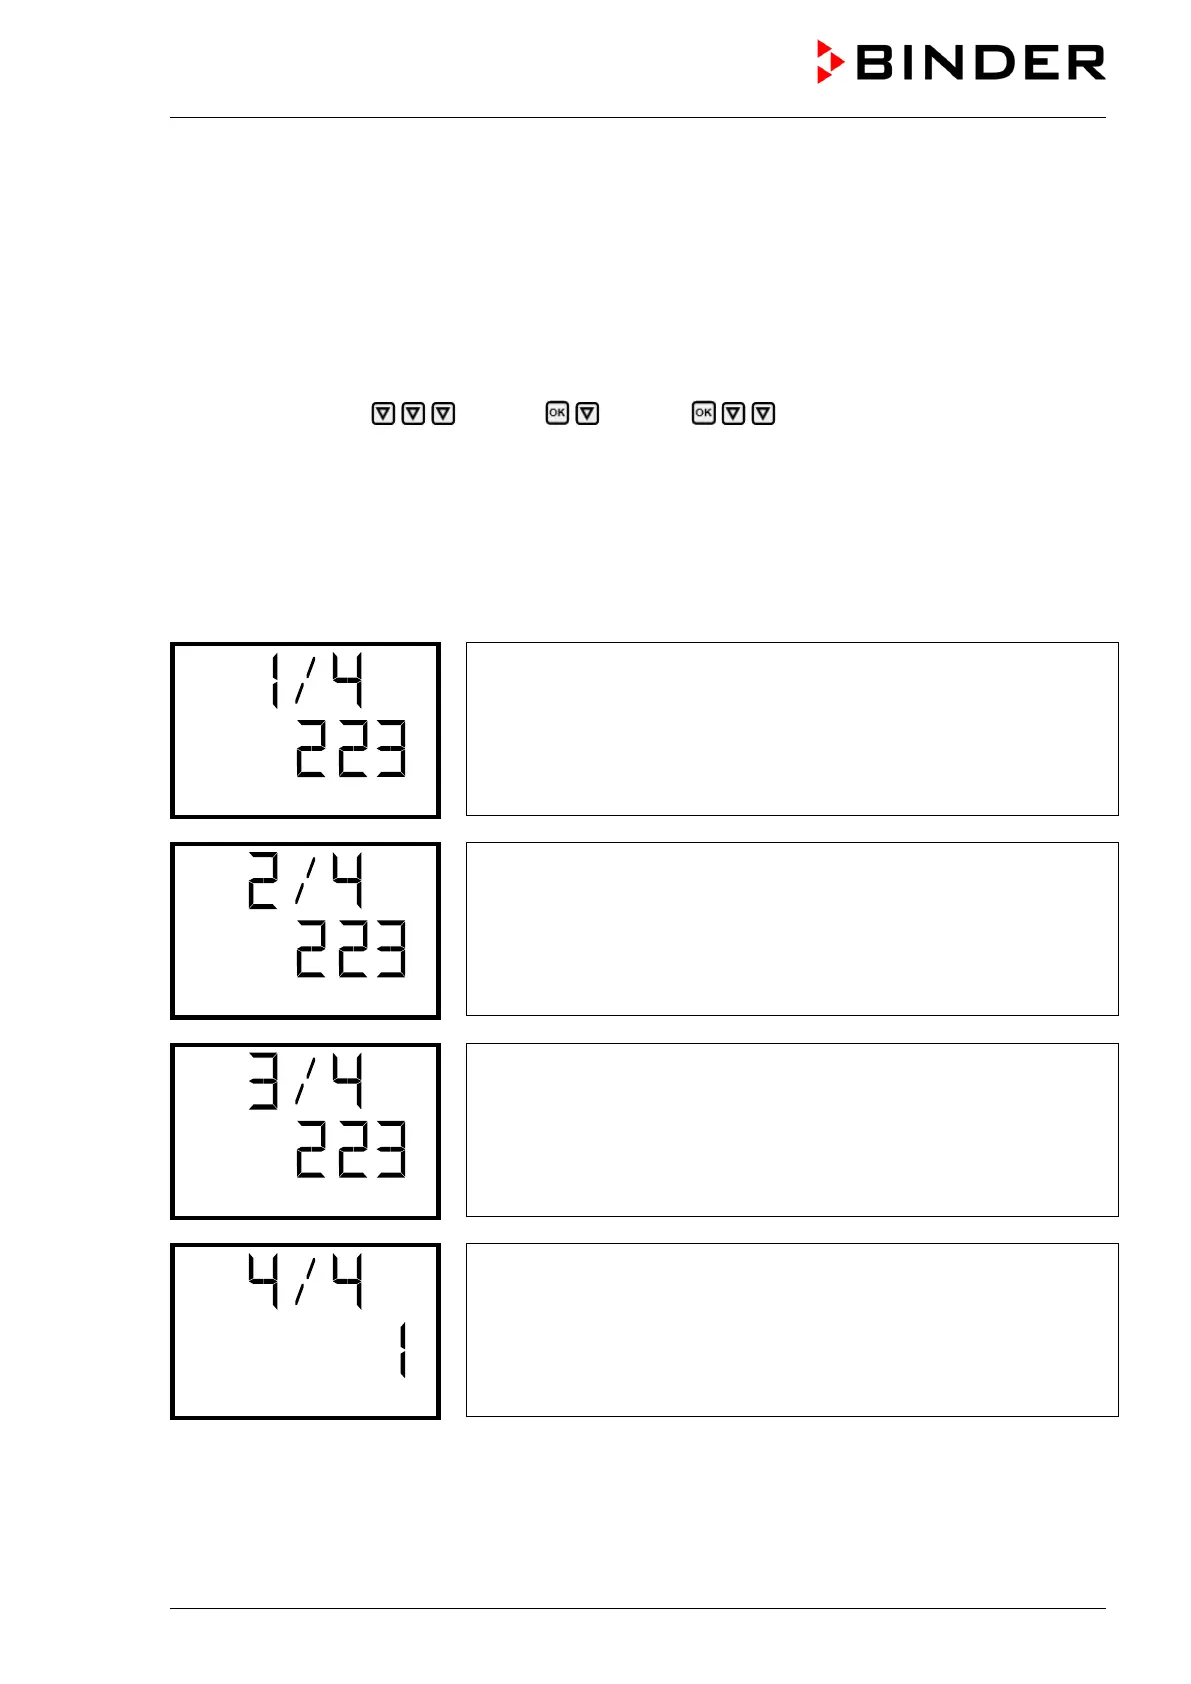
The IP address entry is done in four steps, corresponding to the number sections: (1).(2).(3).(4)
Principle of entry:
• Use the OK button to select the desired section of the IP address 1/4, 2/4, 3/4, 4/4 in the upper display
line
• Use the Arrow buttons to enter the value for the selected section of the IP address
IP address assignment (sample values).
The first section of the IP address is shown.
Enter the desired value with
the arrow buttons.
Use the OK button to confirm the entry and proceed to the second sec-
tion of the IP address.
IP address assignment (sample values).
The second section of the IP address is shown. Enter the desired value
with the arrow buttons.
Use the OK button to confirm the entry and proceed to the third section
of the IP address.
IP address assignment (sample values).
The third section of the IP address is shown. Enter the desired value
with the arrow buttons.
Use the OK button to confirm the entry and proceed to the last section
of the IP address.
IP address assignment (sample values).
The forth section of the IP address is shown. Enter the desired value
with the arrow buttons.
Confirm the setting with the OK button.
With the arrow-down button you can now change to the enter the subnet mask.
With the Back button you can go back to the “Ethernet” submenu and, repeatedly pressing it, to Normal
display.