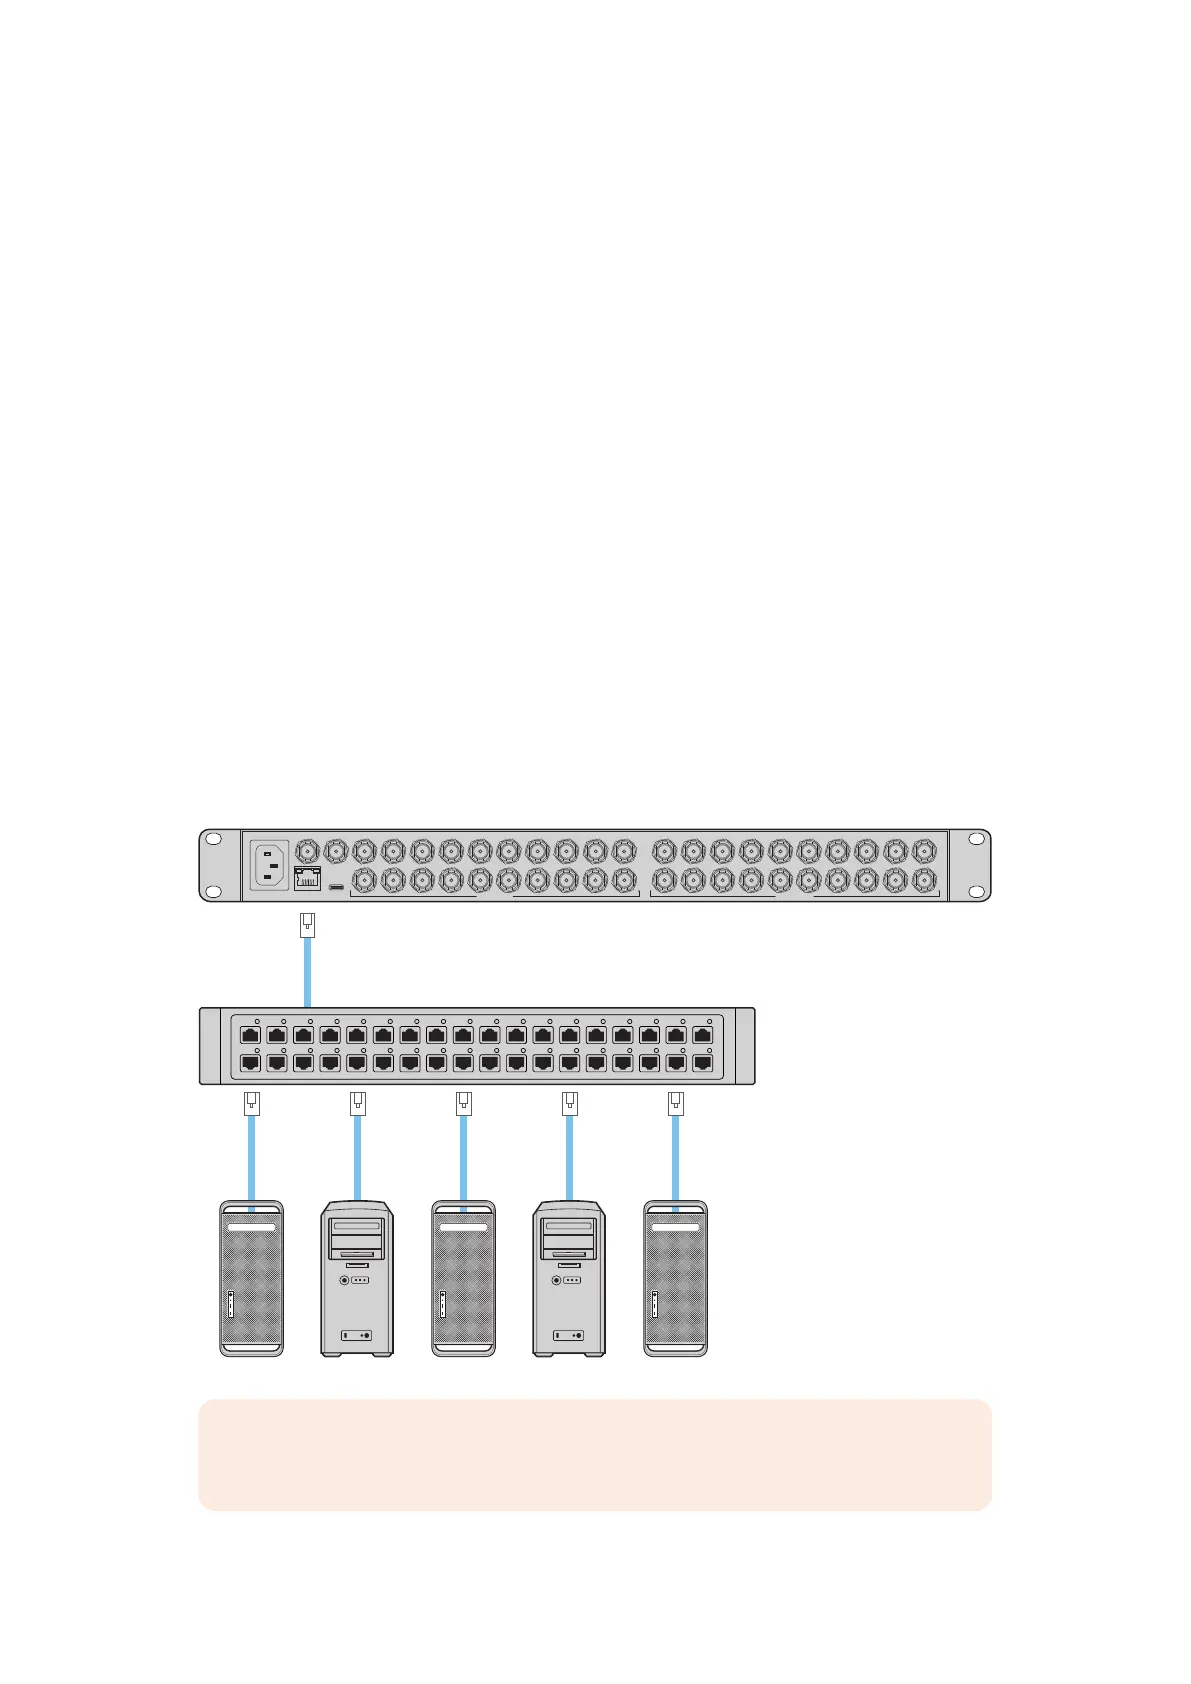
Connecting Videohub to a Network
All Videohub models have an Ethernet port and can connect directly to your Ethernet network
switch or a computer on your local area IP based network. This lets you control your videohub
using Blackmagic Videohub Control software on a computer connected to the same network,
or by using an external Videohub hardware control panel.
To connect Videohub to a network:
1 Connect power to your Videohub. On Universal Videohub models, make sure all power
supplies are turned on.
2 Connect your Videohub router to the network switch or computer Ethernet port with a
standard RJ45 Ethernet cable.
For Videohub models with a built in control panel, you can use the search dial and buttons
to configure IP address in the LCD menu, or use Blackmagic Videohub Setup. For Universal
Videohub models, set your network settings using Blackmagic Videohub Setup.
If you have a Universal Videohub288 populated with two crosspoint cards, connect Ethernet
cables to both for network failover redundancy. Your Universal Videohub288 will have a single
IP address, despite having two Ethernet connections to the network switch.
Network settings adjustments using Blackmagic Videohub Setup can only be adjusted when
connected to your Videohub via USB. The next section of the manual will describe how to
change network settings using the built in control panel.
Connecting to an Ethernet Network
Blackmagic Videohub 20x20 12G
Network Switch
Computer
Ethernet
Ethernet
ETHERNET
REF IN REF OUT
USB
3 5 7 9
4
1
2 6 8 10
13 15 17 19
14
11
12 16 18 20
SD/3G/12G SDI IN
3 5 7 9
4
1
2 6 8 10
13 15 17 19
14
11
12 16 18 20
SD/3G/12G SDI OUT
NOTE For information on how to connect Videohub hardware control panels to a
Videohub unit on the network, refer to Videohub Hardware Panel Setup.
13Connecting Videohub to a Network