Getting Started
Getting started with Videohub is as simple as connecting power and plugging in your video
sources and destination equipment.
Creating an IP Videohub with Teranex Mini IP Video 12G
If you are looking for information on the creation of an IP Videohub for routing
Blackmagic Teranex Mini IP Video 12G units, refer to the Teranex Mini IP Video 12G
manual which can bedownloaded from www.blackmagicdesign.com/support.
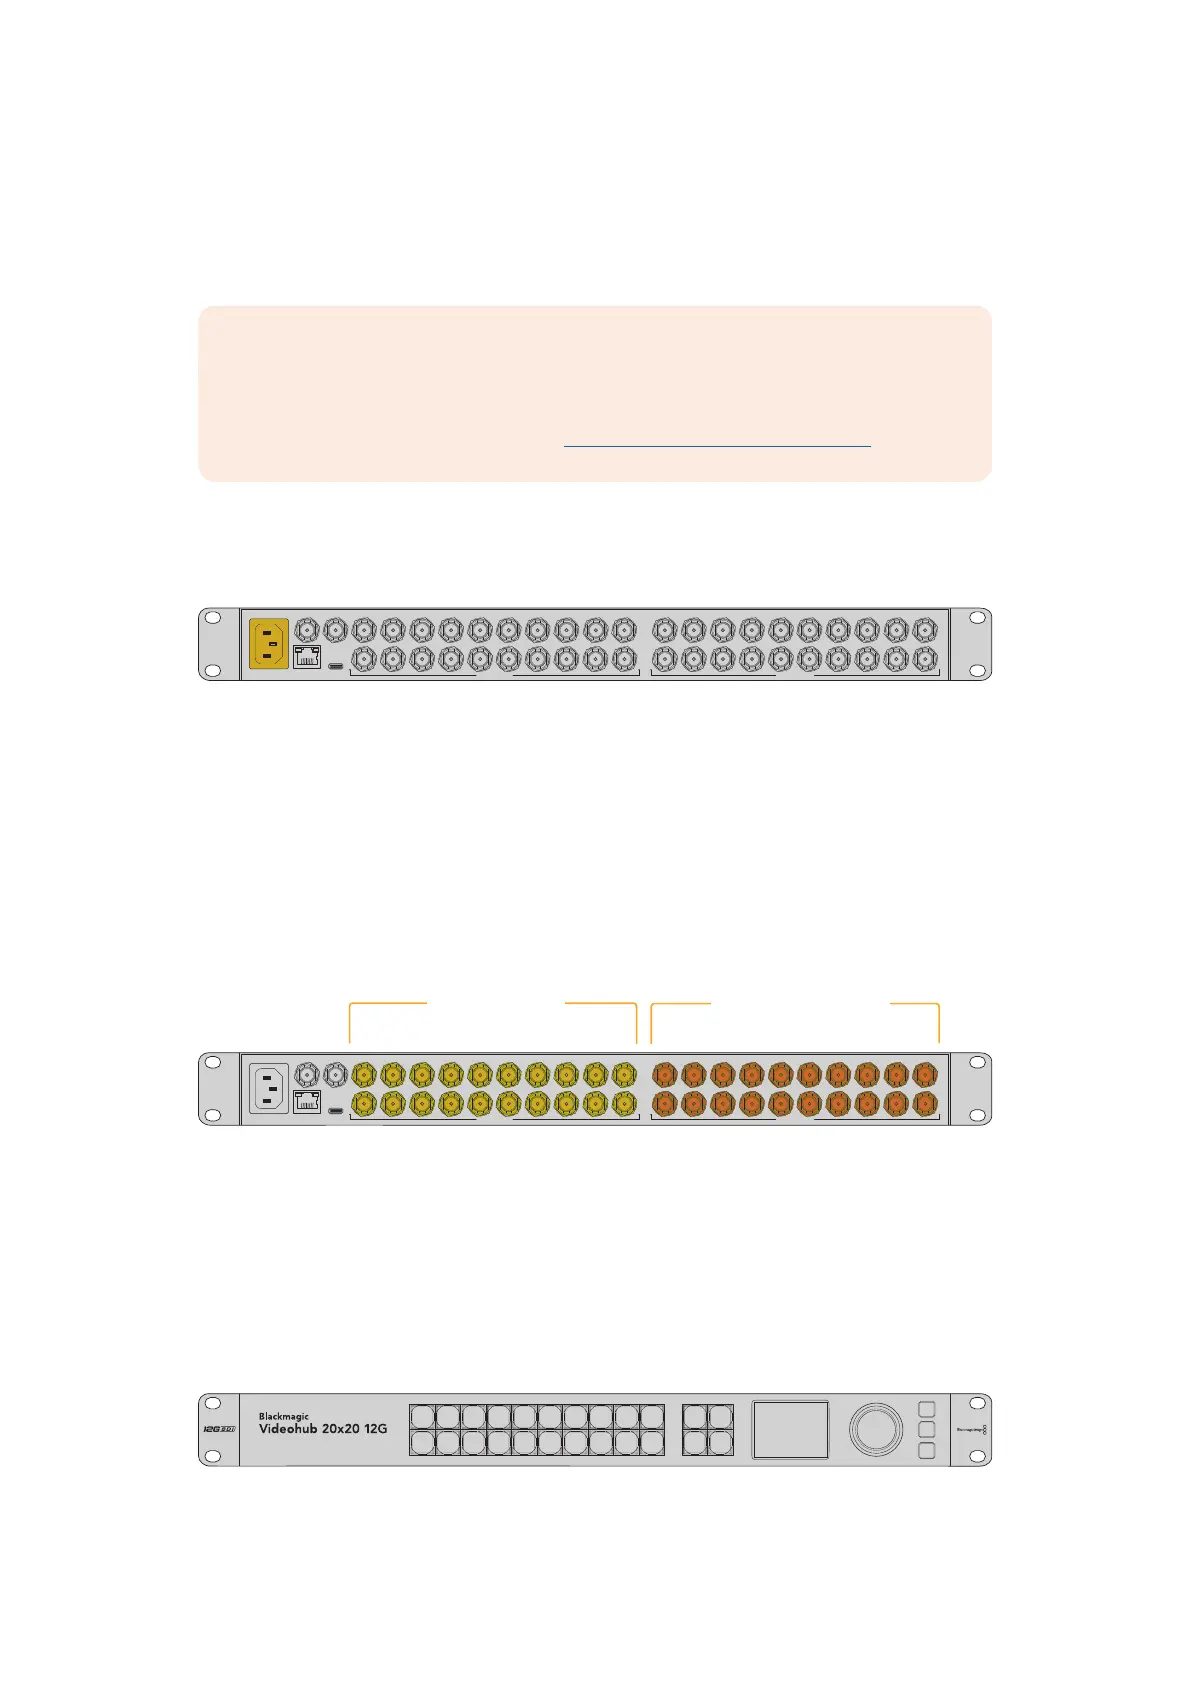
Connecting Power
Connect power to the unit’s power input via a standard IEC power connector.
ETHERNET
REF IN REF OUT
USB
3 5 7 9
4
1
2 6 8 10
13 15 17 19
14
11
12 16 18 20
SD/3G/12G SDI IN
3 5 7 9
4
1
2 6 8 10
13 15 17 19
14
11
12 16 18 20
SD/3G/12G SDI OUT
When you first turn on a Videohub 12G model, the LCD will ask you to select your chosen
language. Scroll through the languages using the search dial and press the ‘set’ button to
confirm your selection.
Connecting Video
1 Connect your video sources to your Videohub’s SDI inputs.
2 Connect your destination equipment to your Videohub’s SDI outputs.
The SDI connections will auto detect all supported video formats.
ETHERNET
REF IN REF OUT
USB
3 5 7 9
4
1
2 6 8 10
13 15 17 19
14
11
12 16 18 20
SD/3G/12G SDI IN
3 5 7 9
4
1
2 6 8 10
13 15 17 19
14
11
12 16 18 20
SD/3G/12G SDI OUT
Source SDI inputs Destination SDI outputs
Connect your sources and destination equipment to your Videohub’s SDI inputs and outputs
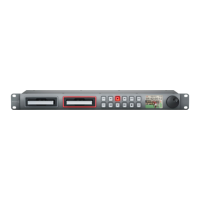
Controlling your Videohub
The fastest, most convenient way to control your Videohub is by using the unit’s built in
control panel. However, you can also change routes and settings remotely via USB or over
Ethernet using an external Videohub hardware panel or by using the Blackmagic Videohub
Control software. You can find more information about how to use the control software later
inthe manual.
STREAM CAM ST/C PC IN
6 7 8 9
MAC
0 OUT
CLEAR
TAKE
MON DECK EDIT ATEM M/VIEW
1 2 3 4 5
LOCK
MENU
SET
The built in control panel lets you change routes and settings using the buttons, LCD and search dial
7Getting Started