3 Type in the destination port number using the numeric pushbuttons. Each button will flash
gold once as you press it. The destination will be displayed on the LCD. If you make a
mistake, press the white ‘clear’ button and retype the port number.
4 Press the source button marked ‘SRC’. The source field will be highlighted blue on the LCD.
5 Type in the source port number using the numeric pushbuttons. Each button will flash white
once as you press it. The source will be displayed on the LCD. If you make a mistake, press
the white ‘clear’ button and retype the port number.
6 The ‘take’ button will flash red, awaiting your confirmation of the route change. Press ‘take’
and the route will change immediately. Otherwise, press ‘clear’ and no route change will
take place. Videohub Master Control returns to its idle state with the latest route displayed
on the LCD.
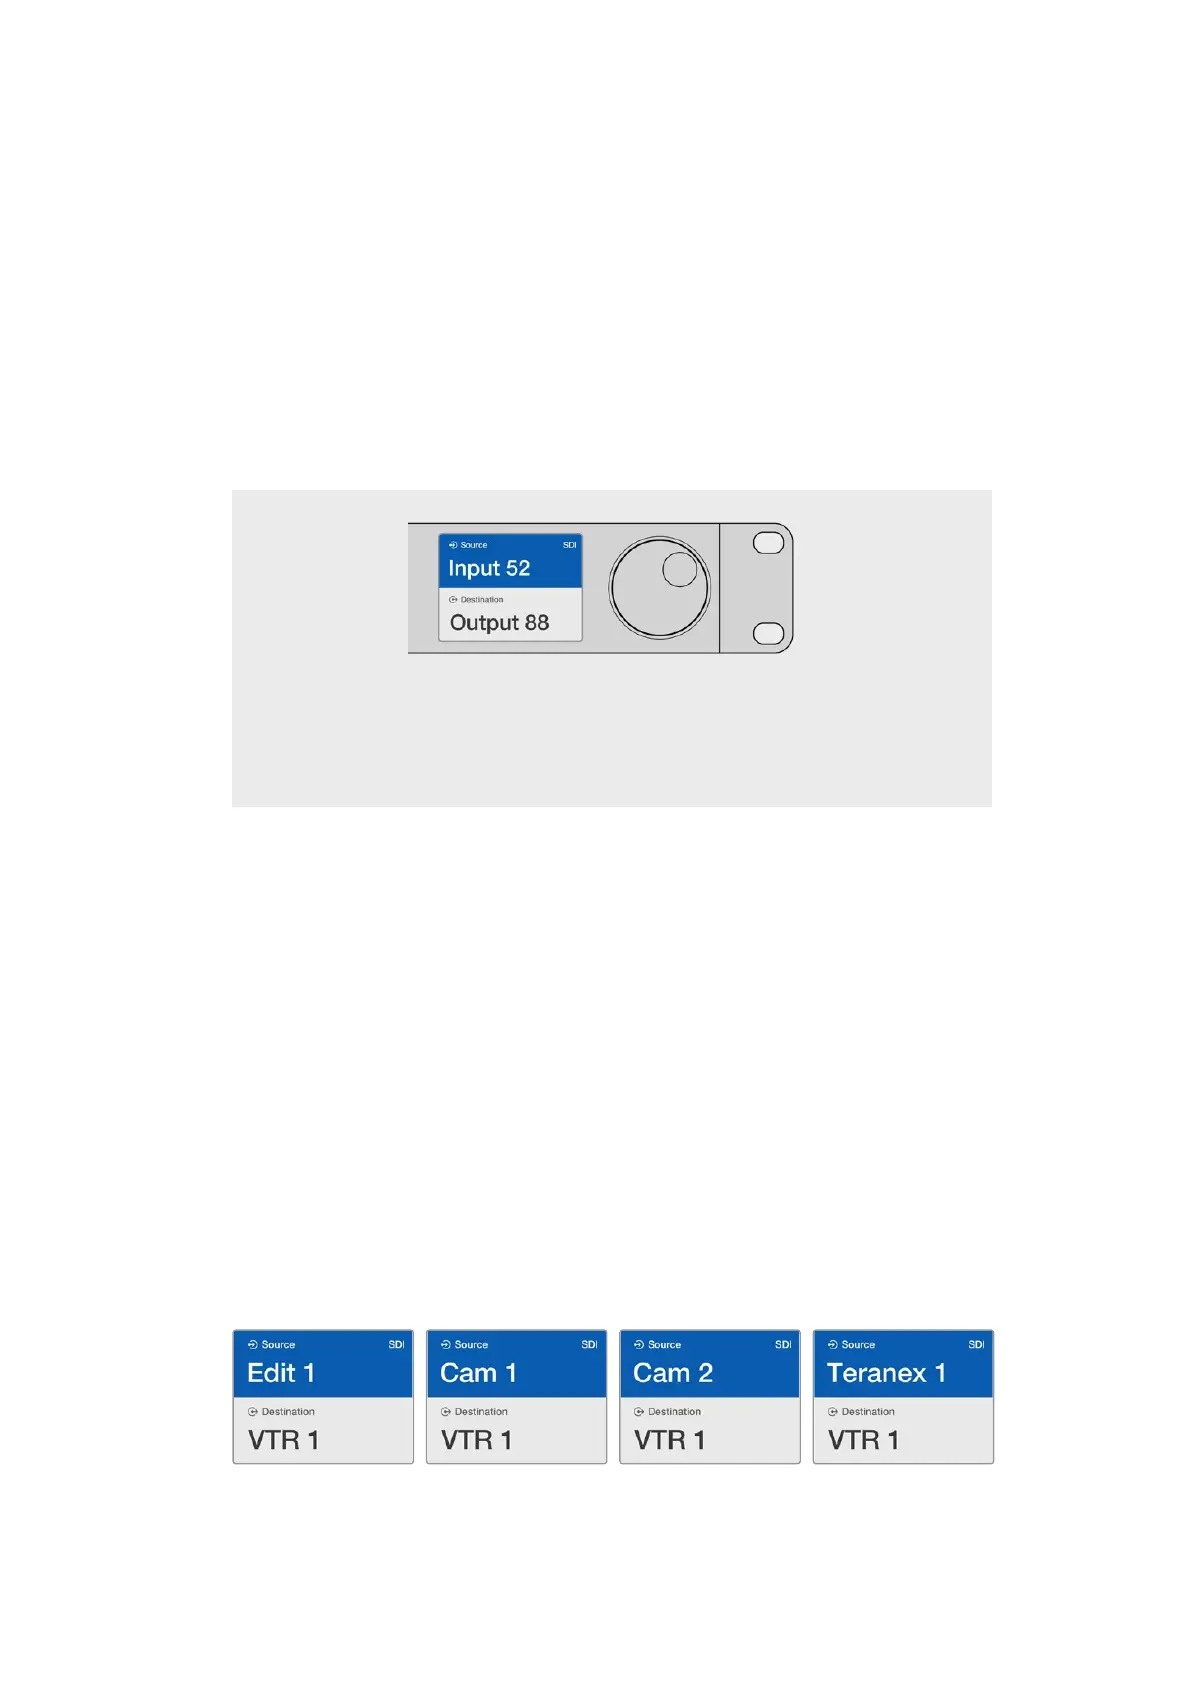
If you’ve chosen to keep the default labels for all Videohub
SDI and remote ports, you can simply type the port
numbers to make a routing change. In this example, press
the destination button marked ‘DEST’ and then type the
port number 88. Then press source button and type the
port number 52. Press ‘take’ to confirm the route change.
Selecting Units using the Scroll Wheel
Regardless of whether or not you’ve customized the Videohub port labels, you can always use
the scroll wheel to browse through a list of sources and destinations. This is the slowest method
but is useful if you want to see the list of all available equipment and ports.
1 Press the destination button marked ‘DEST’. The destination field will be highlighted blue
on the LCD.
2 If your Videohub router has RS-422 remote control, press the ‘level’ button until you have
set the appropriate routing level for your equipment. Otherwise you can skip this step.
3 Scroll the wheel forwards or backwards until the desired destination is found.
Thedestination will be displayed on the LCD.
4 Press the source button marked ‘SRC’ so it illuminates white. The source field will be
highlighted blue on the LCD.
5 Scroll the wheel until the desired source is found. The source will be displayed on the LCD.
6 The ‘take’ button will flash red, awaiting your confirmation of the route change. Press ‘take’
and the route will change immediately. Or press ‘clear’ and no route change will take place.
Videohub Master Control returns to its idle state with the latest route displayed on the LCD.
In this example, the scroll wheel is being used to list all sources that can be routed to the destination
VTR 1, based upon the SDI routing level. When the scroll wheel is rotated, the names of source
equipment are progressively displayed to make it very easy to find the desired video source.
36Videohub Hardware Control Panels