Inside the inlet opening [2] pull the filter replacement
cover [1] out through the opening in the filter housing.
1
2
TOP
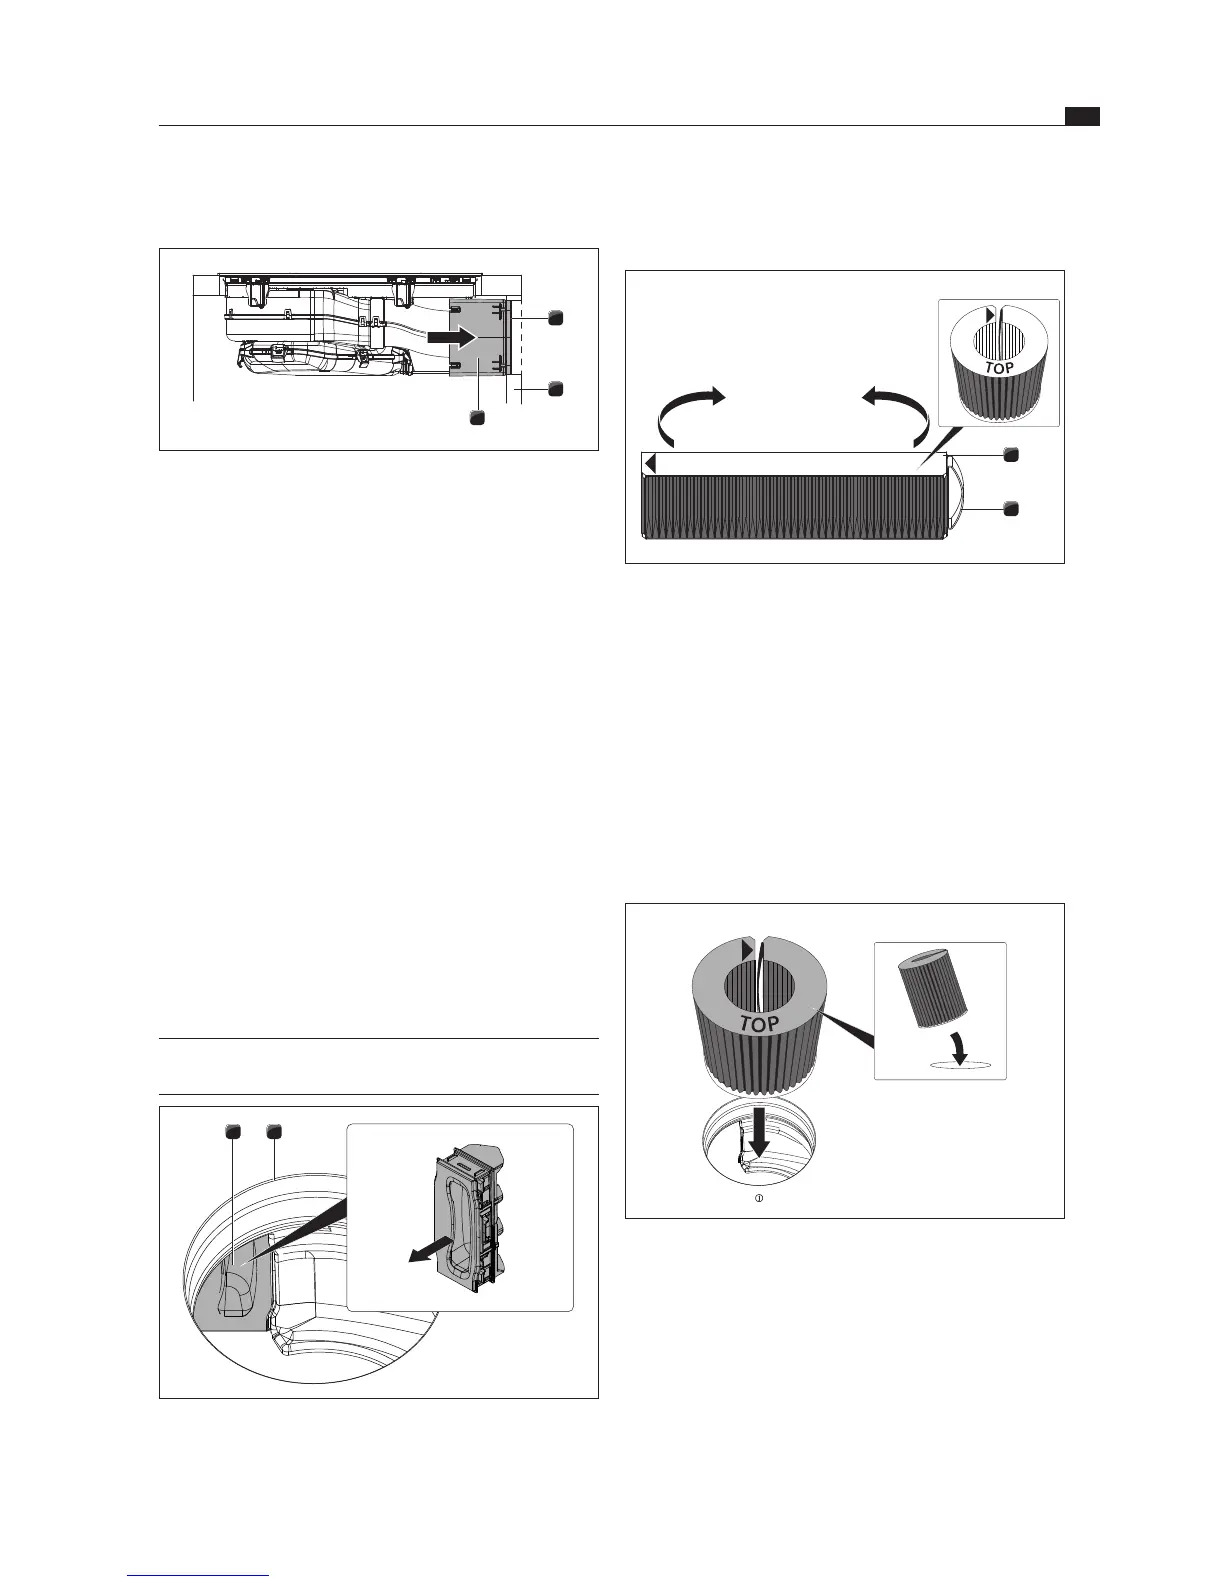
Fig. 6.20 Activated charcoal lter
[1] Activated charcoal filter
[2] Grip strap
Remove the packaging from the activated charcoal
filter [1].
Position the activated charcoal filter correctly with the
help of the printed symbols (arrow left, grip strap [2]
right).
Hold the activated charcoal filter at both ends.
Bend the activated charcoal filter into a cylindrical
shape so that both ends of the filter are opposite each
other.
Fig. 6.21 Inserting the activated charcoal lter through the vent
opening
Tilt the activated charcoal filter towards you slightly and
insert it through the inlet opening.
Guide the left end of the filter into the opening in the
filter housing.
Establishing a connection with the back wall
1
2
3
Fig. 6.18 Connecting the telescopic duct to the back wall
[1] Adhesive tape
[2] Back wall of unit
[3] PURE air cleaning box telescopic pull-out
Remove the protective film from the adhesive tape [1]
on the front of the telescopic pull-out [3].
Establish a connection with the back wall of the unit
[2] with the help of the flexible telescopic pull-out [3].
To do this, push the telescopic pull-out [3] until it is
tight up against the back wall of the unit [2].
With the PURE air cleaning box telescopic pull-out the
distance to the back wall of the unit can be flexibly
bridged (max. 80 mm).
If necessary, extend the telescopic pull-out [3] with
the PURE air cleaning box telescopic pull-out PULBTA
(available as an accessory).
Check that the telescopic pull-out [3] fits accurately, is
flush with the cut-out on the back wall of the unit [2]
and closes it off.
Secure the telescopic pull-out [3] to the back wall of
the unit [2] using the adhesive tape [1].
Inserting the activated charcoal filter
INFO Removing the filter – see Cleaning chapter,
Changing the filter
21
Fig. 6.19 Remove the lter replacement cover
[1] Filter replacement cover
[2] Inlet opening