1/05 | F01U002505B
EN | 16FPT-DACT | Operation & Installation Guide |
2.0 Installation
2.2.3 Telephone Connections
Telephone Cord Installation
Connect the primary telephone line to the FPT-DACT
Modular Jack Line 1 using a telephone cord. Connect
the secondary telephone line to the FPT-DACT
Modular Jack Line 2 using another telephone cord.
For all applications, connect separate
primary and secondary telephone lines to
the FPT-DACT.
Location
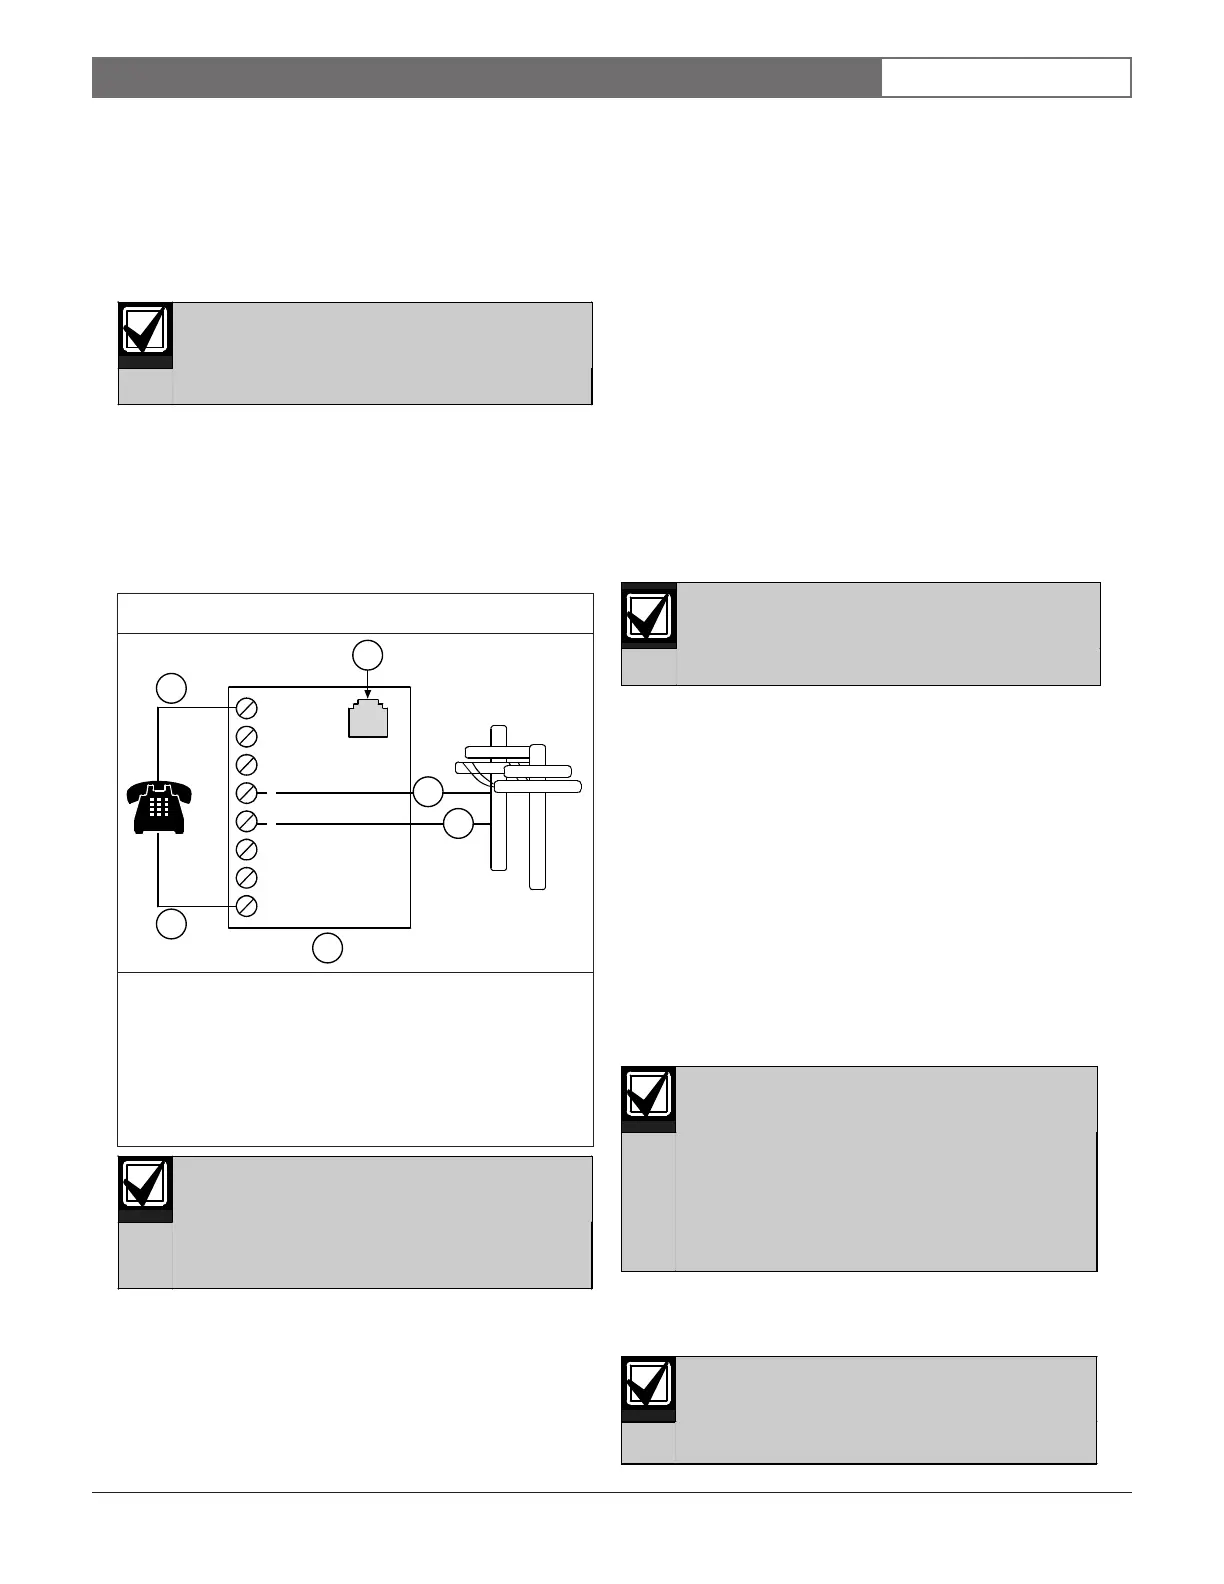
To prevent jamming of alarm and other reports, wire
and locate the RJ31X jack so normal telephone use is
temporarily interrupted while the FPT-DACT transmits
data (Figure 14). After installation, verify the FPT-
DACT seizes the line, acquires dial tone, and reports
correctly to the receiver.
Use the supplied Telco cable assemblies to
connect to an RJ31X jack. Ensure the
RJ31X jacks are mounted in a secure
location to prevent unwanted
disconnections and tampering.
Figure 14: RJ31X Wiring
1 - Full modular telephone jack
2 - Ring (Telco)
3 - Tip (Telco)
4 - RJ31X Module
5 - T1 (house telephone tip)
6 - R1 (house telephone ring)
1
1
2
3
6
7
8
4
5
2
3
4
5
6
Notification
Do not connect registered equipment to party lines or
coin-operated telephones. If the local telephone company
requests notification before you connect the FPT-DACT
to the telephone network, tell them:
• which line you are connecting to the DACT.
• the make, model, and serial number of the device.
• the FCC registration number
(ESVMUL-46514-AL-E) and ringer equivalence
(0.0B).
If the telephone company changes its communications
facilities, equipment, operations, or procedures that can
affect the performance of the FPT-DACT, the telephone
company is obligated to notify the user in writing.
The FPT-DACT meets the UL1950 requirements.
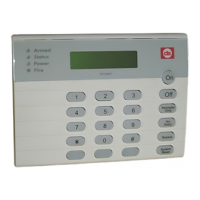
Connecting the Keypad to the FPT-DACT
Only use the FMR-DACT-KEYPAD for
programming and debugging purposes.
Use the FMR-DACT-KEYPAD to operate the FPT-
DACT Communicator. Remove the cover from the FPT-
DACT case and plug the molex connector from the
FMR-DACT-KEYPAD onto the connector pins located
on the FPT-DACT board (Figure 15 on page 17).
When programming the FPT-DACT from the FMR-
DACT-KEYPAD:
1. Set the FMR-DACT-KEYPAD address between 1
and 15.
2. Use the wire connector supplied with the FPT-
DACT to connect the FMR-DACT-KEYPAD to the
FPT-DACT (Figure 15).
3. Program the FPT-DACT as explained in Section 5.0
Programming on page 28.
If there is no FMR-DACT-KEYPAD activity for
3 min, it disables. The FMR-DACT-KEYPAD
buzzer sounds and a System Fault message
appears on the keypad. Disconnect the
keypad from the FPT-DACT by removing the
wire harness plug from the FPT-DACT pins.
Reconnect the wire plug harness to enable
the keypad.
4. Replace the instruction label (supplied with the
FMR-DACT-KEYPAD) with the one supplied with
the FPT-DACT (P/N: 45772).
While installing the FMR-DACT-KEYPAD
Programmer, the system does not monitor
the input points nor the serial connection to
an FACP.