EN | 29FPT-DACT | Operation & Installation Guide |
1/05 | F01U002505B
5.0 Programming
5.2 Programming Key Sequences
A programming key sequence is a series of keys you
press to reach the desired level option. The purpose of a
programming key is to reduce repetition and provide
brief instructions when programming the FPT-DACT.
Level 1 is the Main Menu. Select [0 Program] for all
system programming. The first number in the key
sequence is “0”. The Main Menu selections are:
• PROGRAM
•STATUS
•HISTORY
•TEST
•RESET
Level 2 is the Programming Mode Menu. It represents
the second number in the key sequence. The
programming options are:
• PROG TIME
• PROG TIMERS
• PROG INPUTS
•PROG RELAY
• PROG ACC’NTS
•PROG FORMATS
• PROG DEFLTS
Level 3 provides options that branch from Level 2
(Figure 25). The third number in the key sequence
represents the option selected in Level 3.
Level 4 includes keypad prompts that supply
instructions specific to the selected menu item.
Level 5 includes submenu prompts specific to Level 4.
Not all programming menus extend to Level
4. If a menu does not reach Level 4, the
instructional prompts appear on the last
(highest) menu level.
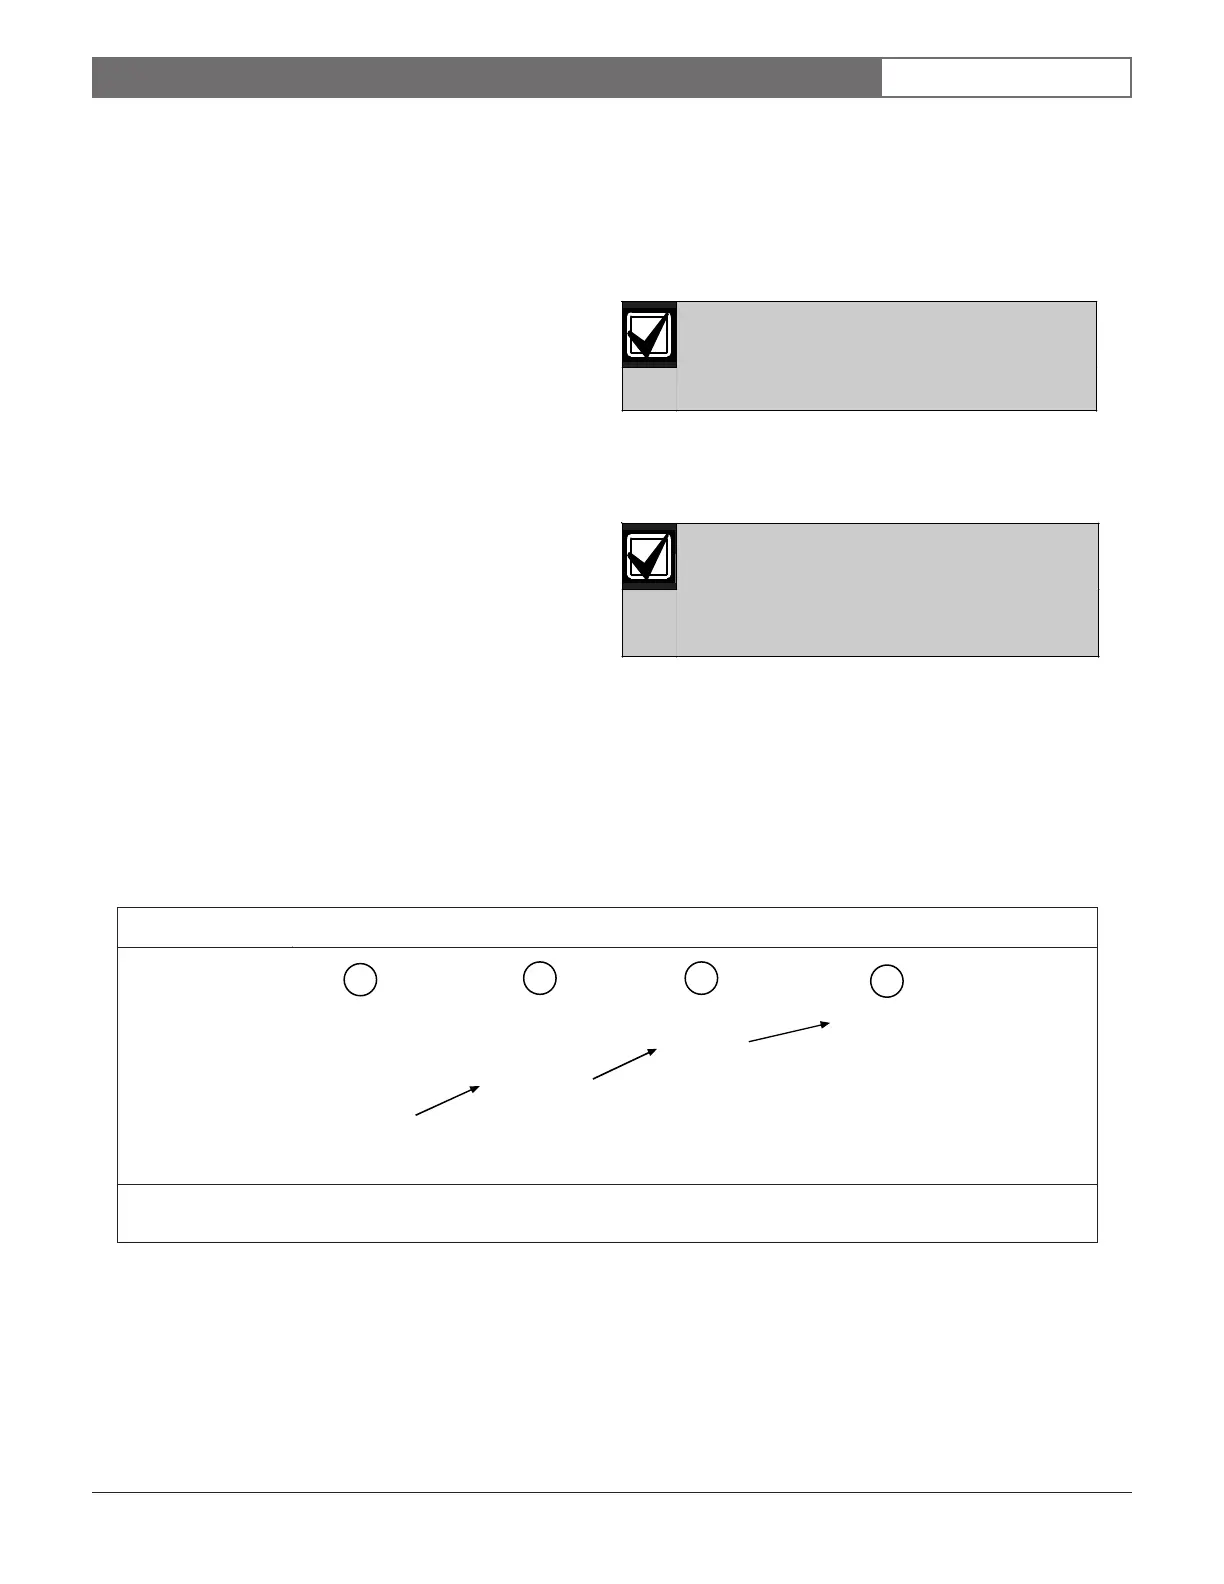
The example in Figure 25 shows the programming key
sequence used to enter system settings such as the date
and time. Once you enter the key sequence, follow the
procedure of the specific function you are programming.
Once you enter the Programming Menu
(Level 2), you no longer need to press [0] to
re-enter the Programming Menu. If you press
[0] while already in the Programming Menu,
the keypad emits a three-beep error tone.
1. At the Main Menu (Level 1), press [0] to enter the
Programming Menu (Level 2).
2. At the Programming Menu, press [1] to enter the
Prog Time Submenu.
3. At the Prog Time Submenu (Level 3), press [1] to
select 1: SYSTEM (Level 4).
4. Follow the keypad prompts to select system settings.
5. Press [#] to verify the setting.
1 - Main Menu (Level 1) 3 - Prog Time Submenu (Level 3)
2 - Programming Menu (Level 2) 4 - Level 4
[0]: PROGRAM
[1]: PROG TIME
[1]: SYSTEM
1: SYSTEM
1
2 3
4
Figure 25: Programming Key Sequence Diagram