20
Never tum off the power while sampling
is
in
progress
.
10.Press the SAMPLING START/STOP
button.
The REC button will light, and sampling will begin.
You may reverse the order of steps 5-9, or make them as
many times as desired.
9·2.
If
you wish to use Tap
Input,
listen to
the
sound
that you wish to sample,
and
press the TAP but·
ton in time
with
the beat
of
the sound.
When you have pressed the button four times or more,
the value will be input (displayed).
A
tempo in the range of 40-200 can be specified. (When
PITCH is OFF)
9·
1. To enter a numerical value, press the
.A.
T but-
tons to select the desired value.
If
you continue holding down
a
button
,
the value will
increase or decrease continuously.
8.
While the
desired
sound is
being picked up by
the microphone, rotate
the
REC LEVEL
knob
to
adjust the sampling
level so
that
PEAK
lights
occasionally.
If
you make the BPM (tempo) setting before you begin
sampling, pressing the SAMPLING
START
/STOP button
will cause the stop time (End Point) to automatically be set
to a beat of the BPM value that was
in
effect before you
pressed the button, and the
MARK
button will light. (Refer
to page
27
"Playing only the desired portion of
a
sound")
There are two ways to enter the BPM.
If
you already know
the desired setting, you can enter it numerically.
If
not,
press the TAP pad
in
time with the tempo (Tap
input)
.
7.
Make sure that MONO is
lit.
If
STEREO is lit, press the MONO/STEREO
button
to
make MONO light.
Even
if
you sample with
a
setting of STEREO, the same
sound will be recorded for both
L
and
R
if
the input is
monaural. In this case, the sound will be the same as
if
you had sampled using MONO, but it will use two notes
of polyphony.
6.
Press pad
2.
5.
Press the BANK INT
A/8
button
to make
B
light.
If
at this
point
you wish to stop
sampling
,
press
the
CANCEL button. The REC button will go dark.
4.
Press the SAMPLING ST ART/STOP
button.
The REC
button
will blink, and the SP-202 will enter
standby mode.
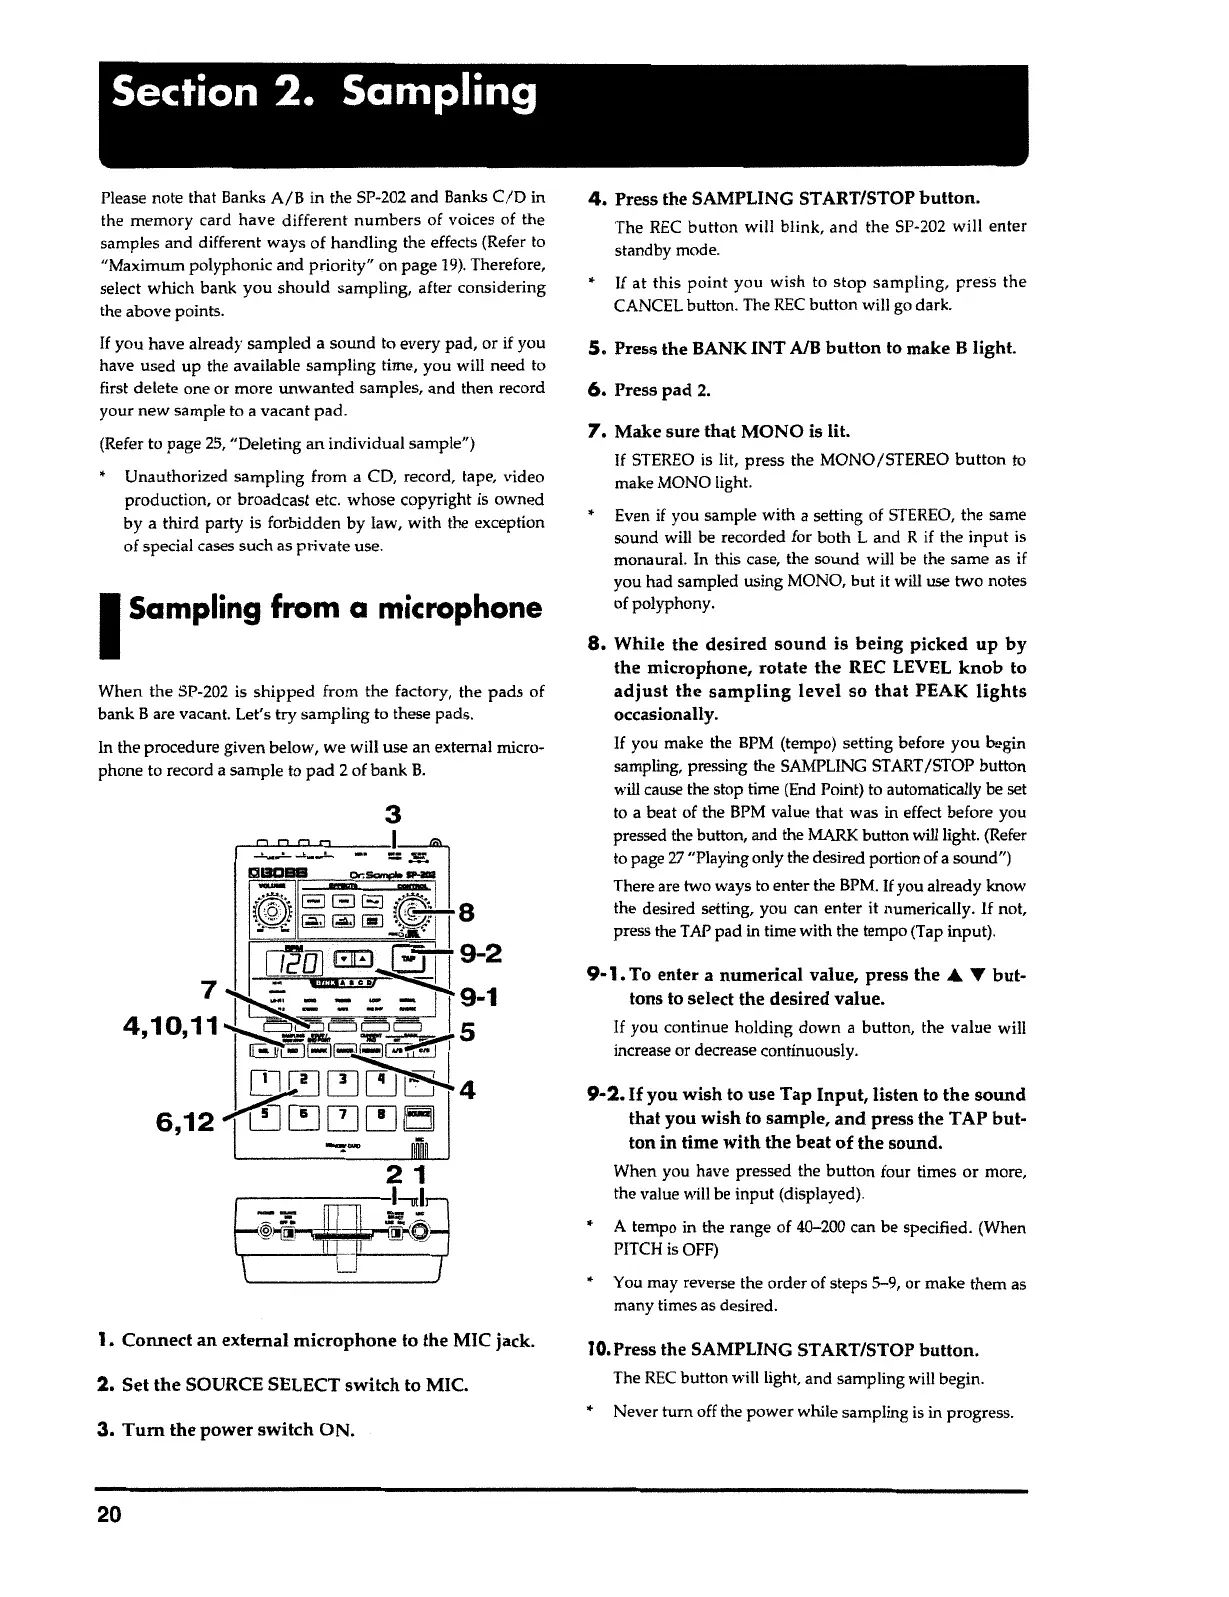
3.
Tum
the power
switch
ON.
2.
Set
the
SOURCE SELECT switch to MIC.
1. Connect an external
microphone
to the MIC jack.
3
When the SP-202 is
shipped
from the
factory
,
the pads of
bank Bare vacant. Let's
try
sampling to these pads.
In the procedure given below, we will use an external micro-
phone to record
a
sample to pad
2
of bank
B.
I
Sampling from
a
microphone
Please note that Banks A/B in the SP-202 and Banks
C/D
in
the memory card have different numbers of voices of the
samples and different ways of handling the effects (Refer to
"Maximum polyphonic and priority" on page
19).
Therefore,
select which bank you should sampling, after considering
the above
points
.
If
you have already sampled a sound to every pad, or if you
have used up the available sampling time, you will need to
first delete one or more unwanted samples, and then record
your new sample to
a
vacant
pad
.
(Refer to page
25,
"Deleting an individual sample")
Unauthorized sampling from a CD, record, tape, video
producti
o
n, or broadcast etc. whose copyright is owned
by a third party
is
forbidden by law, with the exception
of special cases such as private use.
Section
2. Sampling