27
3.
At
the location
where
you wish
to set the End
Point, press the MARK
button.
When MARK lights, the setting is complete.
If
you now set the
BPM
(tempo), the End Point will auto-
matically be adjusted to the location of the beat closest to
the timing (i.e., an interval of beats measured from the
Start Point according to the BPM value) which set when
you next press the MARK
button.
You can select the
desired BPM value either by pressing the 'Y
A
buttons,
or by pressing the TAP pad four times or more in time
with the tempo.
2.
Release the MARK button.
The MARK button will blink, and the
BPM
display will
indicate"---".
1. Hold down the MARK
button,
and press the pad
which contains the sample
that
you wish to edit.
(Specify the current pad)
The pad will light, and the sample will sound.
In the case of Gate playback, continue holding the pad.
• Adiusting only the
End
Point
If the setting
was not made as
desired, press the lit
MARK button while the sound
is
still playing to make it
go dark, and re-do the procedure from step
1.
3.
At
the
location where you
wish
to
set
the End
Point, press the MARK
button
once again.
When the MARK button lights, the setting is completed.
,_
A
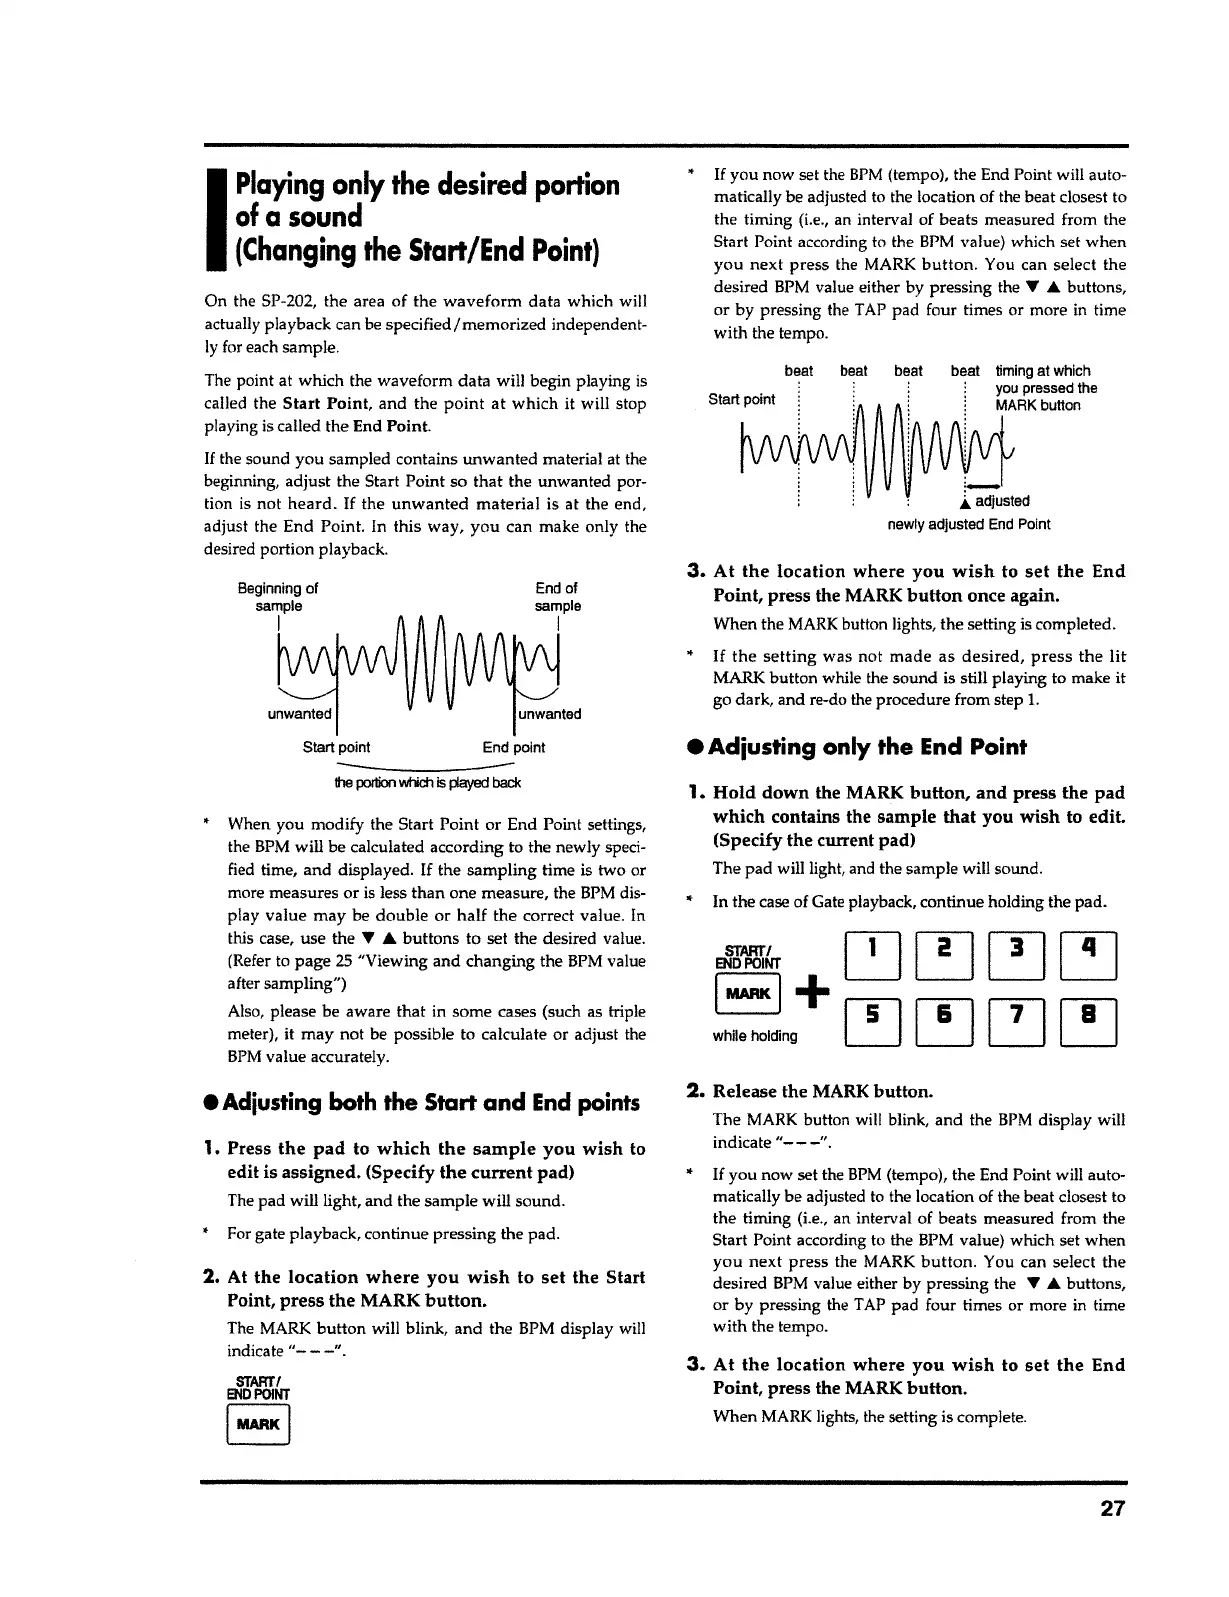
adjusted
newly adjusted
End
Point
Start point
beat timing at which
you pressed the
MARK button
beat beat beat
If
you now set the
BPM
(tempo), the End Point will auto-
matically be adjusted to the location of the beat closest to
the timing (i.e., an interval of beats measured from the
Start Point according to the BPM value) which set when
you
next press the MARK
button.
You can select the
desired BPM value either by pressing the 'Y
A
buttons,
or by pressing the TAP pad four times or more in time
with the tempo.
START
I
ENDPOINT
E1
2.
At the
location where
you
wish
to set the Start
Point, press the MARK
button.
The MARK button will blink, and the BPM display will
indicate"---".
1. Press
the pad
to
which the sample
you wish to
edit is assigned. (Specify
the current
pad)
The pad will light, and the sample will sound.
•
For gate playback, continue pressing the pad.
•
Adiusting both
the Start and
End points
•
When you modify the Start Point or End Point settings,
the BPM will be calculated according to the newly speci-
fied time, and displayed.
If
the sampling time is two or
more measures or is less than one measure, the BPM dis-
play value may be double or
half
the correct value. In
this case, use the ..,
A
buttons to set the desired value.
(Refer to page 25 "Viewing and changing the BPM value
after sampling")
Also, please be aware
that
in some cases (such as triple
meter), it may not be possible to calculate or adjust the
BPM value accurately.
Start point End point
----
the
portion which
is
played
back
unwanted unwanted
End of
sample
I
Beginning of
sample
I
On the SP-202, the area of the
waveform
data which will
actually playback can be specified/memorized independent-
ly for each sample.
The point at which the waveform data will begin playing is
called the
Start
Point, and the
point at
which it will stop
playing is called the End Point.
If
the sound you sampled contains unwanted material at the
beginning, adjust the Start Point so that the unwanted por-
tion is not
heard. If
the
unwanted material
is at the end,
adjust the End Point. In this way,
you
can make only the
desired portion playback.
I
Playing
only
the desired
portion
of
a
sound
{Changing
the
Start/End
Point)