22
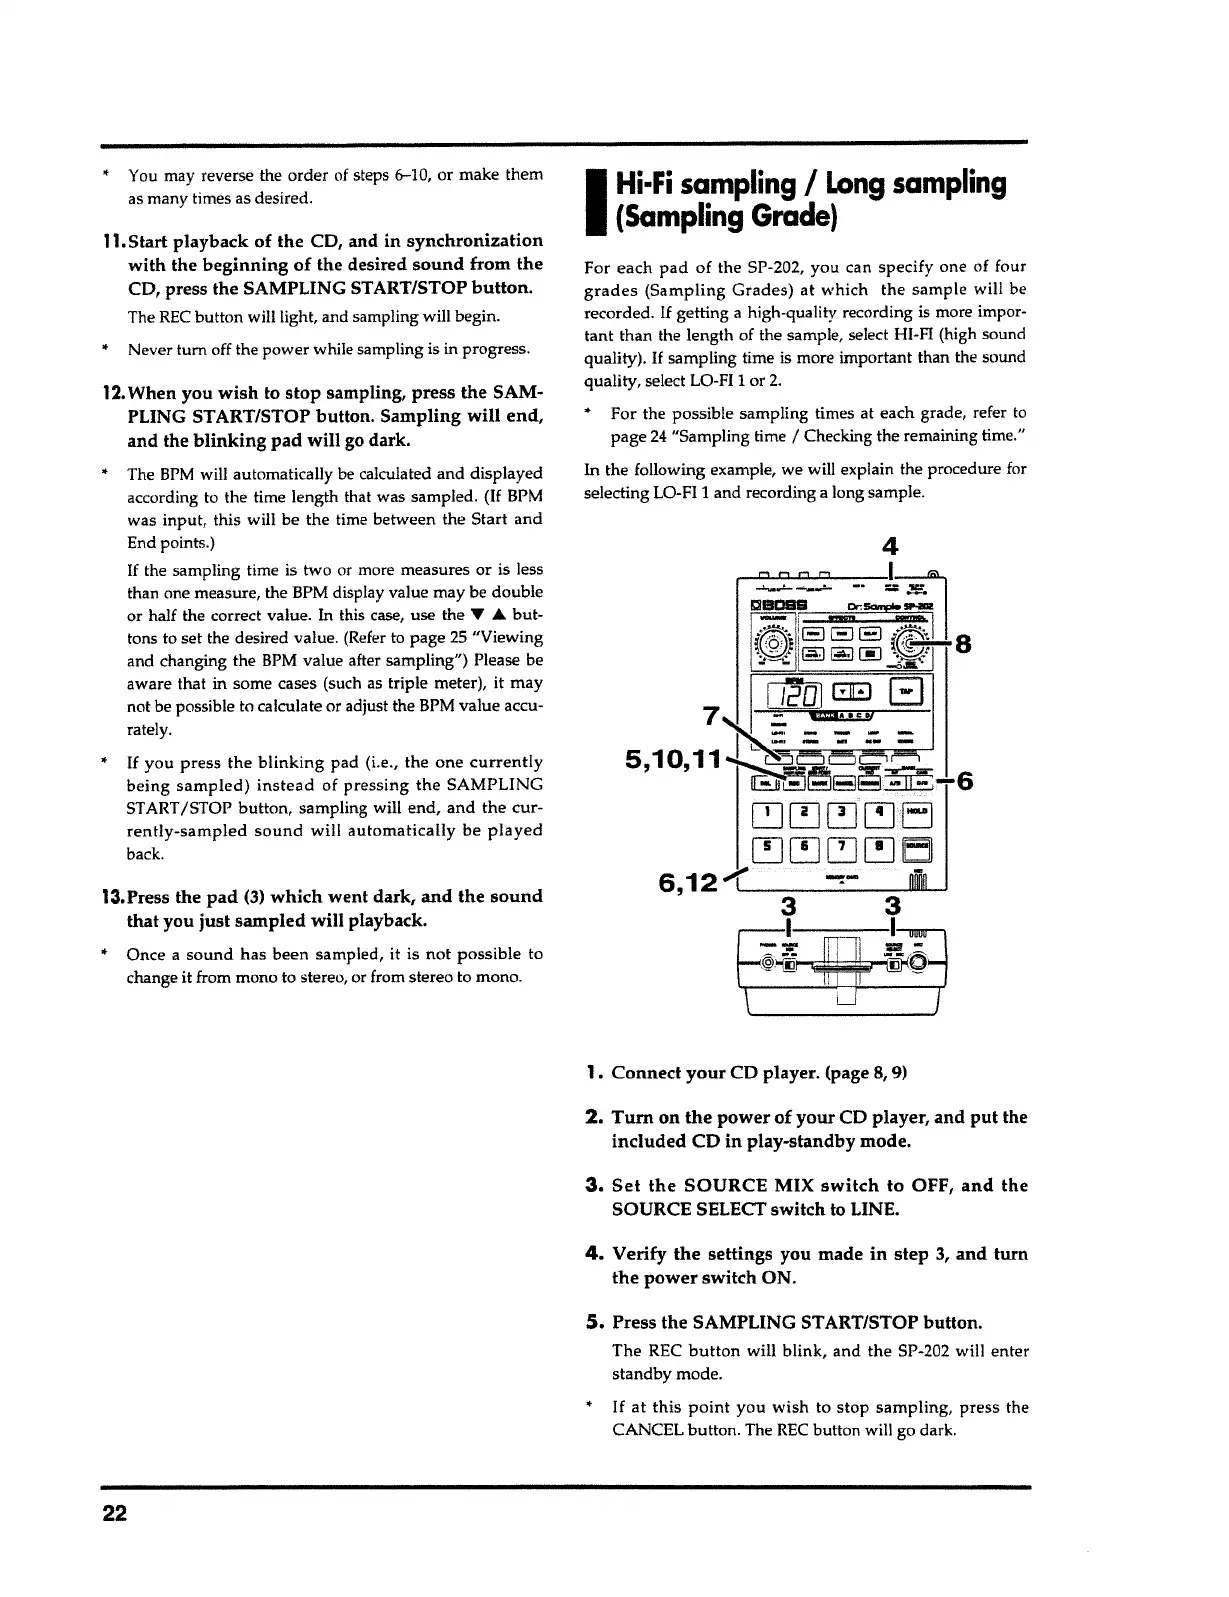
5.
Press the SAMPLING ST ART/STOP button.
The REC
button
will blink, and the SP-202 will enter
standby mode.
•
If at this point
you wish to stop
sampling, press
the
CANCEL button. The REC button will go dark.
4.
Verify
the
settings you made in step
3,
and turn
the
power switch ON.
3. Set the
SOURCE MIX
switch
to OFF,
and
the
SOURCE SELECT switch to LINE.
2.
Turn
on
the
power of your CD player, and
put
the
included
CD in play-standby mode.
1
,
Connect
your
CD player. (page
8,
9)
4
For each
pad of
the SP-202, you can specify one of four
grades (Sampling Grades)
at which
the sample
will be
recorded.
If
getting
a
high-quality recording is more impor-
tant than the length of the sample, select HI-FI (high sound
quality).
If
sampling time is more important than the sound
quality, select LO-FI
1
or
2.
• For the possible sampling times at each grade, refer to
page
24
"Sampling time
I
Checking the remaining time."
In
the following example, we will explain the procedure for
selecting LO-FI
1
and recording a long sample.
I
Hi·Fi
sampling
I
Long
sampling
(Sampling
Grade)
• Once
a
sound
has been sampled, it is
not possible
to
change it from mono to stereo, or from stereo to mono.
13,Press the
pad
(3)
which
went dark, and the
sound
that you
just
sampled will playback.
12.
When you wish to stop sampling, press the SAM-
PLING ST ART/STOP button. Sampling will end,
and the
blinking
pad will go dark.
•
The
BPM
will automatically be calculated and displayed
according to the time length that was sampled.
(If
BPM
was input, this will be the time between the Start and
End points.)
If the sampling time is two or more measures or is less
than one measure, the BPM display value may be double
or half the correct value.
In
this case, use the
~ •
but-
tons to set the desired value. (Refer to page 25 "Viewing
and changing the BPM value after sampling") Please be
aware that in some cases (such as triple meter), it may
not be possible to calculate or adjust the BPM value accu-
rately.
•
If
you
press the blinking
pad (i.e., the one
currently
being sampled) instead
of
pressing the
SAMPLING
ST ART /STOP button, sampling will end, and the cur-
rently-sampled sound will automatically
be
played
back.
11.Start playback of the CD, and in
synchronization
with the beginning of the desired sound from the
CD, press the SAMPLING ST ART/STOP
button.
The REC button will light, and sampling will begin.
•
Never
tum
off the power while sampling is in progress.
•
You may reverse the order of steps 6-10, or make them
as many times as desired.