6
1
O.
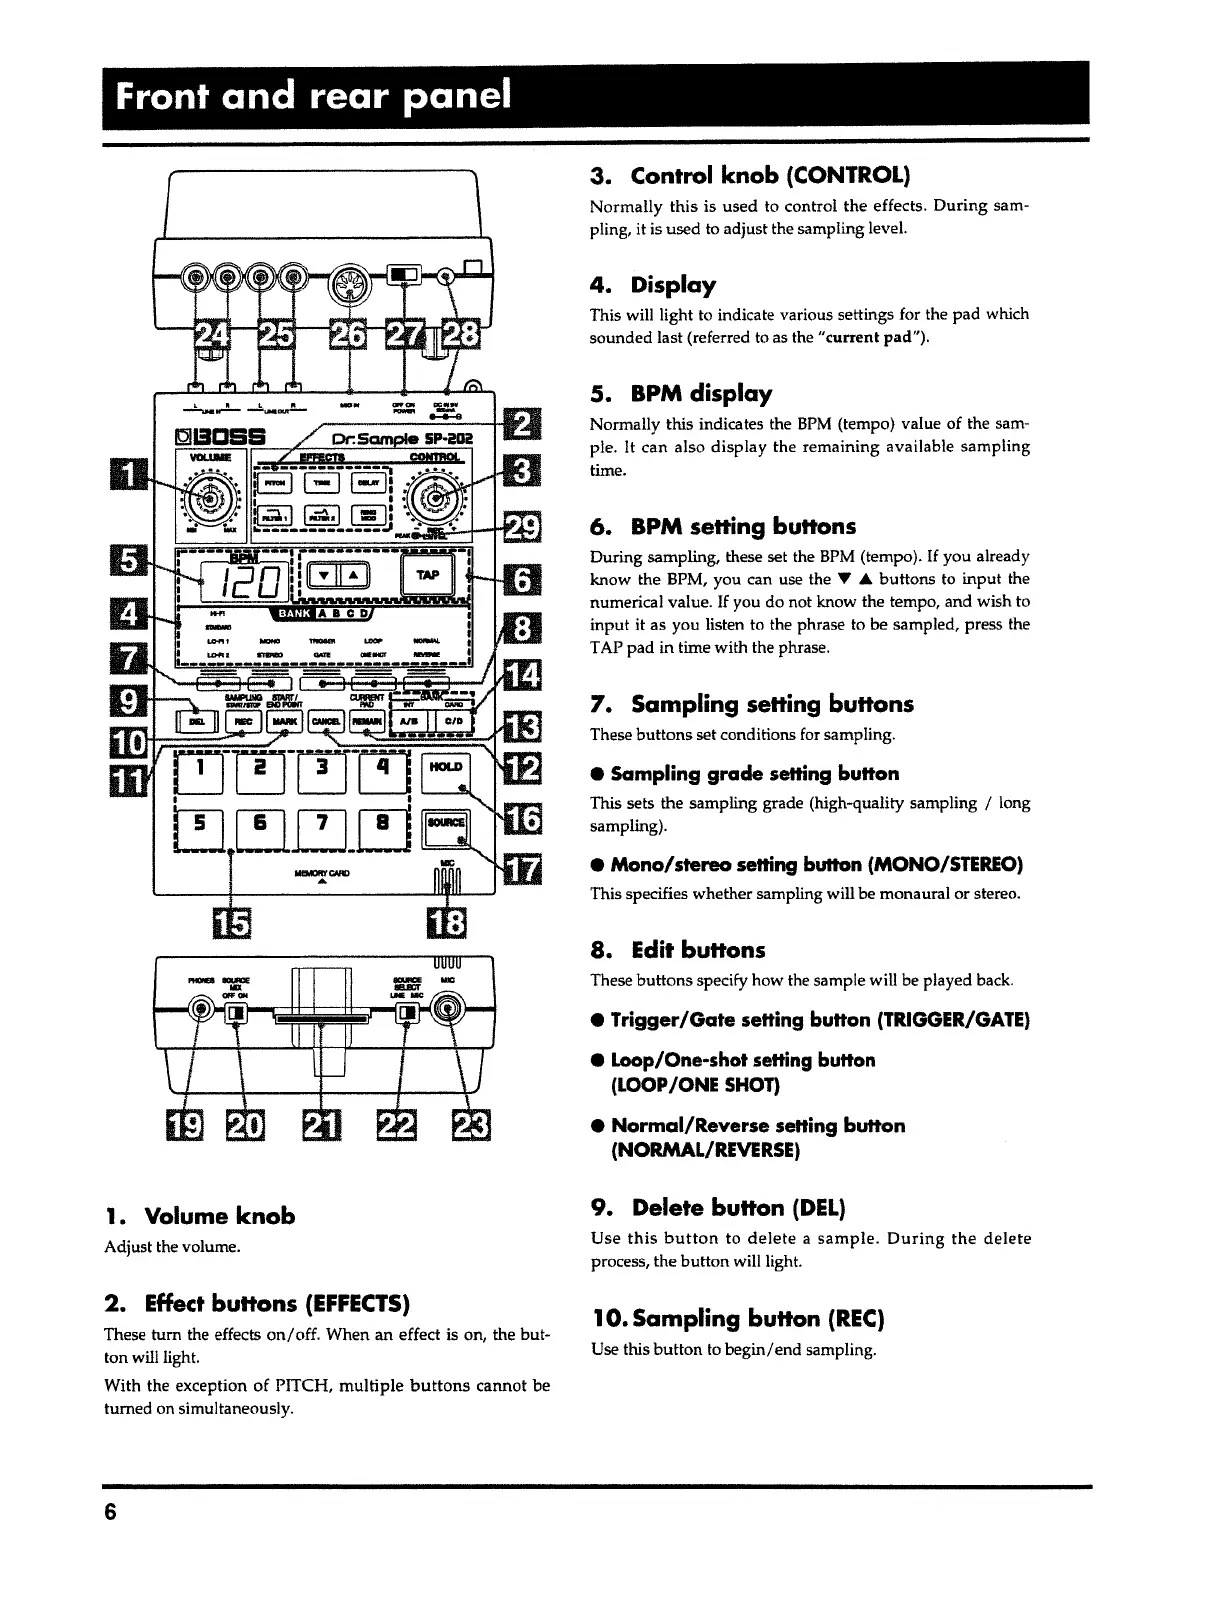
Sampling button
(REC)
Use this button to begin/end sampling.
9. Delete
button
(DEL)
Use
this button
to
delete
a
sample. During
the
delete
process, the button will light.
• Normal/Reverse
setting
button
(NORMAL/REVERSE)
e
Trigger/Gate
setting
button
(TRIGGER/GATE)
•
Loop/One-shot setting button
(LOOP /ONE SHOT)
These buttons specify how the sample will be played back.
8. Edit buttons
e Mono/stereo
setting button (MONO/STEREO)
This specifies whether sampling will be monaural or stereo.
• Sampling grade
setting
button
This sets the sampling grade (high-quality sampling
I
long
sampling).
7.
Sampling setting buttons
These buttons set conditions for sampling.
6. BPM setting buttons
During sampling, these set the BPM (tempo).
If
you already
know the BPM, you can use the
1' A
buttons to input the
numerical value.
If
you do not know the tempo, and wish to
input
it
as you listen to the phrase to be sampled, press the
TAP pad in time with the phrase.
S.
BPM
display
Normally this indicates the
BPM
(tempo) value of the sam-
ple.
It
can also display the remaining available sampling
time.
4. Display
This will light to indicate various settings for the pad which
sounded last (referred to as the "current pad").
3. Control
knob
(CONTROL)
Normally this is used to control the effects. During sam-
pling, it is used to adjust the sampling level.
2. Effect buttons
(EFFECTS)
These tum the effects
on/
off. When an effect is on, the but-
ton will light.
With the exception of PITCH, multiple
buttons
cannot be
turned on simultaneously.
Adjust the volume.
1. Volume
knob
Front and rear panel