23
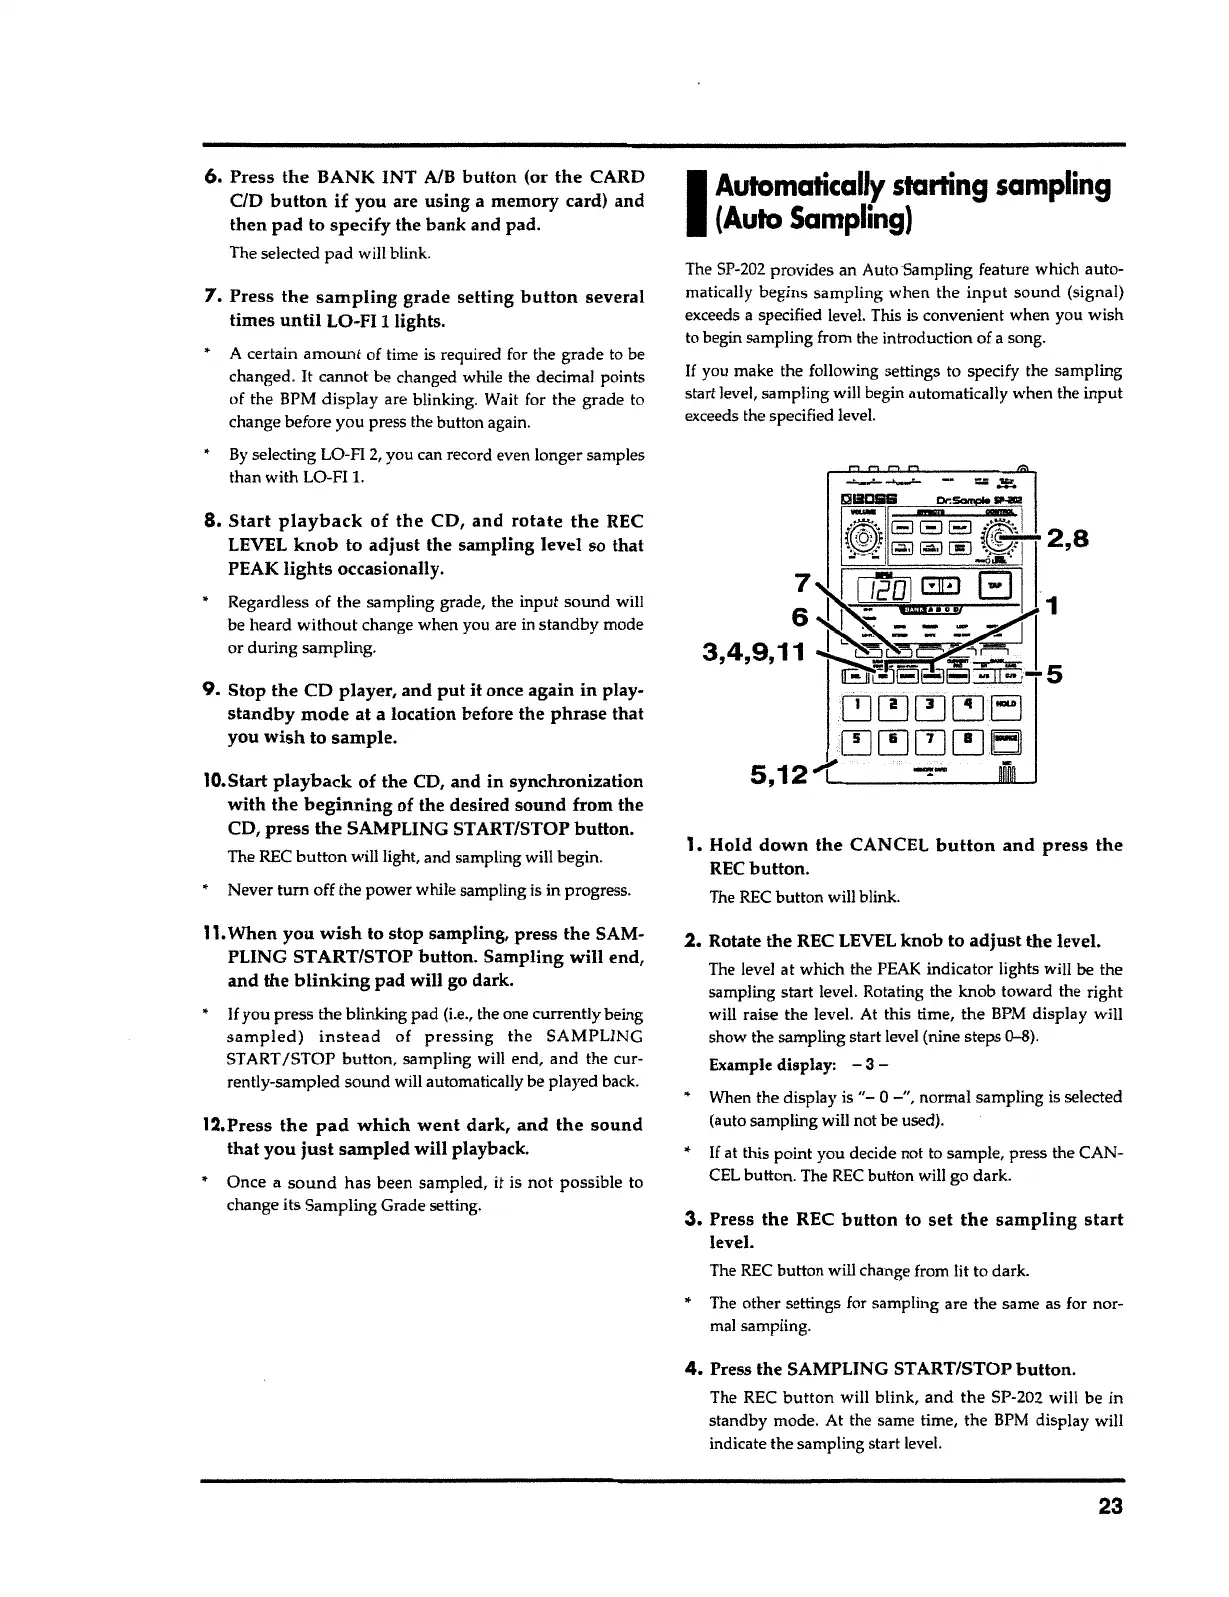
4.
Press the SAMPLING START/STOP
button.
The REC
button
will blink,
and the
SP-202 will be in
standby mode. At the same time, the BPM display will
indicate the
sampl
i
ng start level.
3.
Press
the
REC
button
to
set the sampling start
level.
The REC button will change from lit to dark.
*
The other settings for sampling are the same as for nor-
mal sampling.
2.
Rotate the REC LEVEL knob to
adjust
the level.
The level at which the PEAK indicator lights will be the
sampling start level. Rotating the knob toward the right
will raise the level. At this time, the BPM display will
show the sampling start level (nine steps
0-8)
.
Example display:
-
3
-
• When the display
is"-
0
-"
,
normal sampling is selected
(auto sampling will not be
used)
.
*
If at this point you decide not to sample, press the CAN-
CEL button. The REC button will go dark.
1.
Hold
down the
CANCEL
button and press the
REC
button.
The REC button will blink.
The SP-202 provides an AutoSampling feature which
auto
-
matically begins sampling when the
input
sound (signal)
exceeds
a
specified level. This is convenient when you wish
to begin sampling from the
i
ntroduction of a song.
If
you make the
foll
o
wing settings to specify the sampling
start level, sampling will begin automatically when the
input
exceeds the specified level.
I
Automatically starting sampling
(Auto
Sampling)
• Once a
sound
has been sampled, it is
not
possible to
change its Sampling Grade setting.
12.Press
the pad which went dark, and the sound
that you just sampled
will playback.
11.
When
you wish
to stop sampling, press the SAM-
PLING START/STOP
button.
Sampling
will
end,
and
the
blinking
pad will go dark.
•
If
you press the blinking pad (i.e., the one currently being
sampled) instead
of
pressing the
SAMPLING
ST ART
/STOP button,
sampling will end, and the cur-
rently-sampled sound will automatically be played
back
.
10.Start
playback
of the CD, and in synchronization
with
the
beginning
of the desired
sound
from the
CD,
press the
SAMPLING START/STOP
button.
The REC
button
will light, and sampling will begin.
•
Never
tum
off the power while sampling is in
progress
.
9.
Stop the CD player, and
put it
once again
in
play-
standby mode
at a location before the
phrase
that
you
wish
to
sample.
8.
Start playback of the
CD,
and rotate the
REC
LEVEL
knob to adjust
the sampling level so that
PEAK
lights
occasionally.
•
Regardless of the sampling grade, the input sound will
be heard
without
change when you are in standby mode
or during sampling.
• A certain
amount
of time is required for the grade to be
changed
.
It cannot be changed while the decimal points
of the BPM
display
are blinking. Wait for the grade
t
o
change before you press the button again.
•
By
selecting LO-FI
2,
you can record even longer samples
than with LO-FI
1.
7.
Press
the sampling
grade setting
button
several
times
until
LO-FI
1
lights.
6,
Press
the
BANK INT A/B
button
(or
the
CARD
CID
button if
you are using a memory card) and
then
pad to specify the bank and pad.
The selected
pad
will blink.