9-4
Check cooking oil level
before turning cook/filter
switch to COOK.
6. Turn cook/filter switch to COOK.
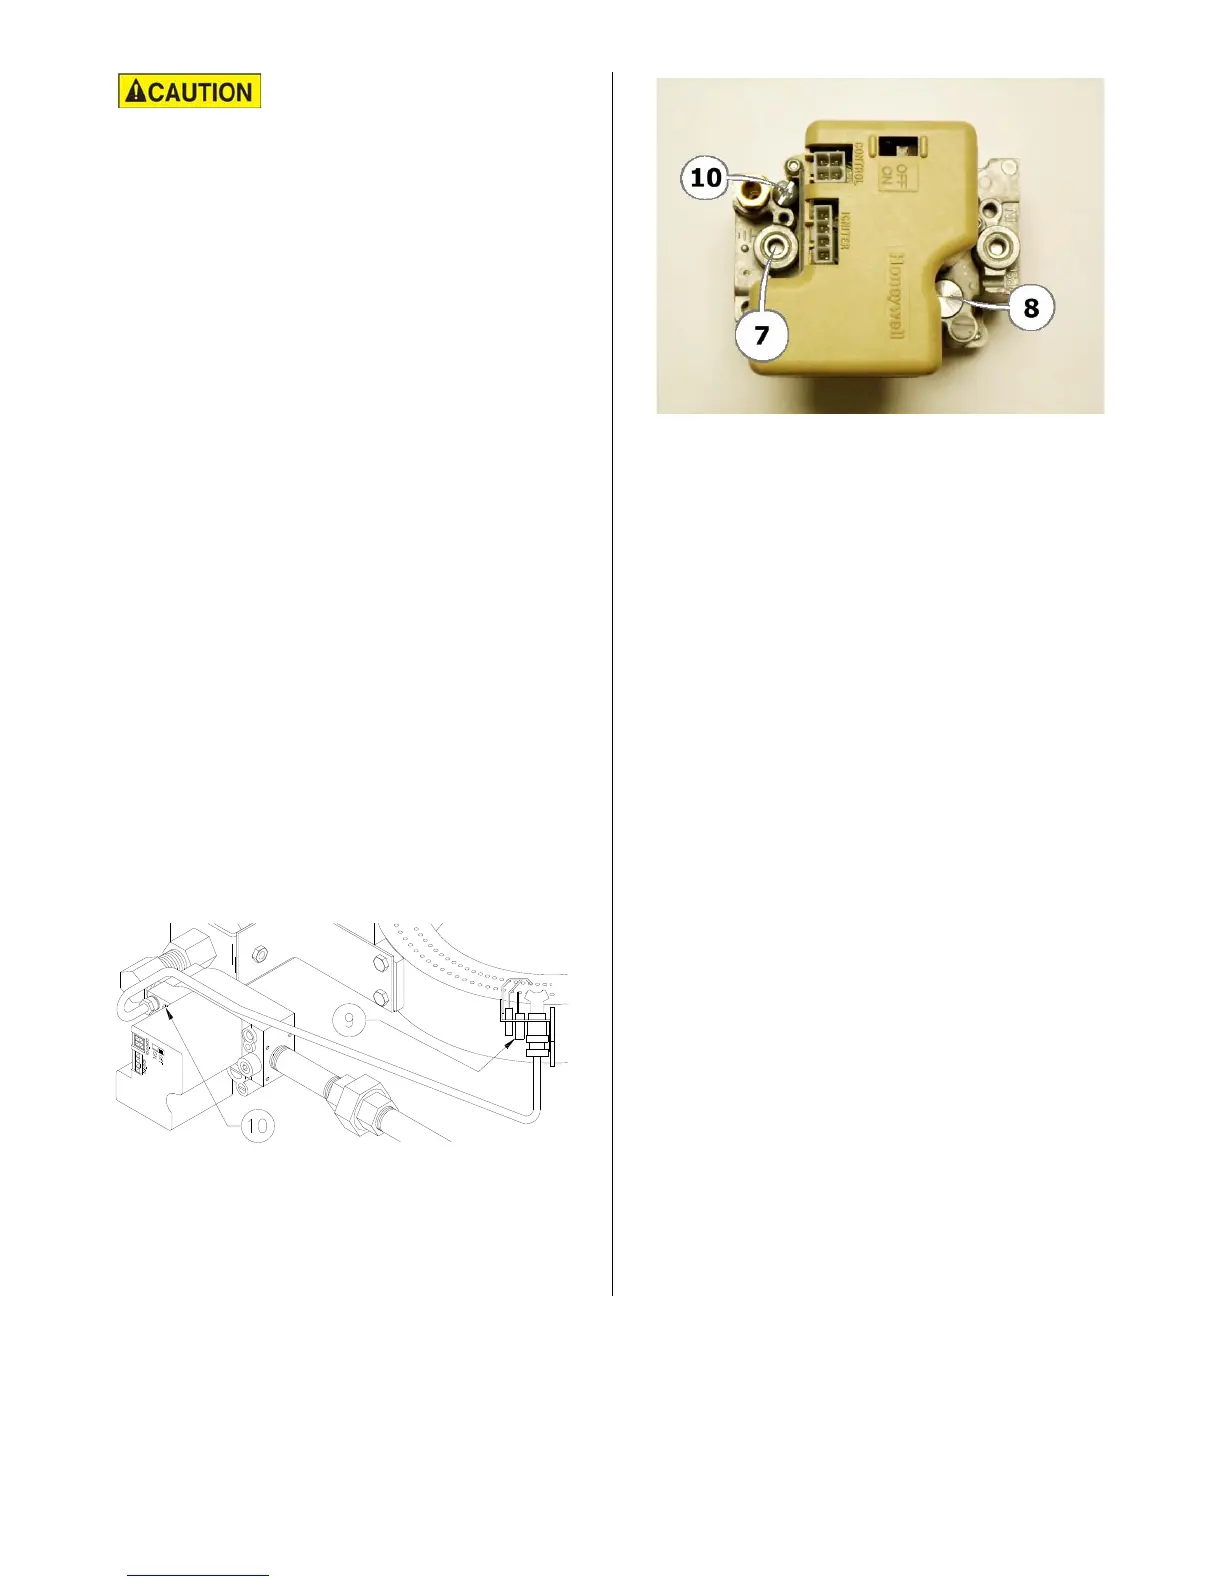
7. Remove regulator adjustment cover
(8). Adjust pressure when main burner
is on.
8. Turn cook/filter switch, manual gas
shut off valve (1) and switch (2) OFF.
9. Remove manometer. Replace pressure
tap plug. Use gas pipe sealer on
threads.
10. Turn manual gas shut off valve (1) ON.
11. Slide gas valve switch (2) ON.
12. Turn cook/filter switch to COOK.
13. Check pressure tap with a soap and
water solution when main burner is on.
Bubbles indicate a gas leak.
Pilot Burner Flame Adjustment:
Pilot burner flame must surround sensor (9).
1. Remove screw (10).
2. Adjust flame and replace screw.
Main Burner Flame:
Flame must be blue and sit on the burner
surface. During normal operation, a slight
“whoosing” sound may be heard when
burner shuts off. If you cannot adjust the
flame correctly check the following:
1. Air shutter adjustment. See AIR SHUT-
TER Adjustment.
2. Centered main burner orifice. After
installing a new gas valve or piping,
brackets can shift causing gas not to
travel down center of the venturi. A
bad air/gas mixture is the result.
3. Drafts on floor can affect combustion.
Drafts can be caused by open doors,
fans and ventilation systems. See
VENTILATION.
4. Incorrect ventilation can affect com-
bustion. See VENTILATION.
5. Gas pressure is a main factor for good
operation. Be sure correct water col-
umn is present. See Gas Pressure
Adjustment under FLAME ADJUST-
MENTS.
broaster.com Manuals #14680 3/99 Rev 5/14
 Loading...