5-4 ©2013 Brooks Automation Inc. Pub. No. 8040444, Rev. AA, 01/14/2013 ECO No. 63723
Adjusting System Helium Pressure
NOTE: These procedures can be performed on a compressor that is turned
ON or OFF. However, the helium pressure gauge should be set to the
("OFF" Condition) helium charge pressure value if the compressor is
turned OFF or set to the normal system operating pressure if the
compressor is turned ON. Refer to “Section 4 - Operation” for more
information.
Reducing Helium Pressure
NOTE: You must obtain the normal system operating pressure from the
“Compressor Operation” procedure in “Section 4 - Operation” in order to
perform this procedure. If the normal system operating pressure is
unknown, then shut the compressor OFF and perform the “"OFF"
Condition Helium System Pressure Verification” procedure in “Section 4 -
Operation” instead.
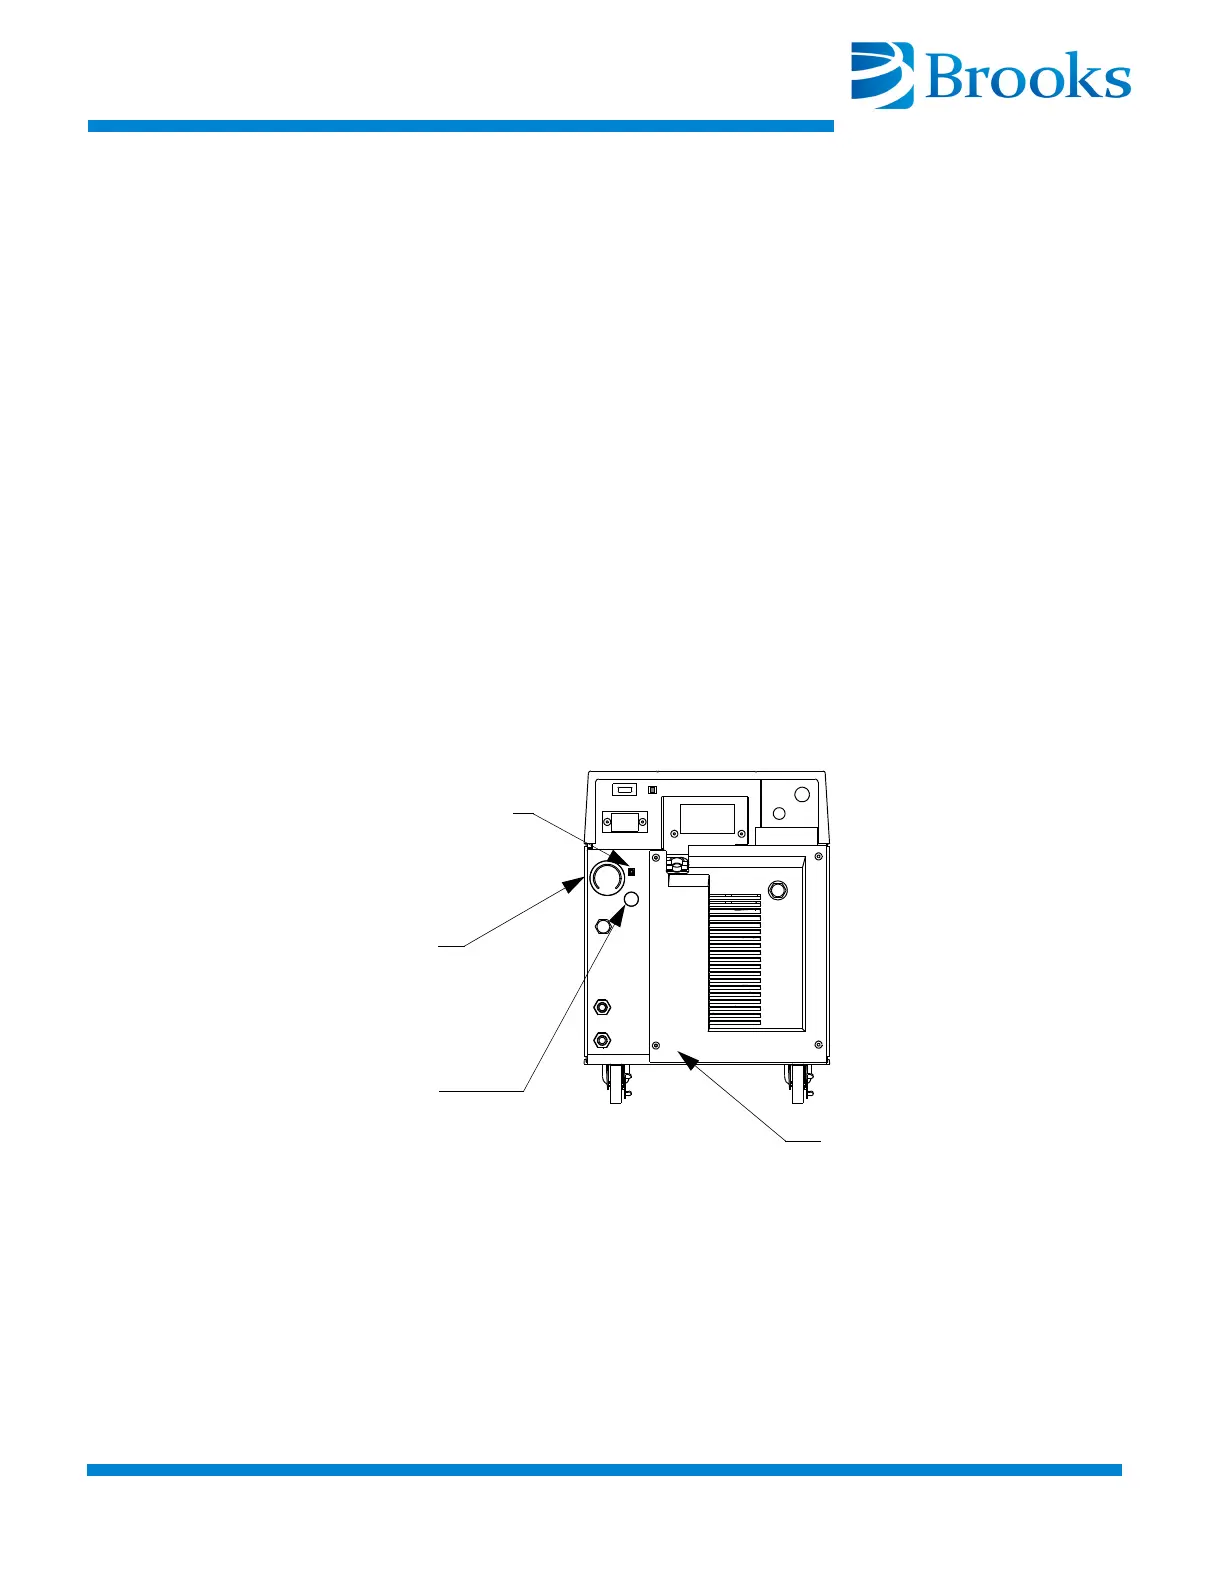
1. Remove the flare cap from the gas charge fitting as shown in
Figure 5-3.
Figure 5-3: Helium Pressure Control Components
2. Open the gas charge control valve very slowly to allow a slight
amount of helium to escape. Leave the valve open until the helium
pressure gauge indicates one of the following:
• To the appropriate value in Table 4-1 if the compressor is OFF and
acclimated to a temperature between 60º F and 80º F
(15.5º C - 26.6º C).
Gas Charge Flared Fitting
Helium
Pressure
Gauge
Rear Panel
Gas Charge
Control Valve