Polycold Cryochiller Interfacing
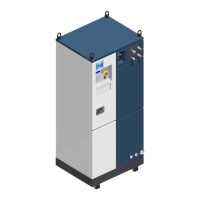
Installation and Operation Manual HMI Display
Brooks Automation
214072 Revision B
5-5
Fault LEDs
Fault LED (amber and red) indicates a warning or fault has occurred.
Red fault LED is reserved for High Pressure Faults
Some Faults cause the compressor contactor to open (Compressor OFF)
Reset Button
Reset button can perform 2 functions.
• Acknowledges Alarms / Faults the same as the RESET_ALARMS command.
– If the alarm / fault condition still exists, then the alarm / fault does not clear.
– If the alarm / fault is acknowledged and cleared, the Amber / Red Fault LED turns off.
• Turns on Compressor if compressor was turned OFF by an alarm / fault condition and the com-
pressor switch is in the ON position (contactor closed)
HMI Display
Use Navigation keys to move to each display menu and make selections.
• HMI display is 4 rows with 20 characters per row.
•Use Arrow keys to scroll cursor up and down through current screen selections
•Use Enter key to select highlighted item.
• Pressing an Arrow key to move the cursor past the end of a nested display returns you to the
next higher display.
• If highlighted item has an right arrow (>), then Enter will bring you to a nested sub-menu.
• If highlighted item does not have a right arrow (>), then Enter toggles the selection or allows
data entry using the up and down arrows.
HMI Display
• Press the up and down arrow key to advance to additional items on the same menu.
• Asterisk at the end of a menu item (*) indicates the current setting.
• Up and down arrows in the display indicate more display selections are available. Use the up
and down arrows to advance up and down in the display.
• Right arrow (>) at the end of a menu line indicates this entry has additional nested pages. Use
the Enter key to display the nested menu.
• After a period of inactivity, the display selection returns to the previous display until it reaches
the Home Screen Display. The period of inactivity is configurable.
• Selecting a nested display opens the nested display at the selection that was last displayed.
• Numeric values in the display may be either a reported value or a set point value.
• Reported display values cannot be changed.
• Set point display values may be changed by using the Enter key to open the value for setting
and then using the up and down arrows to change the value of each digit and using the Enter
key to move to next digit and then use the Enter at the last digit to store the value.
• Display illustrations in this chapter show the full list of screen options for each nested display.