2-68
Confidential
Black horizontal stripes
Fig. 2-9
Diameter of rollers and pitch which appears in the image
<User Check>
- Clean inside the machine and the corona wire of the drum unit.
- The paper tray earth spring on the machine side may be dirty.
Clean it with a dry cloth.
- This problem may disappear after printing multiple sheets of paper.
- When the horizontal stripes appear at intervals of 45.3 mm, replace
the toner cartridge with a new one.
- When the horizontal stripes appear at intervals of 94.2 mm, replace
the drum unit with a new one.
Step Cause Remedy
1
Dirt on electrodes of the drum unit
and those of the machine
Clean the electrodes of the drum unit and those
of the machine. (Refer to Fig. 2-6 or Fig. 2-7.)
2
Dirt on electrodes of the toner
cartridge and those of the machine
Clean the electrodes of the toner cartridge and
those of the machine. (Refer to Fig. 2-6 or Fig. 2-7.)
3
Earth wires or earth plate attachment
failure (not grounded correctly)
Retighten the screws to secure the earth
wires or earth plate.
4 Tray earth spring is bent. Replace the paper tray.
5
Scratches or dirt on the heat unit
(horizontal stripes at intervals of
104 mm)
Replace the fuser unit.
6
High-voltage power supply PCB
failure
Replace the high-voltage power supply PCB
ASSY.
CAUTION:
• Image defects which appear periodically may be caused by failure of rollers. Refer to
the table below and determine the cause based on the diameter of the rollers or the
pitch at which defects appear in the image.
No. Part name Diameter
Pitch at which defects
appear in the image
1 Developer roller ø 20 mm 45.3 mm
2 Exposure drum ø 30 mm 94.2 mm
3 Heat unit in the fuser unit
-
104 mm
4 Pressure roller in the fuser unit ø 30 mm 94.2 mm
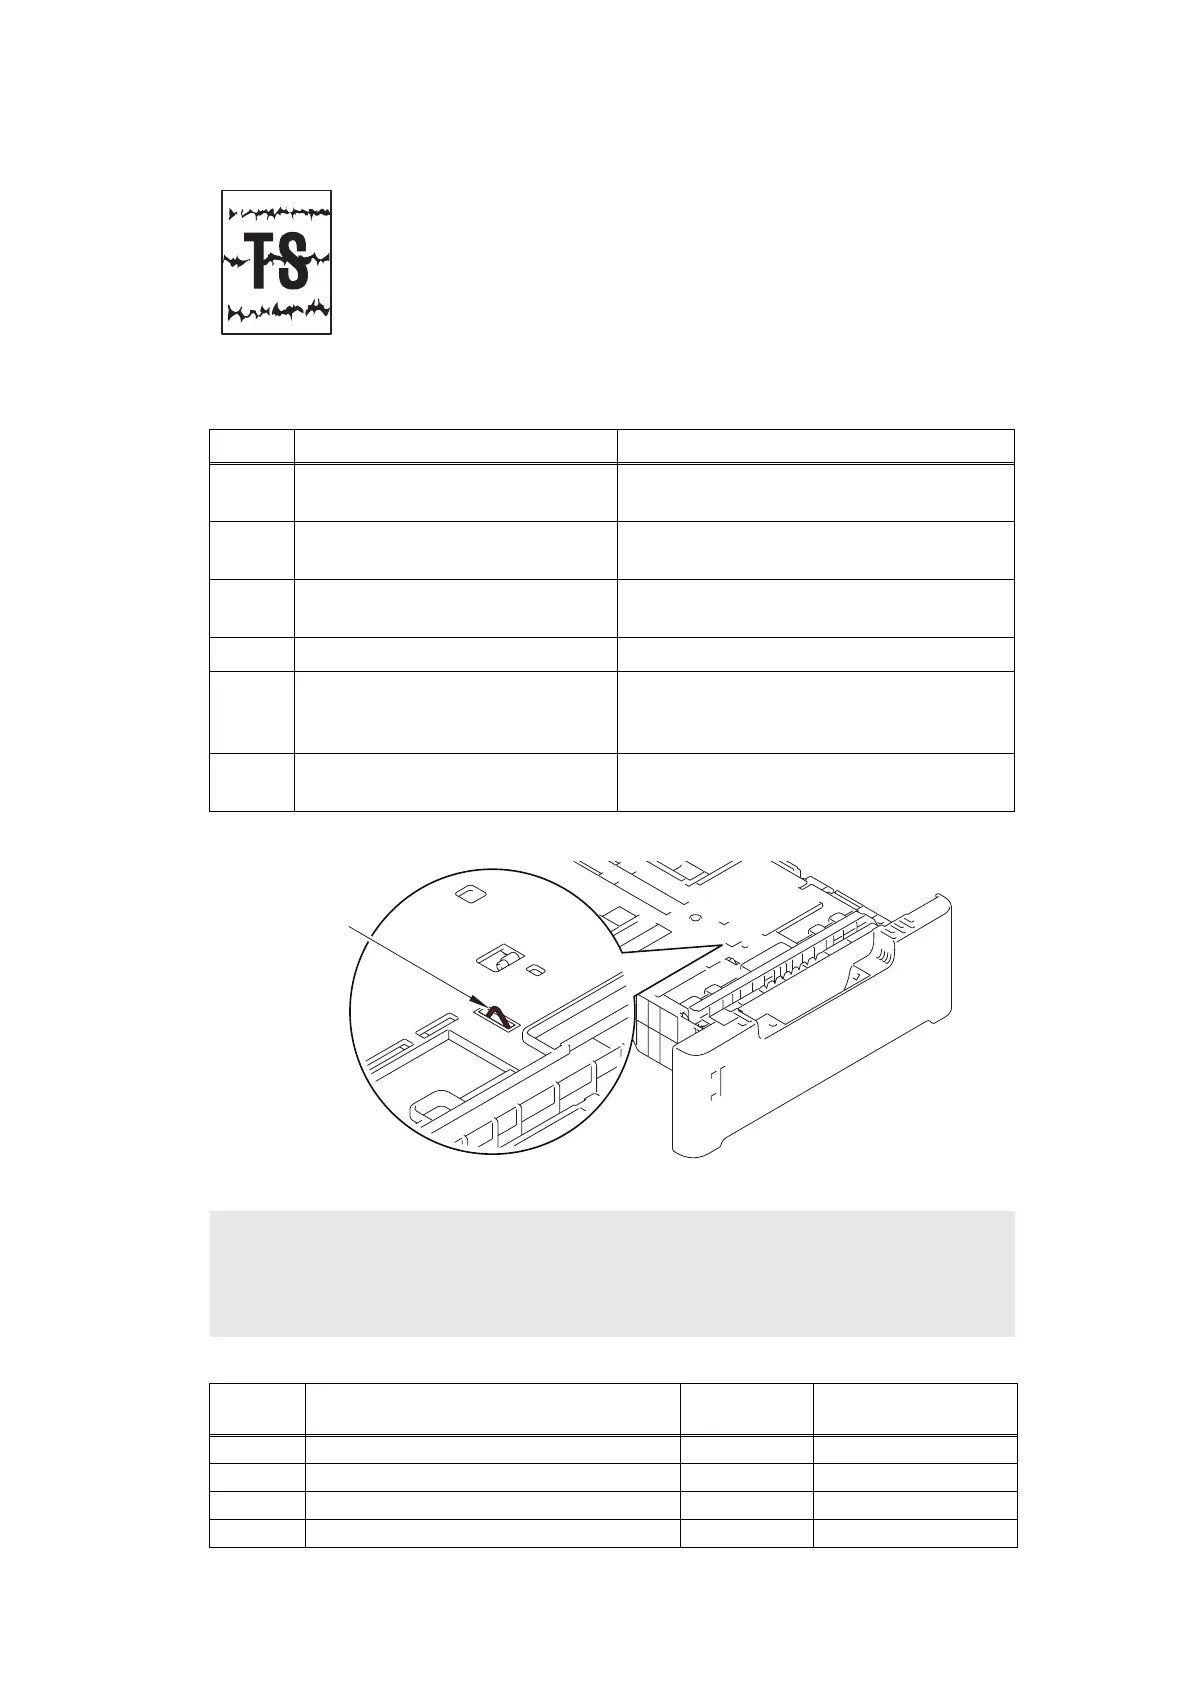
Tray earth spring
Bottom surface of Paper tray

 Loading...