18
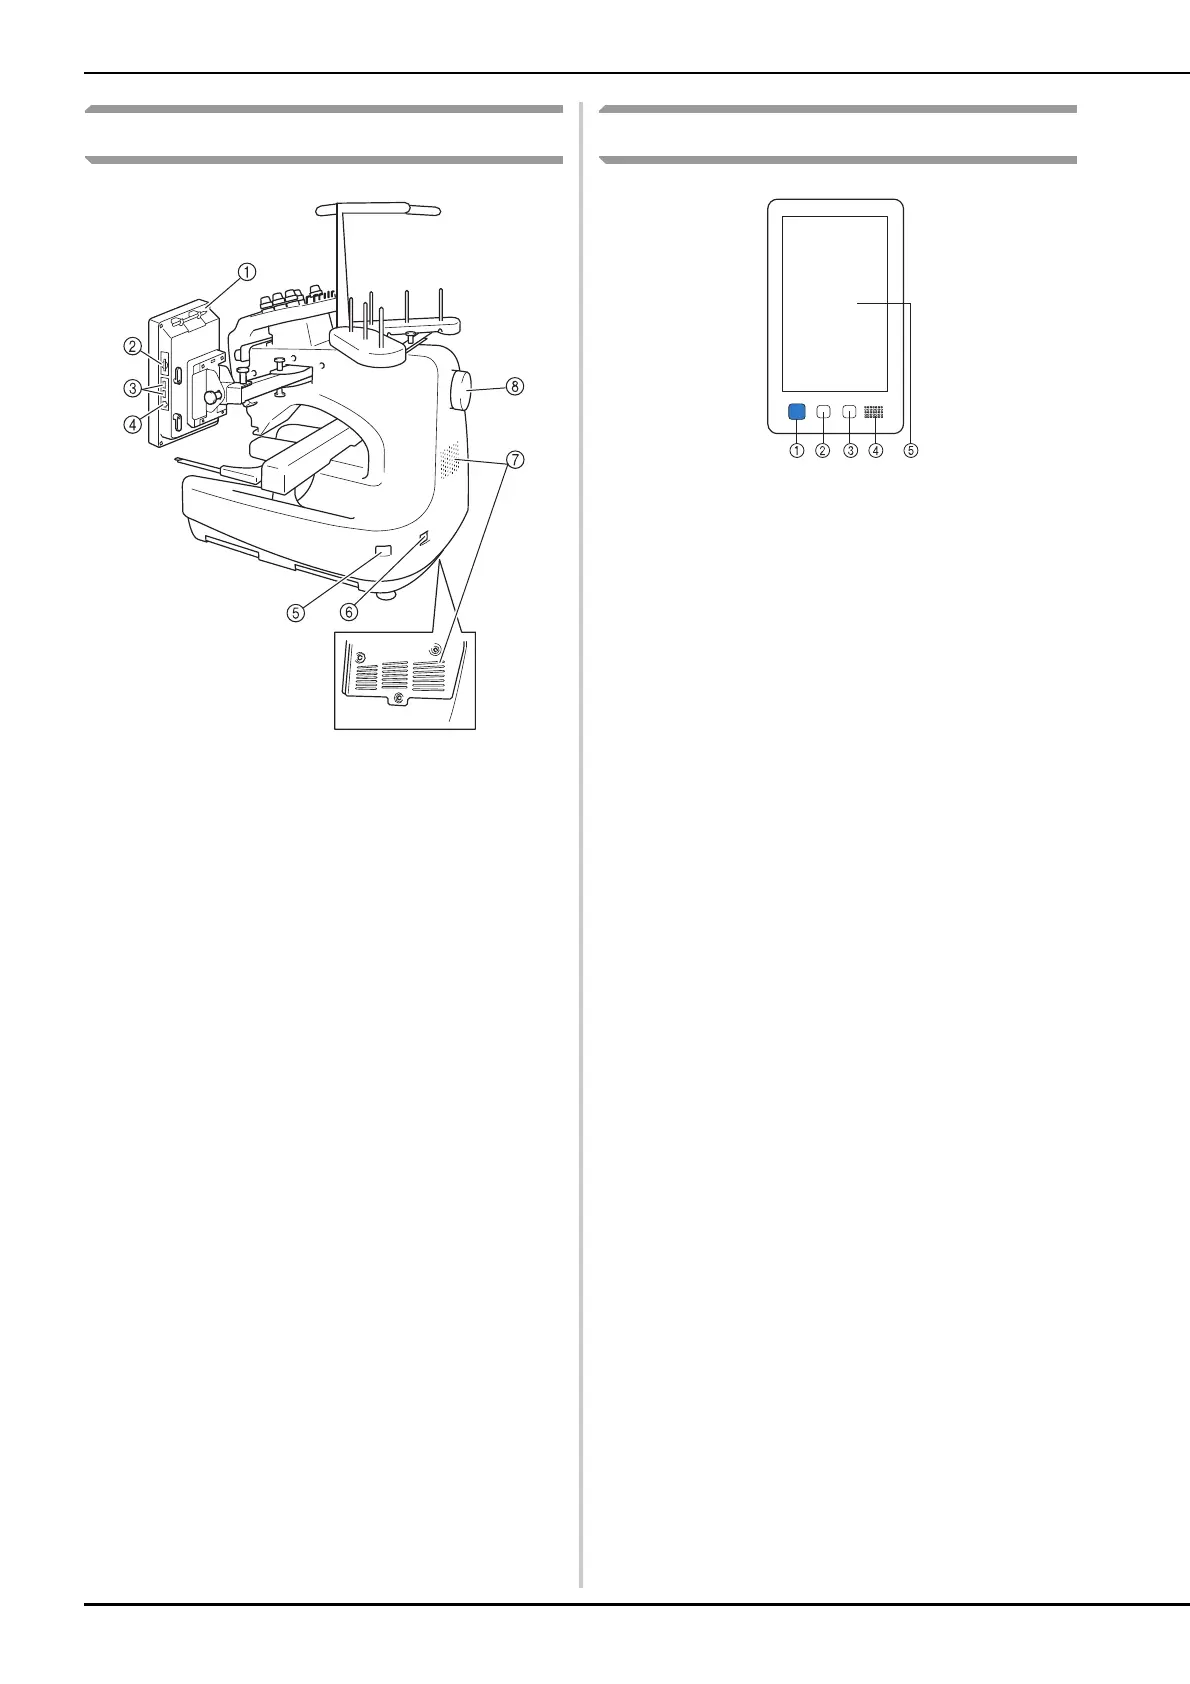
Right-side/rear view
1 Touch pen holder
Use the touch pen holder to hold the touch pen when not in
use.
2 SD card slot
Insert an SD card into the SD card slot in order to import/export
embroidery pattern data.
3 USB port for media
In order to send patterns from/to USB media, plug the USB
media directly into the USB port.
4 USB port for computer
In order to import/export patterns between a computer and the
machine, plug the USB cable into the USB port.
5 Main power switch
Use the main power switch to turn the machine ON (I) and OFF
(
).
Do not turn the power on soon after turning the power off. It is
recommended that you wait 5 seconds before turning the
power back on.
6 Power supply plug
Insert the plug on the power supply cord into the power supply
plug.
7 Ventilation slots
8 Handwheel
Rotate the handwheel to move the needle up and down. Be
sure to rotate the handwheel toward the LCD panel
(counterclockwise).
Operation panel
1 Start/Stop button
Press the start/stop button to start or stop the machine. The
lighting status and color of the button changes depending on
the operation condition of the machine.
2 Thread trimming button
Press the thread trimming button to trim both the upper and
the bobbin threads.
3 Automatic needle-threading button
Press the automatic needle threading button to thread the
needle.
4 Speaker
5 LCD (touch panel)
Touch the keys that appear on the touch panel to select and
edit patterns and confirm various information.
Bottom
Lit in red : When the machine cannot start
sewing
Flashing in green : When the machine can start
sewing
Lit in green : While the machine is sewing
Flashing in orange : When the machine can cut the
thread
Off : When the machine is turned off