GETTING READY
25
1
d
Use the included wrench to turn the
adjustable foot nut on the foot.
Turning the nut in direction 1 lengthens the leg;
turning the nut in direction 2 shortens the leg.
1 Adjustable foot nut
• Adjust all four legs so that they securely contact the
desk or table, and the machine is level.
e
After adjusting the legs to the desired
length, use the included wrench to tighten
the nuts.
1 Lock nut
f
Press down on each corner of the
embroidery machine to check that it is
stable.
If it is still unstable, perform steps c through e
again to adjust the legs.
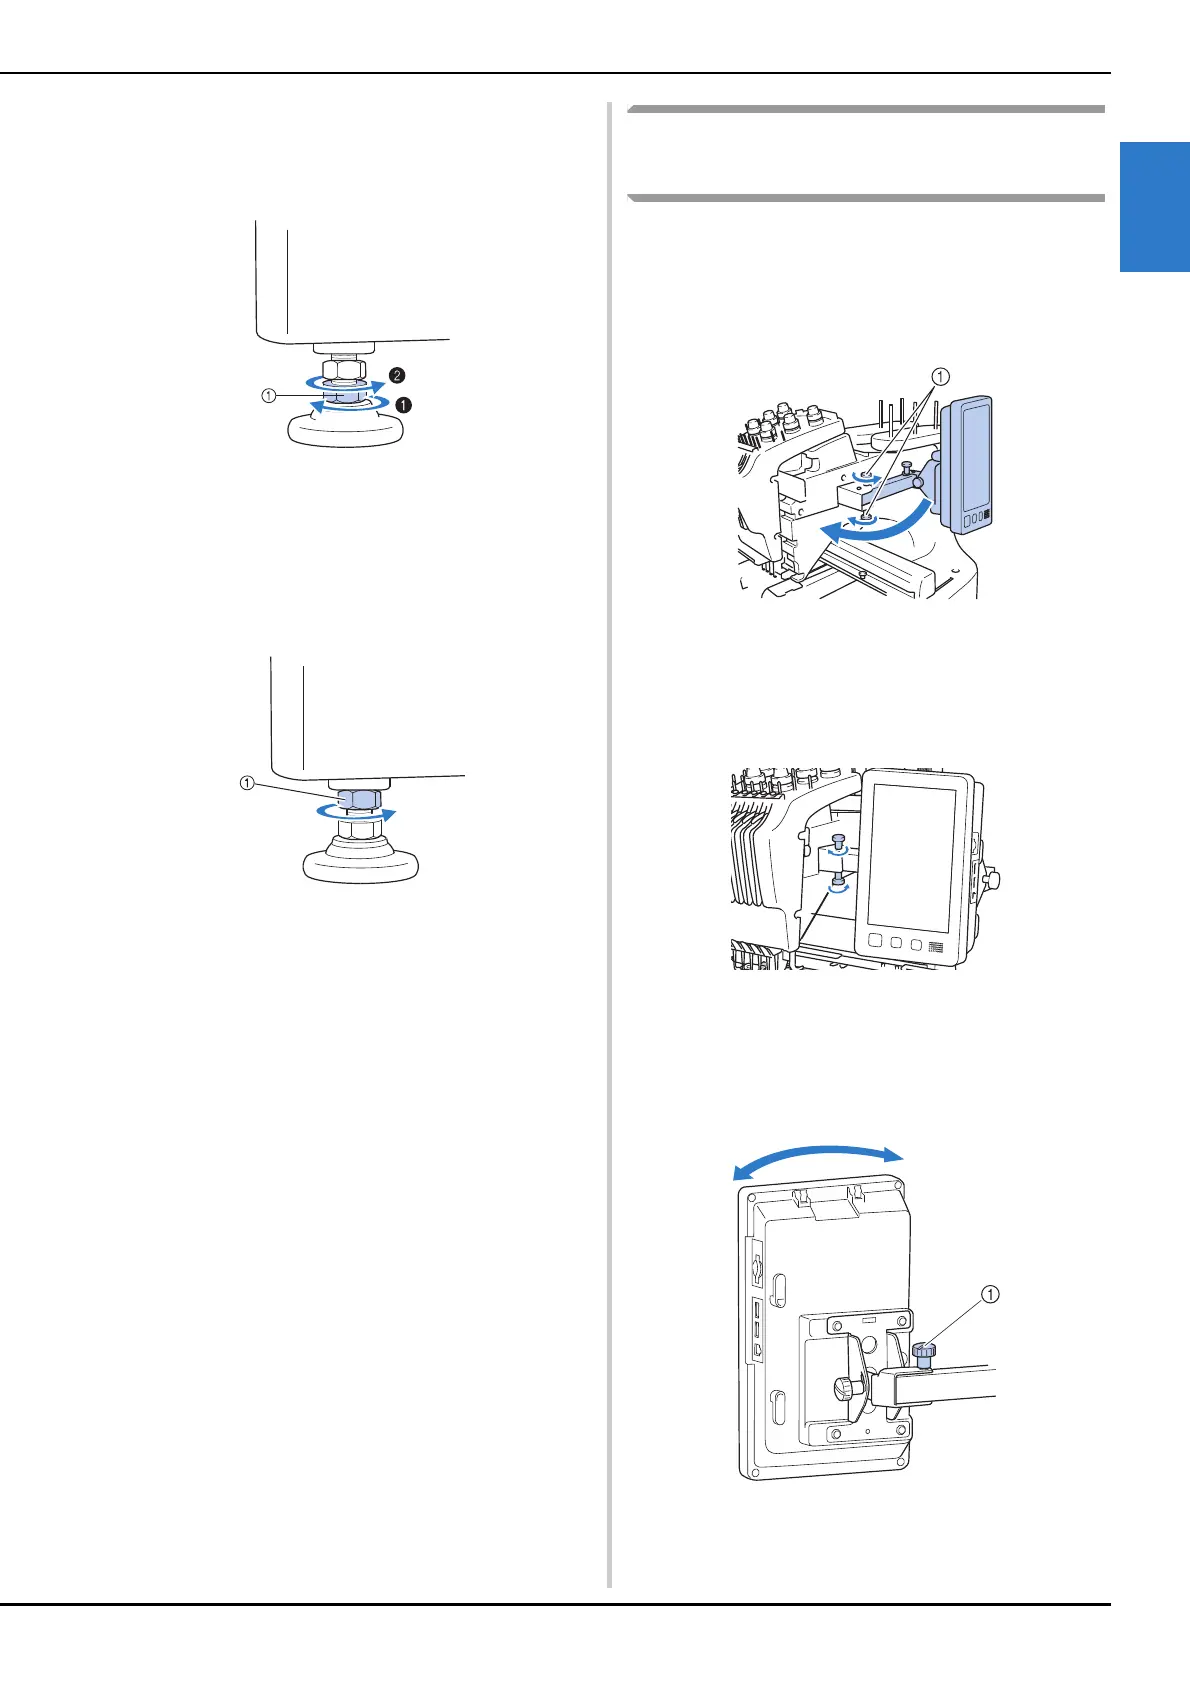
Adjusting the operation panel
position
Adjust the orientation and angle of the operation
panel so it can easily be operated.
a
Loosen 2 thumb screws to bring the
operation panel forward.
1 Thumb screws
b
Adjust the operation panel to an easy-to-
operate position, and then tighten the
thumb screws.
c
Adjust the orientation of the operation
panel.
Loosen the thumb screw, adjust the operation panel to
an easy-to-view orientation, and then tighten the
thumb screw.
1 Thumb screw